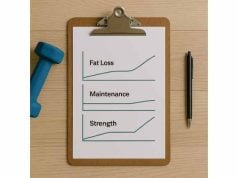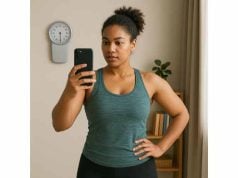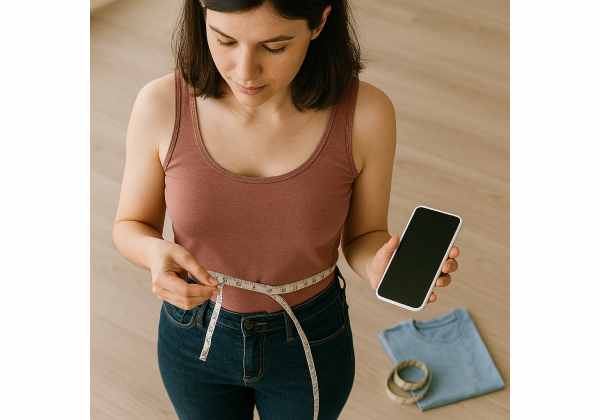
If the scale will not cooperate—or you simply do not want it to run your mood—you still have reliable ways to track fat loss and body changes. Tape measurements, progress photos, and how your clothes fit tell a clearer story about waistlines, muscle shape, and posture than a single number on the display. This guide lays out a simple system you can run in minutes per week: how to measure accurately, how to take photos that actually compare, and how to use a “fit kit” from your own closet. You will also learn when to tweak calories or training based on these signals. If you are dealing with a plateau or shifting into maintenance, our structured plateau and maintenance troubleshooting pairs well with the methods below.
Table of Contents
- Progress without the scale
- Tape measure protocol that works
- Photos that reveal real change
- Clothes fit as a metric
- Common mistakes and fixes
- When to adjust the plan
- Evidence and sample templates
- Frequently Asked Questions
Progress without the scale
“Progress without the scale” is not a slogan; it is a measurement framework that captures the changes you actually want—smaller waist, firmer legs and glutes, shoulders that fill a shirt, and clothes that move better when you sit or bend. Scale weight can be noisy for reasons that have nothing to do with fat: glycogen, sodium, hydration, hormones, and digestion. Measurements, photos, and clothes reduce that noise and show shape and fit.
Why this approach works
- Body fat distribution matters. A two-pound change looks different if it leaves your waist versus your legs. A tape and photos show where you changed.
- Recomposition hides on the scale. Gaining muscle while losing fat can keep weight steady, yet your waist drops and your shape sharpens.
- Behavior is easier to link to outcomes. When you see a weekly half-inch off waist and a looser waistband, you can connect that to meals, steps, and lifts you controlled.
The three-pillar system
- Tape measurements give you numbers with little day-to-day noise. Because you control the landmark and technique, a 0.5–1.0 cm change is meaningful.
- Progress photos capture posture, muscle fullness, and body symmetry. Photos “see” changes that are hard to notice in the mirror because you adapt to your look day by day.
- Clothes fit ties measurements to lived reality: how your pants sit when you tie shoes, how a blazer moves in the shoulders, how a sports bra feels during rows.
Cadence and decision rules
- Weekly measurements and photos (same day, same conditions) build a stable trend.
- Two-week review cycles prevent overreacting to one odd reading.
- Change thresholds make decisions easier: for example, if waist and hip have not changed for two to four weeks and you have held steps, protein, and training steady, it is time to adjust food or movement.
How this integrates with calorie targets
If you prefer some scale data for trend analysis, use weekly averages and keep the focus on measurements and fit. If you are new to energy balance, our concise weight loss guide covers the basics so the numbers you collect translate into action.
Mindset advantages
- You stop chasing day-to-day validation and start managing systems (meals, steps, sleep, training).
- You see progress during menstrual-cycle water swings, travel, or higher-sodium meals.
- You learn which changes (more protein? more steps? better sleep?) create the most visible results for your body.
Tape measure protocol that works
A tailor’s tape is inexpensive, objective, and—used correctly—remarkably sensitive. The key is repeatability: same landmarks, same tape tension, same timing each week. Follow this protocol for numbers you can trust.
Tools
- Soft, flexible tailor’s tape (150 cm/60 in).
- Fine-tip marker (optional) for small skin dots on hard-to-find landmarks.
- Notes app or spreadsheet with date, time, and conditions.
Timing and setup
- Measure once weekly, preferably morning, after using the restroom, before breakfast, in similar hydration.
- Stand tall, feet hip-width, neutral posture, relaxed abdomen (do not suck in).
- Breathe normally; take measurements at end-exhale.
Core sites and landmarks
- Waist (narrowest): typically just above the navel. If anatomy varies, choose a consistent landmark (e.g., top of the navel).
- Navel waist: directly across the belly button—useful when the narrowest point is hard to find.
- Hips: widest point over the gluteals.
- Thigh: midpoint between hip crease and top of kneecap.
- Chest/bust: at nipple line or fullest point.
- Upper arm: midpoint between shoulder tip and elbow.
Technique cues
- Keep tape parallel to the floor and snug but not compressing skin.
- Take two readings at each site; if they differ by more than 0.5 cm (¼ in), take a third and log the average.
- Use skin dots the first two weeks on tricky sites (they fade); this locks in the landmark.
Interpreting changes
- Expect waist and hip to be the most responsive.
- A typical, sustainable pace during fat loss is 0.5–1.5 cm (¼–½ in) off the waist per week averaged across a month, with plateaus and spikes.
- If thighs or arms increase slightly while waist decreases, that can indicate recomposition, especially with consistent lifting and protein.
Decision thresholds
- Two to four weeks with no change at waist or hips (and steady adherence) → adjust movement or calories.
- Sudden +1–2 cm after a high-sodium meal or travel → wait 48–72 hours before judging; it is likely fluid.
If you also track weight, combine this with our sensible daily weigh-in protocol so a single salty dinner does not derail your judgment.
Photos that reveal real change
Great progress photos are standardized, not glamorous. They should be boring to shoot and powerful to compare. The aim is to capture shape, posture, and muscle definition under the same conditions every time.
Setup
- Lighting: bright, indirect natural light or consistent artificial light. Avoid harsh overhead shadows that wash out detail one week and exaggerate it the next.
- Background: plain wall, consistent distance (use floor tape or tiles as reference).
- Camera: phone on a tripod or shelf at hip height for body shots; use the rear camera and a 3–10 second timer.
- Framing: full body in frame, head to feet, with space above and below so you do not crop off reference points.
Poses (front, side, back)
- Neutral, relaxed posture first—no flexing, feet hip-width.
- Second set: gentle flex to show muscle shape (e.g., squeeze glutes, light lat spread) without contorting.
- Side view: stand tall, arms slightly away (thumb on seam), neutral head position.
Clothing
- Use the same fitted outfit each session: shorts and sports bra; shorts and fitted tee; or swimwear. Baggy clothing hides changes.
- Choose solid colors; patterns can distort comparisons.
Cadence and file management
- Shoot weekly or biweekly, same day/time as measurements.
- Store in a dedicated album labeled by date; keep a four-photo “comparison strip” (week 1 vs. week 4 vs. week 8 vs. week 12) for quick reviews.
What to look for
- Waist contour and ribcage definition.
- Glute and thigh lines from the side; jeans fit will mirror these.
- Shoulder and upper-back width relative to waist.
- Posture improvements—scapular position, hip tilt, head carriage.
Troubleshooting illusions
- Pump from a hard workout and carb/water changes can alter look for 24–48 hours. Try to keep photo timing relative to training and meals similar each week.
- Strong downlights can fake extra leanness; soft, forward lighting is more honest.
Photos are also the best way to see body recomposition: you may weigh the same yet look tighter. For help judging recomposition specifically, skim our guide on recomp versus scale loss.
Clothes fit as a metric
Clothing is a built-in measuring tool. When you standardize what you try on and how you test it, your closet becomes a progress dashboard that costs nothing and feels real.
Build a “fit kit”
- Anchor jeans or trousers: a snug pair that buttons but feels tight sitting.
- Everyday top or blazer: something that used to pull across the chest or shoulders.
- Athletic item: leggings or a sports bra that highlight waist and hip changes.
- Occasion piece: a dress or fitted shirt that tells the truth in photos.
How to test
- Try on your kit every two weeks, ideally after morning measurements.
- Sit, stand, and do three movements: tie shoes, reach overhead, and kneel and stand. Note pressure points, waistband roll, and shoulder mobility.
- For jeans, note if you can now button without exhaling, whether pocket lines smooth out, and how the waistband sits when you sit down.
Track with simple language
- “Buttoned with ease; minimal waistband roll.”
- “Blazer closes; shoulders move freely overhead.”
- “Leggings slide on; waistband no longer digs when tying shoes.”
How fit complements tape and photos
- Tape shows centimeters; clothes show comfort and confidence in daily life.
- Photos reveal lines and posture that explain why a waistband stayed the same yet the seat fits better.
When the scale confuses you
Big sodium days, travel, or menstrual cycles can spike water and bloat. Clothes smooth out this noise. If your waist measurement is unchanged but the blazer closes cleanly for the first time, you are progressing. For a primer on fluid shifts, see the explainer on water, glycogen, and sodium so you do not misinterpret a temporary spike.
Common mistakes and fixes
Even good systems fail if you change the variables week to week. These errors cause false plateaus or “fake” progress. Fix them once and your trend becomes obvious.
Mistake 1: Inconsistent conditions
- Different times of day, different meals beforehand, different lighting, different tape landmarks.
- Fix: standardize a measurement morning (same day/time), a photo corner, and written landmarks (“waist at navel,” “hips at widest point”).
Mistake 2: Sucking in or flexing
- A smaller number feels good, but it ruins comparisons.
- Fix: breathe normally, relax your abdomen, and take a second reading to confirm.
Mistake 3: Changing clothes or poses
- Baggy shorts one week, compression the next; random poses.
- Fix: same fitted outfit; three consistent poses.
Mistake 4: Overreacting to one week
- You tighten calories or add cardio after a salty dinner masks progress.
- Fix: use two- to four-week windows and change thresholds. Let your plan breathe.
Mistake 5: Only tracking the waist
- Hips, thighs, chest, and arms can change even when waist stalls for a week or two.
- Fix: log a short panel of sites so you see recomposition patterns.
Mistake 6: Weekend drift
- Measurements look “stalled,” but weekends erase your weekday deficit.
- Fix: pre-plan weekend meals and drinks; keep your step floor and sleep schedule intact.
If you suspect a real stall, run a structured check rather than guessing. Our two- to four-week process in is it a true plateau? separates noise from an actual pause in fat loss.
When to adjust the plan
Measurements and fit tell you when to move a lever and which one to move first. Use this decision tree to protect muscle, mood, and adherence.
After two consistent weeks
- Waist ↓ ≥ 0.5 cm and clothes easier: stay the course.
- Waist flat; hips/thighs ↓ with stronger training: likely recomposition; hold steady.
- All sites flat; photos unchanged; clothes the same: consider a small adjustment.
Choose the smallest effective change
- Movement: add +1,000–2,000 steps/day or two 20–30 minute easy cardio sessions per week.
- Protein and fiber: confirm 1.6–2.2 g/kg protein and 25–35 g fiber daily.
- Meal structure: anchor 25–40 g protein at breakfast and lunch; move treats later in the day.
- Calories: if adherence is solid, reduce 100–200 kcal/day from carbs or fats (not protein) and reassess for two to three weeks.
Training alignment
- Keep frequency; cap most sets at RPE 7–8; remove junk volume.
- Progression can be via reps, sets, or better technique—photos will show denser muscle even before measurements move.
When stress or sleep is the issue
If your numbers are flat but you are exhausted, irritable, and sleeping poorly, fix recovery first. Short nights increase water retention and appetite. Repairing sleep often reveals progress you already earned. If you decide an intake change is warranted, our guide to adjusting calories and macros walks you through it safely.
Evidence and sample templates
You do not need a lab to track body change well. These ranges and templates cover most people and turn your week into a repeatable routine.
Practical ranges
- Waist change during a cut: average 0.5–1.5 cm (¼–½ in) per week, with normal pauses.
- Photo cadence: weekly or biweekly; compare at weeks 1, 4, 8, 12.
- Fit kit cadence: every two weeks, same order, same three movements (tie shoes, reach overhead, kneel/stand).
- Decision window: act on two- to four-week trends, not one measurement.
15-minute weekly routine
- Five minutes: tape measurements at 5–6 sites.
- Five minutes: three photos (front, side, back) in your standard outfit.
- Three minutes: fit kit try-on; jot one-line notes.
- Two minutes: update your log; glance at the 4-photo strip.
Simple logging template
- Date:
- Conditions: morning, pre-breakfast, bathroom, usual hydration.
- Measurements (cm): waist (narrow), waist (navel), hips, thigh, chest, arm.
- Photos: Y/N uploaded to album.
- Fit kit notes:
- Steps (7-day avg):
- Protein (g/day 7-day avg):
- Training sessions (last 7 days):
- Sleep (avg hours):
- Decision: hold / add steps / adjust meals / trim 100–200 kcal.
Why this beats the scale alone
- You can see progress during water spikes, holidays, and travel.
- You link actions to visible results, which improves adherence.
- You build a permanent maintenance toolkit: the same three pillars protect against regain.
Frequently Asked Questions
How often should I measure my waist and take photos?
Once per week works well for most people. Use the same morning routine, landmarks, lighting, camera height, and outfit. Review changes every two to four weeks to avoid overreacting to a single noisy reading.
What if my weight is up but my clothes fit better?
Water, glycogen, and digestion can raise weight temporarily while fat loss continues. If your waist or hips are trending down and your fit kit is easier, trust those signals. Wait 48–72 hours and judge by weekly averages and measurements, not one scale jump.
Which tape sites matter most?
Prioritize waist (narrowest or at navel) and hips, then add thigh, chest, and upper arm. These give a clear picture of fat distribution and recomposition. Be consistent with landmarks and tape tension so small changes are meaningful.
Are progress photos necessary?
They are not mandatory, but they reveal posture, muscle fullness, and symmetry that tape cannot. Photos also expose recomposition—same weight, tighter look. Take front, side, and back shots weekly or biweekly under the same lighting and distance.
How do I know when to adjust calories?
If waist and hips are unchanged for two to four weeks, photos look the same, and clothes do not fit better—and you have held steps, protein, and training steady—adjust. Start with +1,000–2,000 steps/day or trim 100–200 calories from carbs or fats, then reassess in two to three weeks.
What if I cannot take consistent photos at home?
Choose one well-lit spot, mark camera distance on the floor, and use a timer. If lighting varies, switch to a consistent artificial light source. As a fallback, rely more on tape and a standardized fit kit; you can still track progress accurately.
References
- Waist circumference as a vital sign in clinical practice: a Consensus Statement from the IAS and ICCR Working Group on Visceral Obesity 2020 (Consensus Statement)
- Dietary Guidelines for Americans, 2020-2025 and Online Materials 2020 (Guideline)
- Systematic review and meta‐analysis of protein intake to support muscle mass and function in healthy adults 2022 (Systematic Review)
- Synergistic Effect of Increased Total Protein Intake and Strength Training on Muscle Strength: A Dose-Response Meta-analysis of Randomized Controlled Trials 2022 (Meta-analysis of RCTs)
- Relationship between muscle water and glycogen recovery after prolonged exercise in the heat in humans 2015 (RCT)
Medical Disclaimer
This article provides general education about tracking body changes with measurements, photos, and clothing fit. It is not a substitute for professional medical advice, diagnosis, or treatment. Consult your licensed healthcare professional before making significant changes to your diet, exercise, or medication.
Share and Follow
If this guide helped you see progress beyond the scale, consider sharing it with a friend who is learning the same skills. You are also welcome to follow us on Facebook, X, or any social platform you use for practical updates and step-by-step guides.

