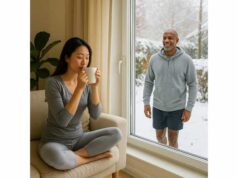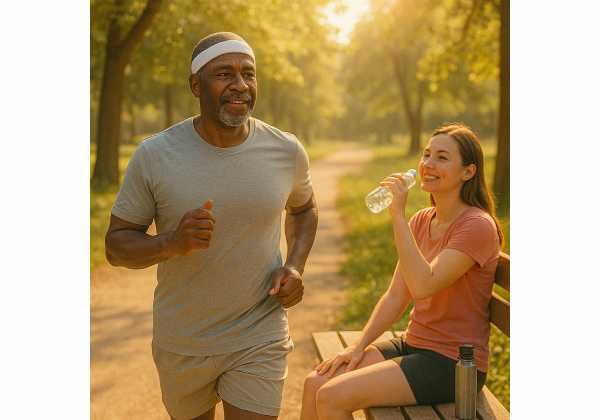
A warmer planet makes hot days more common, yet many adults still spend most of the year in climate-controlled spaces. That gap leaves us underprepared when summer heat arrives, especially as we age. The good news: you can train your body to handle heat more efficiently. Heat acclimation is a deliberate, gradual process that increases blood plasma volume, improves sweating, and lowers cardiovascular strain during the same task. It is not about “toughing it out.” It is about careful dosing, recovery, and tracking—similar to any smart training plan. The approach below shows you how to start from minimal exposure and safely progress toward everyday confidence in hot weather. If you want a broader systems view of how small, repeatable stressors drive resilience, consider our primer on cellular longevity and hormesis fundamentals. For now, let’s build your practical plan, step by step.
Table of Contents
- Why Heat Acclimation Helps: Plasma Volume and Heart Work
- Start Low: Duration, Temperature, and Frequency
- Progressions: Time-in-Heat and Light Activity in Heat
- Hydration and Electrolytes: Practical Rules
- Warning Signs: Dizziness, Cramping, and Overheating
- Seasonal Plans and Cooling Strategies
- Tracking Gains: RPE, HR Drift, and Recovery
Why Heat Acclimation Helps: Plasma Volume and Heart Work
Your body cools itself primarily by moving warm blood to the skin and evaporating sweat. In unacclimated people—especially older adults—this system strains early. Heart rate climbs faster, breathing feels labored, and effort feels high for the same work. Heat acclimation changes the equation in three core ways.
First, plasma volume expands. Plasma is the liquid portion of blood. With more of it, your heart can pump a greater stroke volume each beat. At the same workload, heart rate can stay lower because each beat moves more blood. That extra circulating volume also improves skin blood flow, helping shunt heat away from working muscles and toward the skin where evaporation can carry it off. Many programs show plasma volume rising within the first week of consistent heat exposure, with additional refinements over the second week as the body fine-tunes fluid regulation.
Second, sweating becomes more effective. After acclimation, sweating starts earlier, the rate increases, and the sweat contains less sodium per unit volume. Earlier onset and higher output increase heat loss when it is needed most, while lower sweat sodium reflects improved reabsorption in the sweat glands. Together, you lose heat more efficiently without depleting electrolytes as quickly.
Third, thermal and cardiovascular strain decline at any given workload. People often notice a lower rating of perceived exertion (RPE), reduced “heart rate drift” during steady activities, and a smaller rise in core temperature. Over time, these changes support real-world outcomes: steadier walking pace in hot weather, better tolerance for errands or gardening on warm afternoons, and less end-of-day fatigue during heat waves.
Two principles make these adaptations stick. The first is minimum effective dose: small, repeatable exposures spaced across the week. The second is specificity: expose yourself to actual heat (not just hard workouts in cool air), because the sweating, skin blood flow, and fluid shifts are what train the heat-loss systems. Your plan should combine both, beginning with conservative exposures and building gradually.
Finally, heat acclimation is not “heatproofing.” Medications, illness, dehydration, and poor sleep still raise risk. Treat acclimation as a protective buffer that works best when you hydrate, cool deliberately, and respect warning signs. You will progress faster with patience than with heroics.
Start Low: Duration, Temperature, and Frequency
The safest way to begin is to keep intensity low while you train the heat-loss systems. Think of it like practicing with lighter weights before adding load.
Choose your exposure type (pick one to start):
- Ambient heat practice: Sit or do light chores in a warm room (32–35 °C / 90–95 °F) for short intervals.
- Warm bath: Immersion up to the navel or chest at 38–40 °C (100–104 °F). Keep the head cool and stand carefully afterward.
- Sauna or steam: If you already tolerate sauna, begin at the low end of your usual temperature range with brief bouts and long breaks.
Starting durations (first 1–2 weeks):
- Ambient heat: 15–20 minutes, 3 days per week, at rest or with easy mobility work. Add a fan nearby if you feel stuffy; you can reduce fan use over time.
- Warm bath: 10–12 minutes, exit, cool down, then a second 8–10-minute bout if you feel fine. 2–3 days per week.
- Sauna/steam: 8–10 minutes, long cool-down, then 6–8 minutes. 2 days per week to begin.
Conservative rules:
- Arrive hydrated. Pale-yellow urine and no more than 0.5–1.0% body mass loss after a session.
- Keep effort low. No strenuous exercise in the first week of heat practice. You are training the heat response, not your VO₂max.
- Stop on symptoms. Dizziness, nausea, headache, or unusual fatigue are reasons to end the session and cool promptly.
- Space exposures. Leave at least 24 hours between early sessions. Heat stress is cumulative.
What success looks like after 1–2 weeks: you finish the same exposure with a slightly lower RPE, you cool down faster afterward, and your heart rate rises less for the same time in heat.
As your confidence grows, you can add a third weekly exposure or extend each exposure by a few minutes. Resist the urge to stack long, frequent sessions too early; adaptation is driven by repeatability, not by a single “big” day. For a deeper look at dosing small stressors, see our guide to minimum effective dose.
Progressions: Time-in-Heat and Light Activity in Heat
Once you handle brief, low-intensity exposures, you can extend time-in-heat and add easy movement. This phase often delivers the most visible gains: steadier heart rate, earlier sweating, and better comfort.
Weeks 3–4: extend time
- Ambient heat: Move toward 25–35 total minutes, still at easy intensity. Break it into 2–3 shorter blocks with cool water sips between.
- Warm bath: Work up to 15 minutes, short cool-down, then 10–12 minutes. If you feel flushed or light-headed, end the session.
- Sauna/steam: Two to three rounds of 8–12 minutes each with generous cooling between. Do not chase extremes.
Add gentle movement
- Option A: easy walking in warm shade (28–32 °C / 82–90 °F) for 10–20 minutes. Focus on nasal or relaxed mouth breathing, not pace.
- Option B: mobility and light strength (e.g., sit-to-stands, band pulls) inside a warm room to train heat dissipation at low effort.
- Option C: short post-exercise passive heat (e.g., warm bath or sauna after an easy bike or walk). The light exercise primes circulation; the passive heat adds the thermal stimulus with minimal added workload.
Frequency targets
- 3–5 sessions per week of some heat stimulus typically drive adaptations over 7–14 exposures. You do not need them on consecutive days. A Mon–Wed–Fri rhythm works well.
Effort guardrails
- Keep steady-state efforts in heat at an RPE of 3–4/10. If you use heart rate, stay in an easy zone where you can speak full sentences. If your heart rate climbs >10–15 bpm at a constant pace within 20 minutes, shorten the session.
Recovery boosters
- Finish with cool fluid, a rinse or brief cool shower, and a calm sit in a shaded, ventilated space. Many people find a slow walk during cool-down helps circulation and reduces that “heavy” feeling.
When to add light exercise in hotter conditions
- Only after you can complete the above comfortably. Start with shaded walking or gentle cycling; leave intervals, hills, and long outings for cooler hours.
Curious about the cellular side of these adaptations? Heat exposure upregulates protective proteins that support resilience; explore our plain-language explainer on heat shock proteins basics.
Hydration and Electrolytes: Practical Rules
Good hydration does not mean endless water. It means matching fluids and sodium to your losses so you avoid both dehydration and dilution.
Before heat exposure or activity
- 2–3 hours prior: Drink 5–7 mL/kg body weight of fluid. For a 70-kg person, that is 350–500 mL. If urine remains dark, add another small drink.
- If you often cramp or feel “washed out,” include sodium in this pre-drink (a lightly salted snack or a sports beverage).
During
- For easy, short exposures (<30 minutes at rest), sipping water is usually enough.
- For longer or sweatier sessions (≥45–60 minutes), aim for small sips every 10–15 minutes. Many people do well starting with ~500–700 mg sodium per liter of fluid and adjusting from there based on comfort, swelling, or cramping tendencies.
- Watch body mass change. Try to keep loss within 0–2% per session. More than that? You likely need a bit more fluid and/or sodium next time.
- If you tend to drink a lot, be cautious: overdrinking plain water can dilute blood sodium. Combine fluid with modest sodium and listen to thirst.
After
- Rehydrate with ~1.25–1.5 L per kilogram of body mass lost over the next few hours, with some sodium and a mixed meal to restore fluids and electrolytes.
- A simple check: urine returning to pale-yellow within a few hours and no overnight “hangover” feeling.
Electrolyte quick notes
- Cramping is multifactorial. Sodium can help some people, but pacing, fatigue, and fitness matter too.
- “Salty sweaters” (visible salt on clothes or skin) may benefit from the higher end of the sodium range. Others feel best lower. Adjust week to week as the weather changes.
- Hot days may also require more carbohydrate during activity. Fuel supports both performance and gut comfort under heat stress.
Practical tools
- A digital scale before and after sessions (with clothes/shoes adjusted for sweat) is a powerful, low-cost guide to your personal sweat rate.
- Keep a notes app log of start time, weather, what you drank, and how you felt. Patterns appear quickly.
If you are stacking multiple hormetic stressors (heat, training, cold), smart recovery magnifies the payoff. See practical timing and fluid tips in recovery after stress.
Warning Signs: Dizziness, Cramping, and Overheating
Adapting to heat reduces risk, but it never eliminates it. Know the early signs, respond fast, and err on the side of cooling.
Early signs to pause and cool
- Light-headedness, headache, nausea, or unusual fatigue
- Sudden heavy sweating with chills or goosebumps
- Muscle cramping that does not ease after brief rest and sipping fluids with sodium
More serious signs—treat as urgent
- Confusion, irritability, or unsteady gait
- Hot, flushed skin with either heavy sweating or paradoxically no sweating
- Vomiting, fainting, or a rapid rise in body temperature
Immediate actions
- Stop activity and move to shade or a cool indoor space.
- Cool aggressively: remove excess clothing, douse skin with cool water, apply cold packs to neck, armpits, and groin, and fan the skin.
- Sip fluids if alert; include sodium if available. Do not force fluids in a drowsy or vomiting person.
- Call emergency services if mental status changes, if recovery is not rapid, or if symptoms escalate.
Medication and medical conditions
- Diuretics, some antihypertensives, antihistamines, and anticholinergics can impair thermoregulation or fluid balance. Discuss heat plans with your clinician if you take these.
- If you have heart, kidney, or lung disease—or a history of heat illness—get personalized medical guidance before you begin a stronger acclimation phase.
Older adults and caregivers
- Check in frequently during hot spells. Thirst sensitivity can be blunted, and medication side effects are more common. Plan exposures earlier in the day, shorten sessions, and prioritize cooling breaks.
Many people use sauna as a controlled environment for heat exposure. If that is your route, use our practical safety guidance in sauna safety guidelines to match time and temperature to your needs.
Seasonal Plans and Cooling Strategies
Heat acclimation is easiest when you plan for the seasons. Treat spring as “base building,” early summer as “specific prep,” and mid-summer as “maintenance.”
Spring (6–8 weeks before hot weather)
- Goal: reacquaint your body with heat gently.
- Plan: 2–3 short exposures per week (ambient heat, warm bath, or low-temp sauna). Keep intensity low; focus on consistency.
- Cooling: finish each session with a cool rinse, light snack with sodium, and 15–20 minutes in a ventilated room.
Early summer (2–4 weeks)
- Goal: practical heat readiness for daily life.
- Plan: 3–5 weekly exposures, including two with light activity (easy walking or gentle cycling in shade). Start one or two sessions post-exercise in passive heat (e.g., warm bath) to add thermal load without high mechanical stress.
- Cooling: pre-cooling (cool drink or slushy), shade breaks, and skin wetting with airflow during outdoor chores.
Mid-summer (maintenance)
- Goal: hold adaptations with minimal stress.
- Plan: 1–3 exposures per week, matched to weather. Short “top-up” sessions keep sweating and plasma volume robust.
- Travel or time off: after a week away from heat, a few short sessions often refresh adaptations quickly.
Cooling tactics that work
- Skin wetting plus airflow: spray bottles, misting, or a wet cloth with light fanning.
- Neck and head cooling: cold towels or ice packs for short stints.
- Shaded routes and timing: morning or evening outdoor activity to reduce peak heat load.
- Clothing: lightweight, light-colored, moisture-wicking fabrics; breathable hats.
At-home checklist
- Small fan, spray bottle, digital scale, electrolyte packets or salty snacks, and a notebook or app for session logs.
As you combine heat with other stressors (training, cold, breath practice), balance is everything. For a big-picture framework on combining elements without burnout, see stacking stressors smartly.
Tracking Gains: RPE, HR Drift, and Recovery
You do not need a lab to confirm progress. A simple self-monitoring routine shows whether your plan is working and when to adjust.
1) A steady-state “check ride”
- Pick an easy, repeatable activity in warm conditions (e.g., 20–30 minutes of shaded walking, flat indoor cycling, or light household tasks).
- Record RPE at 5-minute intervals, heart rate if you have a monitor, and brief notes on comfort (“earlier sweating,” “felt stuffy,” etc.).
- Over several exposures, look for lower RPE at the same task, a smaller heart rate rise across the session (less HR drift), and faster cool-down afterward.
2) Sweat rate snapshot
- Weigh yourself (ideally nude or with dry clothes) before and after a representative session.
- Account for drinks taken in. Each 1 kg of body mass loss ≈ 1 liter of sweat.
- Note any swelling in hands or ankles; that can signal too much fluid relative to sodium for your needs.
3) Recovery markers
- Sleep quality: did heat practice disrupt sleep? If yes, move sessions earlier and cool more aggressively afterward.
- Next-day freshness: if you feel drained or headachy, reduce session length and improve hydration and sodium next time.
- Resting morning heart rate: large bumps can reflect accumulated stress. Scale back until it normalizes.
4) Two-week reflection
- At the end of two weeks, review your log. If RPE is declining, HR drift is flattening, and you feel steady between sessions, you can extend time-in-heat or add a modest movement component.
- If progress stalls, change one variable at a time: adjust hydration strategy, shorten sessions, or add more cooling.
What “better” looks like in daily life
- You tolerate midday errands with fewer breaks, gardening feels smoother, and a warm home or transit ride does not spike your heart rate. These are the wins that matter for healthy aging.
Graduating to maintenance
- Once summer feels manageable, keep 1–3 short heat exposures per week. A little makes a big difference in preserving adaptations.
References
- ACSM Expert Consensus Statement on Exertional Heat Illness: Recognition, Management, and Return to Activity (2023) (Guideline)
- Time-course for onset and decay of physiological adaptations in endurance trained athletes undertaking prolonged heat acclimation training (2024)
- Heat Reacclimation Using Exercise or Hot Water Immersion (2021)
- Nourishing Physical Productivity and Performance On a Warming Planet – Challenges and Nutritional Strategies to Mitigate Exertional Heat Stress (2024) (Systematic Review)
- About Heat and Your Health (2025)
Disclaimer
This article shares general education on heat acclimation for healthy adults and is not a substitute for personalized medical advice, diagnosis, or treatment. Heat exposure carries risks, particularly for people with heart, kidney, or lung disease; those taking medications that affect fluid balance; and anyone with a history of heat illness. Consult your healthcare professional before beginning or modifying any heat-related practice, and stop any session immediately if you experience concerning symptoms.
If you found this guide useful, please consider sharing it on Facebook, X, or the platform you prefer, and follow us for future updates. Your support helps us continue producing clear, practical health content.

