A strong core makes everything else easier while you’re losing weight. It protects your back, improves posture, and helps you produce force in lifts, cardio, and everyday tasks. What it doesn’t do is “melt belly fat” on its own. Spot reduction is a myth; fat loss follows a calorie deficit across the whole body, not one exercise. In this guide you’ll learn how to build real trunk strength with simple progressions, how often to train, and how to combine core work with cardio and steps for reliable results. If you’re assembling your full routine, start with our brief overview of exercise planning for weight loss to see how strength, cardio, and daily movement fit together.
Table of Contents
- Why core training matters
- What the core actually does
- Programming principles
- Exercise library and levels
- Time-efficient templates
- Troubleshooting and safety
- Results and expectations
- Frequently Asked Questions
Why core training matters
Core training supports weight loss indirectly by making you more capable. A stable trunk lets you lift more safely, walk farther without aches, and hold efficient positions on the bike, rower, or during runs. Those improvements increase the weekly activity you can tolerate, which helps sustain a calorie deficit—where fat loss actually happens.
The core’s job in plain language
- Transmit force: Your trunk connects legs and arms. Whether you’re squatting, pushing a stroller, or swinging a kettlebell, force passes through the core.
- Resist unwanted motion: Most valuable core work trains anti-extension (resisting back over-arch), anti-rotation (resisting twist), and anti-lateral flexion (resisting side-bend).
- Coordinate breathing and pressure: Good reps use diaphragmatic breathing to create intra-abdominal pressure (IAP) that stabilizes the spine without excessive bracing.
Why this matters during fat loss
- Protect muscle: Strength work signals your body to keep lean tissue in a deficit. A strong trunk makes big lifts safer and more repeatable.
- Raise NEAT: With fewer aches and better endurance, your non-exercise activity (walking, chores, play) tends to rise—quietly boosting weekly burn.
- Improve adherence: When your back feels better and sessions feel efficient, you keep showing up.
Myths to ignore
- “Crunches burn belly fat.” They strengthen muscles under the fat; they don’t target fat itself.
- “Only plank longer.” Longer holds aren’t automatically better. Quality and progression matter more than chasing minutes.
- “Heavy lifts are enough.” Big lifts train the trunk, but targeted core work balances patterns and addresses weak links.
If you’re new to training or returning after a long layoff, first review core ideas within the broader context of safe weight-loss basics and then layer in the progressions below.
What the core actually does
“Core” is more than visible abs. Think of a canister: diaphragm (top), pelvic floor (bottom), deep abdominals (transversus abdominis) and obliques (sides), with the rectus abdominis in front and spinal extensors (erectors, multifidi) in back. These muscles coordinate to stiffen or yield at the right time so you can move powerfully and safely.
Key functions you should train
- Anti-extension: Keep ribs stacked over pelvis and resist the low back’s urge to over-arch (e.g., dead bug, body saw, ab-wheel progressions).
- Anti-rotation: Resist twisting forces—critical for carries, presses, and sport (e.g., Pallof press, dead bug with reach, half-kneeling cable press).
- Anti-lateral flexion: Resist side-bending and asymmetry (e.g., suitcase carry, side plank progressions).
- Hip control: Glutes and deep hip rotators control the pelvis; training hinges, bridges, and split-stance work supports core function.
Breathing and bracing (simple cues)
- Inhale 360° (belly, sides, back) to fill the canister.
- Exhale gently to “stack” ribs over pelvis; feel lower ribs descend.
- Brace to task: Enough tension to keep alignment, not a maximal valsalva for every rep.
How this transfers to results
- Better spinal control allows more training volume with less irritation.
- Efficient positions reduce wasted motion, so you can walk or cycle longer at the same perceived effort.
- Improved breathing mechanics often make cardio feel easier, especially on hills or intervals.
Before hard sessions, a short prep combining breath, hinges, and light carries pays off. For quick flows that take 3–5 minutes, see our notes on warm-ups and recovery you’ll actually do.
Programming principles
Train the core like any other muscle group: with planned doses, clear progressions, and quality reps. You don’t need endless variety; you need steady practice in the functions above.
Frequency and volume
- 2–4 core sessions/week works for most people. Beginners do well with 2–3.
- Aim for 8–14 hard sets/week across anti-extension, anti-rotation, and anti-lateral flexion.
- Treat carries (suitcase, front-rack) as moving planks; one set = 20–40 meters per arm.
Sets, reps, and holds
- Holds: 10–45 seconds; cut the set when form fades.
- Reps: 6–12 controlled reps (1–2 seconds each direction).
- RPE: around 7–8/10—challenging but repeatable, with 1–2 reps in reserve.
Progression levers (change one at a time)
- Increase range (longer lever arms), time under tension (tempo and pauses), load (bands, KBs), or density (shorter rests).
- Move from bilateral → unilateral stances to add anti-rotation demands.
- Advance from supported → unsupported (e.g., hands-elevated plank → floor → body-saw).
Where to place core work
- After your main lifts, as a brief A-block finisher (2–3 movements × 2–3 sets).
- On cardio or step-focused days as a 10–15 minute mini-session.
- Before heavy squats/deads, use low-fatigue primers (dead bugs, side planks, light carries), not ab-burners.
Sample week (core emphasis, 4 days)
- Day 1 (strength-lower): Dead bug 3×8/side; suitcase carry 3×25 m/arm.
- Day 2 (cardio/steps): 12-minute core circuit (anti-rotation, side plank, hip bridge).
- Day 3 (strength-upper): Body-saw 3×8–10; half-kneeling cable press 3×8/side.
- Day 4 (Zone 2 walk/bike): 8 minutes of intermittent carries between easy intervals.
If you’re building from scratch, pair these ideas with a simple whole-body plan like our 3-day beginner strength plan and plug the core blocks where shown.
Exercise library and levels
Choose one exercise from each function (anti-extension, anti-rotation, anti-lateral flexion) plus one hip-dominant move. Start with Level 1; progress when all sets feel crisp.
Anti-extension
- Level 1: Dead bug (exhale to lower; back stays heavy on floor)
- Level 2: Plank with reach (hands-elevated → floor)
- Level 3: Body-saw or stability-ball rollout
- Level 4: Ab-wheel rollout (knees → toes)
Anti-rotation
- Level 1: Tall-kneeling Pallof press (band or cable)
- Level 2: Half-kneeling press (press-out or press-away)
- Level 3: Standing press with step-out
- Level 4: Offset farmer carry (one dumbbell/kettlebell)
Anti-lateral flexion
- Level 1: Side plank (knees → straight legs)
- Level 2: Side plank with top-leg march
- Level 3: Suitcase carry (20–40 m/arm)
- Level 4: Suitcase carry with slow march or uneven load
Hip control and posterior chain (core-adjacent)
- Level 1: Glute bridge (hold 1–2 seconds at top)
- Level 2: Single-leg bridge
- Level 3: Hip hinge (good-mornings, dowel for feedback)
- Level 4: Hip airplane (wall-supported)
Quick coaching cues
- Dead bug: Exhale; feel ribs descend; move limbs without moving the trunk.
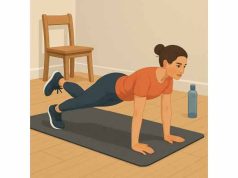
- Plank/Body-saw: Push the floor away; glutes lightly on; long line head to heels.
- Pallof press: Hips square; don’t let the band pull you; exhale as you press.
- Suitcase carry: Zip ribs over pelvis; walk tall; don’t lean to the side.
What about flexion (crunches, sit-ups)?
- These aren’t “bad,” but they’re rarely the priority for performance or back comfort. If you enjoy them and tolerate them well, keep them as a small accessory after your main core work.
Training at home? Everything above has no-equipment options. For a broader, gear-free routine that meshes well with these core choices, see our no-equipment training ideas.
Time-efficient templates
Short sessions count—consistency beats marathons. Use these plug-and-play formats when you have 10, 15, or 20 minutes.
10-minute primer (pre-lift or busy day)
- Block A (6 minutes):
- Dead bug 30s / rest 15s × 4
- Side plank 30s/side / rest 15s × 2
- Block B (4 minutes):
- Suitcase carry 30–40 m/arm × 2 trips (rest as needed)
15-minute circuit (balanced)
- EMOM × 15 (every minute on the minute):
- Pallof press 8–10/side
- Body-saw 8–10 reps
- Suitcase carry 30 m/arm
- Use leftover seconds each minute to rest.
20-minute core + cardio (low impact)
- Circuit × 4 rounds (work 40s / rest 20s):
- Half-kneeling press (left)
- Body-saw
- Half-kneeling press (right)
- Step-overs or fast march (brisk, talkable pace)
Weekly mix (example, 3–4 sessions)
- Mon: 15-minute circuit after upper-body strength
- Wed: 20-minute core + low-impact cardio
- Fri: 10-minute primer before lower-body lifts
- Sat or Sun: Long walk or easy cycle (conversational pace)
Your aerobic base makes fat loss more predictable and helps you recover from hard days. For simple heart-rate targets and workouts that complement core training, review our guide to easy aerobic work (Zone 2).
Troubleshooting and safety
Most core issues come down to two things: too much, too soon or bracing without breathing. Use these quick fixes to keep progress smooth and joints happy.
Low-back discomfort during core
- Check rib-pelvis stack: exhale gently first, then move.
- Shorten the lever (bend knees in dead bugs, elevate hands for planks).
- Swap high-fatigue flexion moves for anti-extension (dead bugs, body-saws).
- Keep loads close; avoid excessive ranges early on.
Neck tension with planks or dead bugs
- Pack the neck (double chin, long spine); eyes on the floor slightly ahead.
- Exhale gently; let the head follow the ribcage, not lead it.
Can’t feel the exercise
- Slow the tempo (3-second lowers).
- Add pauses at end ranges (1–2 seconds).
- Move less but with more control; shaking and breath-holding aren’t the goal.
Diastasis recti or pelvic-floor concerns
- Use talk-test intensities and low-pressure options (dead bug, side plank, bird-dog).
- Avoid breath-holding and high-impact moves early on.
- If you notice doming or dragging pressure, regress and consult a pelvic-health professional.
Progress stalls
- Progress one lever: range, time, load, or density.
- Add unilateral work (split stance, single-arm presses).
- Insert a deload week every 4–6 weeks: cut volume by ~30–40%.
Recovery signals
- Sleep and appetite are steady; soreness fades within 24–48 hours; technique holds late in sets.
- If not, reduce set count or swap one core day for an easy walk until you rebound.
Need help spacing hard and easy days while dieting? Our simple guide to rest-day planning shows patterns that maintain momentum without burnout.
Results and expectations
Core training won’t “shrink” your waist by itself, but paired with nutrition, steps, and strength work, it changes how you carry and produce force—and how you look when fat comes off.
What changes first
- Posture and movement quality: People often feel taller and more stable within 2–3 weeks.
- Performance: Lifts feel more controlled; hills and intervals feel less chaotic.
- Aches: Many notice fewer low-back complaints when they hinge and carry better.
Aesthetic timeline
- Visible midsection changes follow overall fat loss. With a modest deficit, consistent activity, and adequate protein, many see noticeable changes in 3–6 weeks, with clearer definition over months.
How to measure progress (beyond selfies)
- Hold consistent time or load with calmer breathing and less shaking.
- Increase lever length (longer reaches, lower planks) without losing alignment.
- Keep a short log of exercises, sets, and one cue that worked—so you can repeat wins.
Maintainable habits
- Anchor two or three short core blocks in your week; pair them with easy cardio and steps.
- Keep sessions short enough to finish, long enough to matter.
- When life gets loud, do the minimum viable session (10 minutes) and walk later.
Frequently Asked Questions
Can core exercises burn belly fat?
No. Core training strengthens muscles under the fat, but fat loss happens from a calorie deficit across the whole body. Use core work for stability and performance while nutrition, steps, and consistent training reduce overall body fat.
How often should I train my core when losing weight?
Two to four focused sessions per week work well. Spread sets across anti-extension, anti-rotation, and anti-lateral flexion. Keep efforts challenging but repeatable, and add a deload week every 4–6 weeks to maintain recovery during a calorie deficit.
Are planks better than crunches?
Planks and other anti-extension drills usually deliver more transferable stability with less back irritation. Crunches can be fine in small doses if you tolerate them well. Prioritize anti-extension, anti-rotation, and carries; sprinkle flexion as an accessory.
Should I do core before or after lifting and cardio?
Use low-fatigue core primers (dead bug, side plank) before heavy lifts, then place the main core work after strength or on separate days. For cardio, do core either first (low volume) or separately so fatigue doesn’t compromise posture or breathing.
How long should I hold a plank?
Quality beats duration. Start with 10–30-second holds for multiple sets, breathing smoothly. Progress to 30–45 seconds as control improves, then make the exercise harder (reaches, body-saw) rather than chasing multi-minute holds.
What if core work hurts my lower back?
Stop the set and regress. Emphasize breathing, shorten levers, and pick anti-extension drills that keep the spine quiet (dead bugs, body-saws). Avoid breath-holding. If pain persists, consult a qualified clinician before progressing loads or ranges.
Do I need equipment for an effective core program?
No. You can build a strong, resilient trunk with dead bugs, planks, side planks, hinges, and suitcase carries using a tote or backpack. Bands or cables add variety, but the biggest wins come from consistent practice and thoughtful progression.
References
- A proposed model to test the hypothesis of exercise-induced localized fat reduction (spot reduction), including a systematic review with meta-analysis (2022) (Systematic Review & Meta-analysis)
- The effect of abdominal exercise on abdominal fat (2011) (RCT; seminal)
- Core training and performance: a systematic review with meta-analysis (2023) (Systematic Review & Meta-analysis)
- Exercise therapy for chronic low back pain (2021) (Cochrane Review)
- Effects of External Abdominal Pressure Support on Dynamic Balance: A Randomized Crossover Study (2023) (Mechanistic RCT)
Medical Disclaimer
This article provides general fitness information and is not a substitute for personalized medical advice. Always consult your healthcare professional before starting or changing an exercise or weight-loss program, especially if you have medical conditions, are pregnant or postpartum, or take medications that affect heart rate, blood pressure, or balance.
If this guide helped you, consider sharing it with a friend. You’re welcome to follow us on Facebook or X for practical templates and steady, evidence-based coaching tips.


