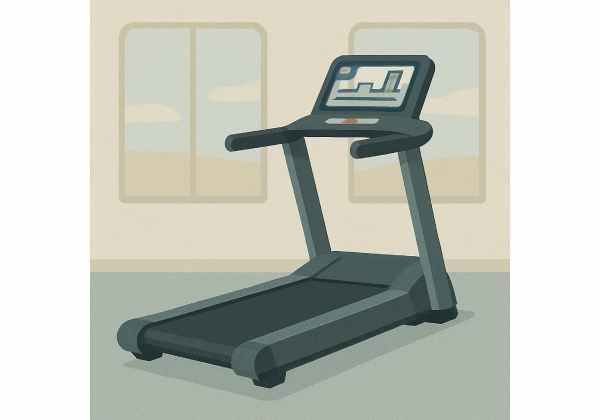
Treadmill walking is predictable, joint-friendly, and easy to scale. A small change in speed or incline noticeably shifts effort, letting you progress without guessing. Whether you prefer steady, meditative walks or focused interval blocks, the belt gives you guardrails to do more work with less stress. This guide explains how incline affects calorie burn, how to structure intervals that beginners actually repeat, and how to build an eight-week plan that fits busy schedules. You will also learn technique cues that protect knees and lower back, plus simple ways to pair treadmill time with strength work and steps. For the big picture on how cardio, lifting, and daily movement fit together, see our exercise framework for weight loss.
Table of Contents
- Why treadmill walking works
- Incline and calorie-burn basics
- Intervals that beginner walkers can repeat
- Eight-week treadmill plan
- Technique and safety
- Strength, steps, and scheduling
- Troubleshooting and plateaus
- Frequently Asked Questions
Why treadmill walking works
Walking on a treadmill checks the boxes that matter for sustainable fat loss: repeatability, control, and low orthopedic cost. Because speed and incline are fixed, effort stays steady. That makes pacing easier than outdoors, where wind, traffic, and uneven surfaces can frustrate beginners. The belt’s predictability also lets you measure progress: the same 30-minute session at the same settings feels easier after a few weeks—or your heart rate runs lower at a given pace. Either way, you see and feel improvement.
From a mechanics standpoint, walking distributes work across the calves, hamstrings, quadriceps, and glutes while sparing joints from impact spikes seen in running. If you’re carrying extra weight or returning after a layoff, the lower peak forces are a clear advantage. With small adjustments—0.1 mph (0.1–0.2 km/h) in speed or 1% in grade—you can raise demand without jumping to high-impact strategies.
Metabolically, treadmill walking increases weekly energy expenditure in a way most people can sustain. The lever that matters most is total weekly minutes at an effort you can repeat. Easy-to-moderate sessions done often will outpace hero workouts done rarely. Incline is the treadmill’s superpower here: a modest grade lifts the cardiorespiratory challenge, recruits the posterior chain, and lets you accumulate meaningful effort without pounding.
The belt also supports consistency. Weather and daylight no longer dictate your plan; a 25-minute block between meetings is enough to move the needle. That reliability helps you hit three to five sessions weekly—arguably the strongest predictor of success. As fitness improves, you can extend one longer steady walk, sprinkle in short intervals, or nudge incline slightly.
Finally, treadmill time plays well with a broader weight-loss approach: two short strength sessions to protect muscle, a daily step habit for “background burn,” and reasonable nutrition. If you’re new to training or returning after time off, skim our safe weight-loss basics and then use the simple progression in this guide.
Key takeaways
- Predictable speed/incline make effort repeatable and progress measurable.
- Low impact encourages more weekly minutes—the real driver of results.
- Incline offers a joint-friendly way to raise intensity.
- Pair the belt with strength work and steps for best long-term outcomes.
Incline and calorie-burn basics
Incline changes the task from flat locomotion to uphill work. That shift increases oxygen demand, heart rate, and perceived effort at the same speed. The steeper the grade, the more your posterior chain contributes—glutes and calves especially—and the more balance and ankle mobility matter.
What “1% grade” actually means
On most treadmills, 1% raises the deck 1 meter for every 100 meters traveled. Small grades (1–3%) subtly increase effort without disrupting gait. Moderate grades (4–7%) feel clearly “uphill” and raise heart rate. Steeper grades (8–12%+) are best used for short blocks unless you already have solid calf strength and ankle range.
Speed vs. incline: which should you adjust?
- Brand-new or coming back: Keep speed comfortable and use 1–3% grade to add challenge.
- Intermediate walkers: Blend modest speed increases with 2–6% grade.
- Short interval blocks: Briefly visit 6–10% grade while keeping speed no faster than your comfortable flat pace.
How to estimate effort without lab gear
- Talk test: You can speak in short sentences at your aerobic/base pace. If you can only say a few words, you’re in a higher zone—useful for short intervals, not most minutes.
- RPE (Rate of Perceived Exertion): Aim for 3–5/10 on steady days; 6–8/10 in work intervals.
- Heart rate (optional): Many people’s aerobic/base zone sits roughly around 60–70% of heart-rate reserve. Use it as a guide, not a handcuff.
Practical incline templates
- Base builder: 30 minutes @ 0–3% grade, change 1% every 5 minutes to vary muscles while staying conversational.
- Rolling hills: 3 minutes @ 4% + 2 minutes @ 1%, repeat 5–6 times; speed stays constant.
- Stair stepper feel (short): 60–90 seconds @ 6–8% + 60–90 seconds @ 1–2%, 6–10 rounds.
Form and comfort guardrails
- Posture: Tall, ribs over pelvis, gentle forward lean from the ankles—not the waist.
- Stride: Let the belt come to you. Shorten stride slightly as grade rises; land under your center of mass.
- Hands off: Avoid leaning on the rails; it changes mechanics and reduces training effect. If you need them briefly for safety, lower the grade instead.
- Footwear: A comfortable daily trainer with mild cushioning and good heel hold is ideal.
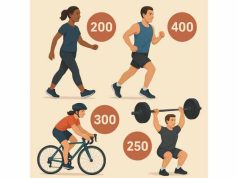
If you like comparing activities by energy cost, see our quick primer on calorie estimates by activity. Treat them as ranges; consistency in minutes is still the bigger lever.
Intervals that beginner walkers can repeat
Intervals compress quality into a short window and make treadmill time less monotonous. The best interval plan is one you can complete with clean form and repeat next week with a small improvement: an extra round, a bit less rest, or the same work at a lower RPE.
How to structure a session (25–40 minutes total)
- Warm-up (5–7 minutes): Start flat at an easy pace; add 1–2% for the last 2 minutes.
- Main set (12–24 minutes): Choose one template below.
- Cool-down (3–5 minutes): Walk easy at 0–1% until breathing normalizes.
Beginner templates (pick 1–2 to rotate for 4–6 weeks)
- 30/60 incline pops × 10–12: 30 seconds @ 5–7% (speed = easy flat pace), 60 seconds @ 0–1%.
- 2-minute ramps × 6–8: 2 minutes @ 3–5% then 2 minutes @ 0–1%. Keep speed constant.
- Pyramid 1–2–3–2–1 (equal rest): All at your comfortable speed; use 4–6% for the work bouts.
Intermediate templates
- Hill repeats 60/60 × 12–16: 60 seconds @ 6–10% + 60 seconds @ 1–2%, speed modest.
- Tempo blocks 5:00 × 3: 5 minutes at 2–4% where the talk test is challenged but still controlled; 2 minutes easy between.
- Speed change (flat): 90 seconds at brisk pace + 90 seconds at easy pace, 8–10 rounds; incline fixed at 1–2%.
Intensity checks
- You should finish upright, not clinging to rails.
- Last round should feel challenging but repeatable; if not, reduce grade or total rounds next time.
- Keep a 2:1 easy\:hard time ratio at first; shift toward 1:1 as fitness improves.
Weekly placement
- Start with two interval days and one to three steady/base walks.
- Separate interval days by at least 48 hours if calves or Achilles feel tender.
- If you also lift, avoid pairing steep-grade intervals with heavy lower-body days.
For perspective on when intervals outperform longer easy work—and when they don’t—see our guide to HIIT vs. steady work.
Eight-week treadmill plan
Use this plan as a scaffold and adjust based on recovery and schedule. The goal is consistency first, then measured progression.
Global rules
- Walk 3–5 days/week; most minutes should be easy to moderate.
- Progress one lever at a time: rounds, incline, speed, or duration—not all together.
- If soreness or life stress spikes, repeat the week.
Pace key (pick your baseline)
- Easy: a pace where you can talk in short sentences.
- Brisk: +0.3–0.6 mph (+0.5–1.0 km/h) faster than easy while keeping form.
- All grades refer to treadmill “% incline.”
Weeks 1–2
- Day A (Base): 25–30 min @ 1–3% grade, conversational.
- Day B (Hills Intro): 10 × (1:00 @ 4–6% + 1:00 @ 1–2%), speed = easy pace.
- Day C (Flat Brisk): 20–30 min at 0–2% alternating 4:00 easy / 2:00 brisk.
Weeks 3–4
- Day A (Rolling Hills): 5 × (3:00 @ 4–6% + 2:00 @ 1–2%).
- Day B (Tempo Block): 3 × 5:00 @ 2–4% at challenging-but-steady effort; 2:00 easy between.
- Day C (Long Easy): 35–40 min @ 0–3% conversational; negative split the last 10 minutes slightly.
Weeks 5–6
- Day A (Hill Repeats): 12 × (1:00 @ 6–8% + 1:00 @ 1–2%).
- Day B (Steady Brisk): 25–30 min @ 1–3% holding brisk pace you can maintain.
- Day C (Recovery Walk): 20–25 min very easy @ 0–1% (optional fourth day: 20 min easy).
Weeks 7–8
- Day A (Longer Hills): 6 × (2:00 @ 5–7% + 2:00 @ 1–2%).
- Day B (Tempo Mix): 10:00 steady @ 2–3% + 6 × 30 s brisk @ 1–2% with 60 s easy + 8:00 steady.
- Day C (Long Easy): 40–50 min @ 0–3% conversational.
Optional benchmark (end of Week 8)
Walk 30 minutes at 2% grade holding your best comfortable pace. Record distance or average speed. Retest every 4–6 weeks.
If you prefer training by heart rate and effort zones, review our primer on Zone 2 cardio basics and apply the same structure to your steady days.
Technique and safety
Clean mechanics reduce aches and improve efficiency, especially as grade rises.
Posture and stride
- Stand tall with ribs stacked over pelvis; eyes forward.
- Let your foot land under your center—avoid reaching far ahead, which increases braking.
- Shorten stride slightly on steeper grades; increase cadence a touch rather than overstriding.
Arms and rails
- Swing arms gently near your sides; hands around lower-rib height.
- Avoid leaning on rails. It offloads body weight and changes gait. If balance feels shaky, lower the grade or speed.
Footwear and surface
- Choose a comfortable daily trainer with mild to moderate cushioning and secure midfoot hold. Replace shoes when tread compresses or you notice new hotspots.
Warm-up and cool-down (5–7 minutes total)
- Start flat; include ankle rocks and gentle calf raises off the belt.
- Finish with 2–3 minutes at 0–1% grade to let heart rate drop gradually.
Who should be cautious with steep grades
- Anyone with Achilles tendinopathy, calf strains, or forefoot pain.
- Those with low-back or hip flexor tightness—steep grades can increase lumbar extension if posture drifts.
- Start with low grades and build tolerance; use intervals rather than long continuous climbs.
Environmental tips
- Heat elevates heart rate; use a fan and hydrate as needed.
- If dizziness appears when stepping off, hold the rails briefly while the “moving ground” sensation settles.
For a short pre-walk routine and recovery ideas that protect joints, see our warm-up and mobility guide. If you’re navigating knee pain or want joint-friendlier options, our overview of low-impact cardio can help you adjust settings.
Strength, steps, and scheduling
Treadmill walking moves the calorie needle; strength training keeps muscle while the scale moves. Together with a daily steps habit, they create a durable plan.
Weekly template (example)
- Mon: Treadmill intervals (20–30 min)
- Tue: Strength (30–40 min) + easy walk
- Wed: Long easy treadmill walk
- Thu: Steps emphasis (micro-walks during the day)
- Fri: Strength + short recovery walk
- Sat or Sun: Rolling-hills treadmill or outdoor walk
Two-day strength plan to pair with walking
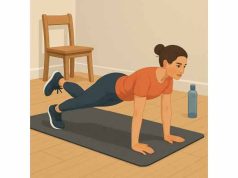
- Day 1: Goblet squat, dumbbell bench or push-ups, one-arm row, Romanian deadlift, suitcase carry, side plank (2–3 sets each, 6–12 reps).
- Day 2: Split squat, overhead press, cable or band pull-down, hip thrust or bridge, farmer’s carry, dead bug.
Leave 1–2 reps in reserve most sets and rest 60–120 seconds. Strength sessions can follow an easy treadmill day or live on separate days.
Steps still matter
Starting a treadmill plan sometimes reduces your non-exercise movement. Keep a simple daily target to protect “background burn.” If you’re building this habit, our primer on daily steps for fat loss explains pacing, time, and realistic targets.
Scheduling notes
- Separate steep-incline sessions from heavy leg strength by 24–48 hours.
- During stressful weeks, hold settings steady and focus on showing up.
- If sleep or energy dips, reduce grade first (mechanical stress), then session length.
Troubleshooting and plateaus
Plateaus usually trace back to three issues: not enough easy volume, too many “kind-of-hard” days, or untracked lifestyle drift (sleep, steps, snacking). Use the checklist below to course-correct.
If weight loss stalls
- Audit steps: Did your daily movement drop when you added treadmill time? Re-establish your baseline.
- Check calorie drift: Keep a few go-to meals on training days to reduce guesswork.
- Protect sleep: 7–8 hours improves appetite control and training quality.
If legs or feet feel beat up
- Rotate incline down before cutting minutes.
- Shorten stride and increase cadence slightly.
- Add a recovery walk day (0–1% grade) or an extra rest day this week.
If performance plateaus
- Extend one easy walk by 5 minutes/week until you reach 45–60 minutes.
- Keep one benchmark (e.g., 30 minutes @ 2% grade) and retest every 4–6 weeks.
- Add micro-progression: same workout, 1% less grade or 0.1 mph faster at the same RPE.
Common mistakes
- White-knuckling the rails. Lower the grade; keep posture tall.
- All intervals, no base. Most minutes should be conversational.
- Never changing a thing. Use tiny, planned changes so progress remains visible.
- Ignoring deloads. Every 3–4 weeks, reduce volume ~20–30% for one lighter week.
If you’re experimenting with training time, our look at morning vs. evening workouts can help you choose a slot that supports adherence and sleep.
Frequently Asked Questions
Is incline walking good for weight loss?
Yes. A modest incline increases cardiovascular demand and muscle recruitment without adding impact. Start with 1–3% for steady sessions and use 4–8% for short intervals. Most progress comes from weekly consistency; incline is a tool to make the same minutes more effective.
What speed and incline should I use as a beginner?
Pick a speed where you can talk in short sentences, then add 1–2% grade. If breathing becomes choppy, lower the grade before reducing speed. As you adapt, alternate easy days (0–2%) with moderate hills (3–5%) to build capacity safely.
How many minutes should I walk for fat loss?
Aim for 150–210 minutes per week split across three to five sessions. Start with 20–30 minutes and extend one walk by 5 minutes weekly until you reach 40–50 minutes. Intervals can replace one session but shouldn’t crowd out easy base work.
Is treadmill walking as effective as outdoor walking?
For weight loss, both work. Treadmills offer precise control of speed and incline and avoid weather limits, which improves consistency. Outdoor routes add variety and natural hills. Many people blend both—treadmill for intervals, outdoors for longer easy walks.
Does incline walking build glutes?
Incline walking increases glute and calf involvement, especially at 4–10% grades. It can strengthen these muscles for endurance but won’t replace targeted strength work for size or maximal strength. Pair incline sessions with squats, hinges, and split-leg work for best results.
Can I walk every day on the treadmill?
You can, provided most minutes are easy and you vary grade and duration. Beginners do well with three to five days weekly. Add daily walking gradually and include at least one lighter day or full rest day when legs feel heavy or sleep suffers.
Should I hold the handrails during steep inclines?
Use rails briefly for balance only. Leaning on them reduces training effect and changes gait. If you need rails to complete a segment, lower the grade or speed and rebuild capacity with clean mechanics.
References
- WHO guidelines on physical activity and sedentary behaviour (2020) (Guideline)
- Aerobic Exercise and Weight Loss in Adults: A Systematic Review and Dose-Response Meta-Analysis (2024) (Systematic Review)
- High-intensity interval training is not superior to continuous aerobic training in reducing body fat: A systematic review and meta-analysis of randomized clinical trials (2023) (Systematic Review)
- Correlation between cardiopulmonary metabolic energy cost and lower-limb muscle activity during inclined treadmill gait in older adults (2021)
- The talk test as a useful tool to monitor aerobic exercise intensity in healthy population (2023)
Disclaimer
This guide is educational and not a substitute for personalized medical advice. Consult a qualified healthcare professional before changing your exercise or nutrition plan—especially if you have cardiovascular, metabolic, or orthopedic conditions, are pregnant, or are returning from injury or surgery.
If this article helped you, consider sharing it with a friend. You’re welcome to follow us on Facebook or X for practical training templates and steady, evidence-based updates.


