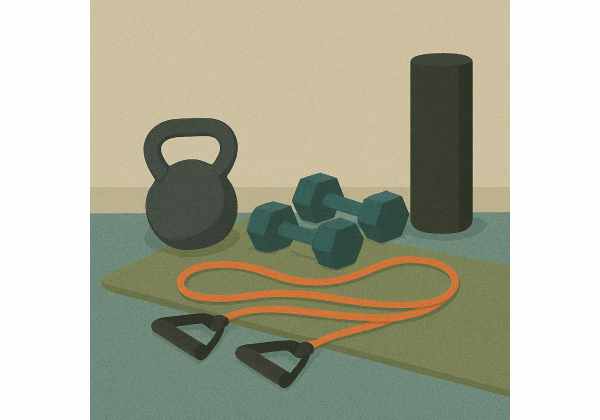
Introduction — Resistance bands are compact, joint-friendly, and surprisingly effective for fat loss when you program them with smart work-to-rest ratios and progressive overload. This guide gives you a precise 30-minute plan, form cues, and weekly progressions so you can train anywhere and keep results coming. Bands make it easy to hit full-body patterns—squat, hinge, push, pull, and core—without the joint stress of heavy external loads. For the best results, pair the plan with nutrition, daily steps, and recovery. If you want a broader view of how strength, cardio, and step targets fit together during a cut, see our concise exercise strategy for fat loss. Keep a timer handy, choose a band that feels “challenging but doable,” and let’s get started.
Table of Contents
- Do Resistance Bands Burn Fat?
- 30-Minute Resistance Bands Workout for Weight Loss
- Form and Technique Cues
- Progression and Programming
- Common Mistakes to Avoid
- Safety and Who Should Avoid
- Equipment and Setup
- Frequently Asked Questions
Do Resistance Bands Burn Fat?
Yes—when you use them in a structured workout that taxes large muscle groups, keeps your heart rate elevated, and progresses over time. Fat loss comes from a sustainable calorie deficit. Training is the lever that protects muscle, raises energy expenditure, and makes your deficit more comfortable. Resistance bands help you do all three with minimal equipment.
Bands let you hit the same movement patterns as barbells and dumbbells: squats, hinges, presses, pulls, and carries. Because tension increases as the band stretches, the resistance curve often matches your strength curve—you are typically stronger at lockout, where the band is tautest. That means challenging reps without heavy joint compression.
For weight loss, prioritize sessions that:
- Cover the big patterns (squat, hinge, push, pull, lunge, brace) so you recruit a lot of muscle mass per minute.
- Use time-based sets (e.g., 40 seconds work/20 seconds rest) to keep pace brisk and rest honest.
- Track difficulty using RPE (rate of perceived exertion). Aim for sets that end with 1–2 reps in reserve, not failure.
- Progress weekly with thicker bands, tighter hand placement, more reps, or shorter rest.
Expect calorie burn similar to moderate strength circuits. It is not “HIIT on rails,” but it is efficient: you can stack compound moves, reduce transitions, and keep moving. Combine this plan with daily step goals, adequate protein, and consistent sleep. If you are new to fat loss, review safe weight-loss basics so your training and nutrition support each other.
Lastly, bands travel well, making adherence easier during busy weeks. Consistency beats perfect programming. When the option is “work out or skip,” bands remove friction and keep your streak alive.
30-Minute Resistance Bands Workout for Weight Loss
This session balances strength and conditioning so you protect muscle while elevating heart rate. You will use two circuits plus a focused cool-down. Keep transitions tight. Use bands that make the last 5–10 seconds of each work interval challenging with clean form.
Timer Overview (30:00 total)
- Warm-Up: 4:00
- Circuit A (Strength-biased): 12:00
- Circuit B (Metabolic/Density): 10:00
- Cool-Down: 4:00
Warm-Up — 4:00
Cycle the following twice, 30 seconds each: band pull-apart, lateral band walk, hip hinge with band (hands at hips to groove pattern), tall-kneeling overhead reach with breathing (inhale nose, long exhale). For more on prep work that protects joints and improves output, see warm-up and mobility basics.
Circuit A — 12:00 (40s work / 20s rest × 3 rounds)
- Banded Squat (loop around shoulders/under feet) — drive knees out, chest tall.
- One- or Two-Handle Row (band anchored at chest height) — elbows ~30–45° from torso.
- Overhead Press (stand on band, press straight up) — ribs down, glutes tight.
- Romanian Deadlift (RDL) (band under feet, hands hold ends) — hinge from hips, neutral spine.
Load target: By round 3 you should be near an RPE 8 (about 2 reps in reserve). If form stays perfect, shorten your hand spacing or step wider on the band next time.
Circuit B — 10:00 Density Block (AMRAP)
Rotate through for as many quality rounds as possible in 10 minutes. Rest only as needed to preserve clean reps.
- Split Squat (Front Rack) — 8–10 reps/side (band under front foot, looped at shoulders).
- Lat Pulldown (Kneeling) — 10–12 reps (band anchored overhead; pull elbows toward ribs).
- Pallof Press — 10–12 reps/side (band anchored at chest height; resist rotation).
Progression lever: Add 1–2 reps per set or thicker band next week. Keep posture tall and breath steady.
Cool-Down — 4:00
- Child’s pose with side reach — 60s
- Figure-4 glute stretch — 60s/side
- Doorway pec stretch — 60s
Modifications
- Beginner: Use 30s work / 30s rest in Circuit A for round 1; keep total time the same.
- Limited equipment: If you have only one loop, swap the overhead press for a push-up with band (band across upper back, ends under palms).
- Advanced: Add an “eccentric 3-count” to the first 20s of each set, then regular tempo for the last 20s.
Track your rounds in Circuit B. If you hit 4+ quality rounds, tighten band spacing or move up a band color next week.
Form and Technique Cues
Good form lets lighter tools deliver serious training. Use these cues to make every rep count while protecting joints.
Breathing and Bracing
- Set the core: Inhale through your nose, fill 360° around the lower ribs, then lightly brace as if preparing to be poked. Exhale smoothly on exertion.
- Neutral spine: Maintain a gentle curve; avoid over-arching during presses or rounding during hinges.
- For a deeper dive into trunk strategy while cutting, see core training during fat loss.
Movement-By-Movement Cues
Banded Squat: Tripod feet (big toe, little toe, heel). Drive knees out to meet the band’s tension. Keep chest proud but ribs “down.” Stand by pushing the floor away.
RDL (Hip Hinge): Soft knees. Push hips back until you feel hamstrings load; shins stay near vertical. Keep lats “on” by pulling band slack out before you move.
Row: Shoulders down and back, neck long. Initiate with shoulder blades, then elbows. Finish with wrists flat and ribs quiet.
Overhead Press: Screw feet into floor; squeeze glutes. Drive hands up and slightly back to finish with biceps by ears. Do not flare ribs to “get the weight up.”
Split Squat: Front shin roughly vertical at the bottom. Think “down, not forward.” Keep pelvis square; press through the whole front foot.
Lat Pulldown (Kneeling): Tall torso. Pull elbows toward the back pockets. Stop when shoulder blades meet—not when posture collapses.
Pallof Press: Stack ribs over pelvis. Lock hips and press the handle straight out; resist rotation as the band tries to twist you.
Effort and Tempo
- Rep speed: Use a 2-0-2 tempo on most sets (two seconds down, no pause, two seconds up).
- Range: Move through a pain-free, technique-sound range. If depth degrades, adjust band tension or foot stance.
- Stop shy of failure: Band tension spikes near lockout. Keep 1–2 reps in reserve to avoid form breakdown.
Record the band color, hand/foot spacing, and reps you achieved at a given RPE. That simple logbook becomes your progression map.
Progression and Programming
Weight loss favors consistency and recoverable stress, not “every session is maximal.” Use these weekly levers to advance without burnout.
Weekly Schedule (2–4 days)
- 2 days/week: Run the 30-minute plan on non-consecutive days (e.g., Mon/Thu). Add an optional 20–30 minutes of easy steps or cycling on a third day.
- 3 days/week: Mon/Wed/Fri. Keep one day slightly lighter (use a thinner band or 30s work/30s rest in Circuit A).
- 4 days/week: Alternate Circuits A/B emphasis. Keep two harder and two easier days.
8-Week Progression Ideas
- Weeks 1–2: Learn movement and set baselines. RPE 6–7 by the last round; note rounds in Circuit B.
- Weeks 3–4: Shorten rests in Circuit A to 35/25 or tighten hand spacing. Aim for +1 rep per set in Circuit B.
- Weeks 5–6: Move up one band thickness on your strongest lift; keep others at baseline to manage fatigue.
- Weeks 7–8: Add a controlled eccentric (3-sec down) to the first set of each move in Circuit A.
Autoregulation
- Green-light day: Sleep and energy are good—turn 40/20 into 45/15 in Circuit A.
- Yellow-light day: Keep 40/20 but choose thinner bands.
- Red-light day: Keep the appointment: cut Circuit B to 7 minutes at easy effort.
Rest days are not “missed opportunities”—they are where you keep muscle and return ready. For guidance on how many to plan each week while cutting, see rest-day scheduling for weight loss.
Common Mistakes to Avoid
Chasing sweat over progression. The goal is not “most breathless.” It is quality work that you can repeat and gradually load. Track band size, spacing, and reps; add small, consistent increases.
Using bands that are too light. If you can sprint through 40 seconds without slowing down or feeling muscular fatigue, tension is too low. Tighten spacing or move up a color.
Only doing isolation moves. Biceps curls and lateral raises are fine, but the bulk of the session should come from squats, hinges, rows, and presses—big patterns that drive energy expenditure.
Poor anchoring. Unreliable anchors waste force and can snap free. Use sturdy door anchors or wrap bands around fixed posts at the correct height.
Letting posture unravel. Rib flare in presses, rounded backs in hinges, and knee collapse in squats all reduce stimulus and raise injury risk. Slow down, shorten the range, and rebuild control.
Misreading calorie burn. Calorie counters can misestimate resistance work. Focus on behavior you can control: session completion, step count, and nutrition. If you want typical ranges across activities, review calorie burn by exercise.
Skipping steps/NEAT. Your daily movement outside workouts (walking, chores, standing) may contribute more total burn than training. Keep a step target and defend it, especially on rest days.
Safety and Who Should Avoid
Most people can train safely with bands, but individual needs vary. Stop any exercise that causes sharp pain, numbness, or joint “pinch,” and consult a clinician if symptoms persist.
- Back pain/history of disc issues: Favor split squats over deep hinges at first; keep core braced and range modest.
- Shoulder irritability: Substitute half-kneeling landmine-style presses (angled path) for full overhead presses; limit end-range abduction.
- Knee sensitivity: Use box-supported squats, shorten range, and bias hinges and hip-dominant moves. For joint-friendly conditioning ideas, see low-impact cardio options.
- High blood pressure: Avoid long breath-holds; exhale on effort. Keep sets submaximal.
- Pregnancy/postpartum: Emphasize breathing and pelvic floor-friendly core (Pallof, dead-bug presses). Avoid valsalva and supine positions if uncomfortable.
- New lifters: Practice the hinge and squat unloaded first; add band tension only after positions are consistent.
Always inspect bands for cracks, sun damage, or thinning before sessions. Replace frayed equipment immediately. Set anchors at or slightly below the line of pull to reduce snap-back risk.
Equipment and Setup
You can do the entire plan with one medium and one heavy loop band. If you want more range and comfort, consider these options:
- Loop bands (41-inch): Versatile for squats, hinges, assisted pull-ups, and loaded carries. Color usually indicates tension; “medium” works for most upper-body moves, “heavy” for lower body.
- Tubing with handles: Comfortable for rows and presses; clips let you combine strands for custom loads.
- Mini-loops: Useful for lateral walks and activation; treat them as accessories, not the whole session.
- Anchors: A door anchor or sturdy post lets you pull horizontally and vertically without a partner.
- Accessories: A yoga mat for traction, a notebook or app for logging, and a small towel for grip.
Choosing Resistance
Pick the lightest band that still forces you to slow in the last 5–10 seconds of a 40-second interval with perfect form. If reps collapse early, go lighter. If you are still accelerating at the end, go heavier or shorten your grip width.
Space and Setup
- Clear a 6×8-foot area.
- Anchor bands at chest height for rows, overhead height for pulldowns, hip height for Pallof presses.
- Orient your station so transitions between moves are steps, not room changes—this preserves density and keeps heart rate up.
Care and Longevity
- Store away from sun and heat.
- Avoid sharp edges and rough surfaces that nick latex.
- Rotate which part of the band contacts feet and anchors to distribute wear.
Frequently Asked Questions
How many days per week should I do this resistance band workout?
Start with 2–3 days per week on non-consecutive days. If recovery, sleep, and step targets are solid, move to 4 days by alternating harder and easier sessions. Keep at least one full rest day weekly. Progress bands or volume gradually rather than adding marathon sessions.
Can resistance bands really help with weight loss?
Yes. Bands let you train full-body patterns with enough tension to protect muscle while elevating heart rate. Pair the plan with a modest calorie deficit, sufficient protein, and consistent steps. Fat loss is driven by behavior you can repeat—bands make that easier anywhere.
What band thickness should I buy as a beginner?
One medium loop for upper body and one heavy loop for lower body will cover most needs. If budget allows, add a light loop for small muscles and technique work. The right band makes the last 5–10 seconds of a 40-second interval challenging without form breakdown.
How do I progress if I only own one band?
Shorten your grip or stance to increase tension, slow the eccentric to three seconds, pause at end ranges, and add reps per set. You can also cut rest slightly (e.g., 40/20 to 45/15) sparingly. Log your metrics so you are adding challenge, not guesswork.
Will I lose muscle while cutting with bands?
Not if you train close to technical failure, hit full-body patterns two to four times per week, and eat enough protein. Bands can produce high-quality tension. Guard sleep and recovery, and keep sessions consistent. The goal is “leaner and as strong,” not just lighter.
What if certain moves hurt my knees or shoulders?
Swap exercises, not the workout. Use box-supported squats or shallower split squats for knees, and angled presses or rows for shoulders. Reduce range, choose a thinner band, and stop any sharp pain. Consider low-impact cardio on sensitive days and rebuild positions carefully.
References
- Resistance training effectiveness on body composition and body weight outcomes in individuals with overweight and obesity across the lifespan: A systematic review and meta‐analysis (2022) (Systematic Review)
- Physical Activity as a Critical Component of First-Line Treatment for Elevated Blood Pressure or Cholesterol: Who, What, and How?: A Scientific Statement From the American Heart Association (2021) (Guideline)
- Insights into Non-Exercise Physical Activity on Control of Body Mass: A Review with Practical Recommendations (2023) (Review)
- Effects of elastic band resistance training on the physical and mental health of elderly individuals: A mixed methods systematic review (2024) (Systematic Review)
- Higher compared with lower dietary protein during an energy deficit combined with intense exercise promotes greater lean mass gain and fat mass loss: a randomized trial (2016) (RCT)
Health Disclaimer
This content is educational and not a substitute for personalized medical advice. Consult a qualified healthcare professional before starting any new diet or exercise program, especially if you have cardiovascular, metabolic, orthopedic, or neurological conditions, take prescription medications, are pregnant/postpartum, or are recovering from injury or surgery.
Share and Stay Connected
If this plan helped, consider sharing it with a friend. You are welcome to follow us on Facebook or X for new templates and practical guides. Thank you for reading and training responsibly.


