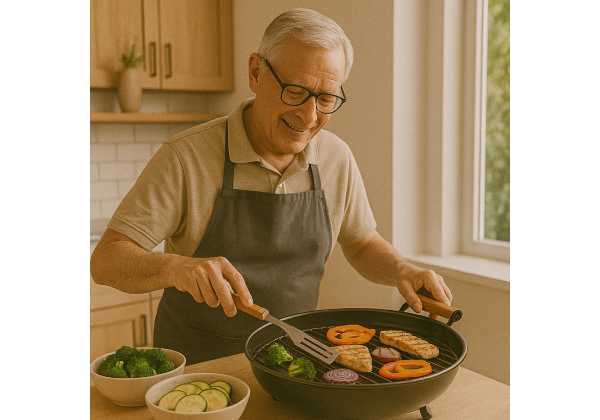
Aging changes how our bodies handle stress from food preparation. High-heat, dry cooking creates compounds such as advanced glycation end products (AGEs), heterocyclic amines (HCAs), and polycyclic aromatic hydrocarbons (PAHs). These molecules can stiffen tissues, nudge inflammation, and add to metabolic strain over time. The good news: small shifts in cookware, temperatures, marinades, and reheating habits markedly reduce exposure—without sacrificing pleasure. This guide translates food chemistry into kitchen moves you can use tonight. You will learn which methods minimize browning byproducts, how acids and herbs shield proteins, the temperatures that matter, and smart ways to grill, air fry, or reheat leftovers. If you want a broader nutrition map for healthy aging, see our pillar on longevity-focused nutrition.
Table of Contents
- What AGEs, HCAs, and PAHs Are and Why They Matter for Aging
- Lower AGE Methods: Steaming, Poaching, Braising, and Pressure Cooking
- Marinades and Spices: Acid, Herbs, and Polyphenols to Reduce Byproducts
- Pans, Oils, and Temperatures: Smoke Points and Oven Settings
- Grilling and Air Frying: Charring Control and Practical Safety Tips
- Leftovers and Reheating: Microwaves, Storage, and Food Quality
- Weekly Cooking Swaps to Reduce Exposure Without Losing Flavor
What AGEs, HCAs, and PAHs Are and Why They Matter for Aging
AGEs, HCAs, and PAHs form when foods—especially protein- and fat-rich ones—are exposed to high dry heat. While your body produces some AGEs naturally, diet contributes additional “exogenous” AGEs. These arise mainly via the Maillard reaction, the browning process that creates crusts and roasted flavors. In meats, intense heat also drives reactions that build HCAs (from creatine, amino acids, and sugars) and PAHs (from incomplete combustion of fats and drippings). These molecules can bind to cellular structures, stress mitochondria, and amplify inflammatory signaling.
Why this matters for aging: AGEs can cross-link collagen in skin, tendons, and blood vessels, reducing elasticity. They interact with the RAGE receptor on cells, activating pathways that elevate oxidative stress and low-grade inflammation—both hallmarks of biological aging. In metabolic tissues, excessive AGE burden is associated with insulin resistance and lipid disturbances. HCAs and PAHs carry genotoxic potential; long-term, high exposures correlate with greater risk in certain cancers. None of this means you must abandon searing or grilling. It means you should manage browning intensity, moisture, and time.
Three kitchen levers reduce formation substantially:
- Moisture: Water-based heat (steaming, poaching, simmering) caps surface temperatures around 100°C, slowing Maillard reactions and limiting AGE and HCA formation.
- Temperature and time: Lower oven settings, gentler pan heat, and “pull temperatures” (removing meat just before target doneness to carryover cook) all cut browning byproducts.
- Antioxidant barriers: Acidic, polyphenol-rich marinades and spice rubs scavenge reactive intermediates and physically limit oxygen at the surface.
Exposure is cumulative. If you love charred dishes, keep them occasional and combine with protective patterns—ample produce, legumes, whole grains, and fish; generous herbs; and balanced cooking across the week. The goal is not zero browning; it is better control.
Lower AGE Methods: Steaming, Poaching, Braising, and Pressure Cooking
Moist-heat techniques are your most reliable ways to tame AGE formation while preserving tenderness and nutrients.
Steaming suspends food above simmering water so surface temperatures rarely exceed 100°C. Vegetables retain structure and color; fish and tofu stay delicate. Use a tight lid to maintain humidity, and avoid overfilling the basket so steam circulates. For flavor, add lemon slices, garlic, ginger, peppercorns, or herbs to the steaming liquid. Steaming suits tender vegetables (broccoli, green beans, asparagus), shellfish, white fish, and dumplings. It is among the lowest-AGE cooking methods because it avoids dry-surface temperatures where browning surges.
Poaching submerges delicate foods in a flavorful liquid at 71–82°C (barely shivering). Eggs, salmon, chicken breast, and pears do well. Maintain sub-boiling heat; vigorous boiling toughens proteins. For savory dishes, use broth with bay leaf, peppercorns, and a splash of vinegar or wine to brighten. For fruit, try water with citrus peel and a cinnamon stick. Poaching minimizes crust formation, limiting AGEs and HCAs.
Braising marries sear (optional and brief) with a long, covered simmer. After a quick color step—keep it light—add aromatic vegetables and liquid (stock, tomatoes, wine, or a mixture), cover, and move to a 150–165°C oven. Collagen melts at these moderate temperatures, making tough cuts succulent without prolonged dry heat. If you skip the initial sear, braising becomes even lower in byproducts. Either way, keep the lid on to trap moisture.
Pressure cooking raises the boiling point of water, cooking at 115–121°C. Shorter time offsets the slightly higher temperature, resulting in low AGE formation overall. It excels with beans, whole grains, stews, and shredded meats. For beans, pre-soak (if desired), then pressure cook with onions, bay leaf, and kombu to improve digestibility.
Technique tips to keep flavor high and AGEs low:
- Build flavor with aromatics and acids instead of deep crusts: sauté onions and tomato paste briefly before adding liquid; finish with lemon, vinegar, or fresh herbs.
- Use umami boosters—miso, anchovy, fish sauce, dried mushrooms—to provide depth that browning would otherwise deliver.
- Aim for gentle doneness: fish flakes but stays moist; vegetables remain crisp-tender; beans are soft but intact.
Planning for convenience helps you rely on these methods during the week. Consider a weekend pot of braised chickpeas or a batch of pressure-cooked lentils to anchor fast meals. For more ways to cook once and eat well all week, see our practical ideas in batch cooking and freezer staples.
Marinades and Spices: Acid, Herbs, and Polyphenols to Reduce Byproducts
Marinades do more than flavor. Acids (vinegar, citrus, yogurt), salt, and polyphenol-rich herbs create a shield that slows HCA and PAH formation in meats and reduces surface browning intensity in high-heat cooking. The mechanism is twofold: antioxidants intercept reactive carbonyls and free radicals that propagate Maillard intermediates; and surface moisture lowers peak temperatures during the hottest phase of searing or grilling.
Core marinade blueprint (per pound/450 g of protein):
- Acid: 2–3 tablespoons of lemon juice, lime, wine, apple cider vinegar, or plain yogurt.
- Salt: ¾–1 teaspoon fine salt (or use soy sauce/tamari for part of the salt).
- Polyphenols: 1–2 tablespoons chopped fresh herbs (rosemary, thyme, oregano, sage, basil) or 1–2 teaspoons dried.
- Aromatics: 2 cloves minced garlic or 1 teaspoon garlic powder; ½–1 teaspoon onion powder.
- Oil (optional): 1 tablespoon extra-virgin olive oil to disperse fat-soluble antioxidants and improve texture.
- Time: 30–120 minutes refrigerated for fish and poultry; up to 8–12 hours for tougher red meats. Pat surfaces lightly before cooking to prevent flare-ups.
Spice strategies that pull double duty:
- Rosemary, thyme, oregano, and sage supply rosmarinic, carnosic, and caffeic acids—potent radical scavengers.
- Turmeric and ginger add curcuminoids and gingerols that counter oxidative steps in HCA formation.
- Black pepper and paprika contribute piperine and capsanthin; use in modest amounts to avoid scorching.
- Tea, coffee, and cocoa (in small quantities) lend polyphenols that blunt browning byproducts while providing complex flavor. A teaspoon of espresso powder or cocoa in a rub enhances crust color at lower heat.
Practical cautions:
- Sugary marinades (honey, barbecue sauce) brown rapidly. Apply sweet glazes in the last 2–3 minutes to limit scorching.
- Excess oil can drip and smoke on grills, encouraging PAHs. Use just enough to coat.
- Some allium-only marinades can darken quickly; balance with herbs and acids.
- For vegetables, marinating is effective too—especially for mushrooms, eggplant, and zucchini—reducing char for the same flavor intensity.
Marinades are most helpful when you plan to cook hot and fast (grilling, broiling, pan-searing). If your weekly pattern centers on moist-heat methods, use herbs and acids more for flavor than protection. For an overview of plant compounds that support healthy aging more broadly, explore our guide to polyphenol-rich foods.
Pans, Oils, and Temperatures: Smoke Points and Oven Settings
Surface temperature—not just oven dial settings—drives browning chemistry. Pan materials, oil choices, and heat management determine whether you develop a savory crust or drift into char.
Pan choices:
- Stainless steel offers even browning with responsiveness. Preheat 2–3 minutes on medium, add a thin oil film, then food; lower heat once sizzling.
- Cast iron retains heat well; great for steady medium heat. Avoid preheating to the point of visible smoke, which accelerates PAH formation and degrades oil.
- Enameled cast iron behaves like cast iron with easier cleanup and less sticking at modest heat.
- Nonstick simplifies eggs and fish at low to medium heat; do not exceed manufacturer guidance. High heat can damage coatings and promote off-flavors.
Oil selection and smoke points (approximate):
- Extra-virgin olive oil: 190–210°C; high in polyphenols; ideal for sautéing and oven roasting at ≤205°C; fine for brief sears if you manage heat.
- Refined avocado oil: 240–260°C; neutral flavor; suitable for higher-heat roasting and quick searing.
- Refined peanut or high-oleic sunflower/safflower: 230–245°C; stable for stir-frying.
- Butter/ghee: whole butter smokes low (~175°C) and browns quickly; clarified butter/ghee (~200–230°C) tolerates higher heat.
Temperature tactics that reduce byproducts:
- Dry-heat ceiling: Keep most oven roasting at 175–205°C. For vegetables, a short finish at 220°C develops color, but pull when edges are browned, not blackened.
- Stovetop: Use medium to medium-high; reserve true high heat for 30–90 seconds to finish a crust. If oil smokes, you are above the threshold—lower heat and start over if needed.
- Reverse sear: Cook thick steaks or chops gently in a 105–120°C oven or on the cool side of a grill until 5–8°C below target internal temperature; finish with a quick, light sear.
- Stir-fry smart: Preheat the pan, add minimal oil, and keep ingredients moving to limit dwell time at peak surface temperature.
Flavor without excess browning:
- Build an aromatic base (onion, garlic, celery, carrot) over medium heat; add tomato paste for umami and deglaze with wine or vinegar.
- Finish with fresh herbs, citrus zest, and a splash of acid to brighten without more heat.
When quality oil is a flavor feature, extra-virgin olive oil works beautifully from dressings to gentle sautéing; learn how to choose and use robust oils in our guide to high-polyphenol olive oil.
Grilling and Air Frying: Charring Control and Practical Safety Tips
Grilling and air frying deliver crisp textures quickly, but they also push foods toward the browning zone in which HCAs, PAHs, and acrylamide (mostly in starchy foods) can form. Focus on distance from the flame, moisture, and time.
Grilling, minimized risk:
- Pre-marinade with acid and herbs for proteins; pat surfaces lightly to prevent flare-ups.
- Two-zone fire: Create a hot side for searing and a cooler side for finishing. Start on the hot side for 45–90 seconds per face; move to the cool side to finish with the lid down.
- Manage drippings: Use a foil drip tray under fatty cuts; avoid fat hitting coals, which generates PAH-rich smoke.
- Avoid visible char: Brown is fine; black is a signal to trim. Flip often to limit surface peak temperatures.
- Skewer and par-cook: Par-cook chicken in the oven or microwave to 60–65°C internal, then finish briefly on the grill to reach safe temperature—less time over direct heat, fewer byproducts.
- Vegetables first: Grill moisture-rich vegetables (zucchini, peppers, mushrooms) over medium heat; remove when tender with light grill marks.
Air frying, calibrated:
- Pre-soak and pat dry potato sticks for 15–30 minutes; this reduces surface sugars that fuel acrylamide.
- Moderate set points: Use 170–190°C for fries and breaded items; shake the basket to promote even cooking instead of pushing temperature higher.
- Go for gold, not brown: Pull when surfaces are golden; extended cycles darken rapidly.
- Do not overcrowd: Thin, single layers reduce edge scorching.
- Choose coatings wisely: Whole-grain or nut-based coatings brown quicker; apply thinner layers.
General safety and quality:
- Use instant-read thermometers to hit doneness without overcooking (63°C whole cuts of beef/pork/lamb with rest; 74°C ground meats and poultry; 63°C fish).
- Keep grills clean; scrape grates before and after to reduce residue that burns.
- Limit smoke exposure; stand upwind, and use lids to control flare and fumes.
If you plan to grill frequently, combine these practices with lower-AGE meals on non-grill days for balance. For broader kitchen hygiene, review essential practices in food safety for older adults.
Leftovers and Reheating: Microwaves, Storage, and Food Quality
Leftovers are nutrition insurance, but reheating can change both flavor and byproduct formation. The microwave often gets an undeserved bad reputation; in reality, it’s a moisture-preserving, low-AGE reheating tool when used well.
Microwave reheating best practices:
- Add moisture: A splash of water or broth and a loose cover (microwave-safe lid) create steam and limit surface drying and browning.
- Stir and stand: Heat in short bursts, stir, then let the dish stand 1–2 minutes to equilibrate temperature and finish via residual heat—less need for higher settings.
- Avoid overly crisping proteins in the microwave; it heats water-containing zones first. For a crisp finish, combine microwave reheating with a brief pan or oven step.
Oven, toaster oven, and skillet:
- Reheat at 150–175°C until hot in the center, then, if you want more texture, finish with a 1–2 minute high-heat blast. This sequence limits time in the browning zone.
- In a skillet, use medium heat with a teaspoon of oil or splash of water; cover for the first few minutes to steam through before uncovering to refresh texture.
Storage and cooling to protect quality:
- Cool quickly: Divide hot dishes into shallow containers; refrigerate within 2 hours (within 1 hour if room is above 32°C).
- Label and rotate: Most cooked leftovers keep 3–4 days refrigerated; freeze for longer storage.
- Reheat once: Repeated reheating dries surfaces and increases browning; portion before storing.
- Rice and potatoes: Chill cooked rice and potatoes promptly; reheat thoroughly to steaming when serving. If keeping some for cold dishes, the chill step can increase resistant starch, which may aid glycemic control.
Quality tricks to keep flavor lively:
- Refresh with acids and herbs after reheating (lemon juice, cider vinegar, parsley).
- Add a healthy fat at the end (olive oil, tahini) for mouthfeel without extra heat.
- For soups and stews, a quick simmer after microwaving melds flavors while staying in a low-AGE zone.
For a deeper look at cooling-and-reheating starches to increase resistant starch, see our practical explainer on resistant starch.
Weekly Cooking Swaps to Reduce Exposure Without Losing Flavor
Reducing AGEs, HCAs, and PAHs is about patterns, not perfection. Use this seven-day template to preserve your favorite textures while leaning on methods that naturally limit byproducts.
1) Two moist-heat anchors
Plan two large-batch dishes early in the week—e.g., a braised chickpea and tomato stew and a pressure-cooked chicken and barley soup. These anchor lunches and fast dinners. They are inherently low in AGEs because they cook under moist, capped temperatures.
2) One “reverse sear” night
Cook thick salmon fillets or pork chops gently in a 110°C oven to just shy of doneness, then finish with a 45–60 second skillet sear per side. You will get a satisfying crust with a fraction of the browning time.
3) One grill night with guardrails
Use a two-zone fire, pre-marinade, keep drippings off flames, and remove food when browned (not black). Grill more vegetables than meat: skewers of zucchini, mushrooms, onions, and peppers alongside marinated chicken. Leftover grilled vegetables make excellent wraps and salads.
4) One air-fryer night with color control
Soak potato wedges 20 minutes, pat dry, coat lightly, and air fry at 180–190°C, shaking the basket. Pull at golden. For breaded fish, use thin coatings and cook to internal temp rather than pushing for deep color.
5) Two “steam and sauté” meals
Stir-fry starts with high heat, but position most of the cooking at medium: steam-cut vegetables in a covered pan with 2–3 tablespoons water, then uncover and sauté briefly with aromatics and a splash of soy, citrus, or vinegar. Add toasted sesame seeds or peanuts off heat for crunch.
Smart substitutions that add up:
- Swap dry-roast for simmer-then-roast: Par-cook dense vegetables (potatoes, carrots) in salted water, then finish with a short roast for light browning.
- Trade long broils for quick finishes: Use the broiler for 1–2 minutes at the end, not as the primary method.
- Choose leaner cuts when grilling, or trim visible fat, to reduce flare-ups and smoke deposition.
- Rotate oils to fit the task: extra-virgin olive for most sauté and roasting ≤205°C; refined avocado or high-oleic sunflower for occasional hotter finishes.
- Plate protection: Serve grilled items with crunchy salads, citrus dressings, and herbs; the added antioxidants and moisture complement flavor and provide a counterbalance.
Mindset to sustain the change: Treat high-brown dishes as occasional highlights rather than nightly standards. Build meals around moist, colorful preparations most days; save deep sears and heavy char for special moments. You will keep flavor—and preserve elasticity in the structures that matter: vessels, tendons, and skin.
References
- Advanced Glycation End-Products (AGEs): Formation, toxicity and role in many pathological diseases (2022) (Systematic Review)
- Dietary Restriction of Advanced Glycation End-Products: Is It Beneficial for Health? (2024) (Systematic Review)
- Unveiling heterocyclic aromatic amines (HAAs) in thermally processed meat products: Formation, toxicity, and strategies for reduction – A comprehensive review (2023) (Systematic Review)
- Effects of Thawing and Frying Methods on the Formation of Acrylamide and Polycyclic Aromatic Hydrocarbons in Chicken Meat (2020) (RCT/Experimental Study)
- Acrylamide formation in air-fried versus deep and oven-fried potatoes (2024) (Experimental Study)
Disclaimer
The information in this article is educational and is not a substitute for personalized medical advice, diagnosis, or treatment. Cooking choices affect health differently based on medical history, medications, and individual risk. Consult your clinician or a registered dietitian for guidance tailored to your needs.
If you found this helpful, please consider sharing it on Facebook, X, or your preferred platform, and follow us for future updates. Your support helps us continue producing clear, evidence-informed content.

