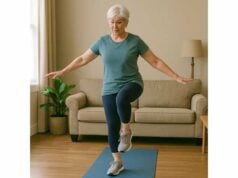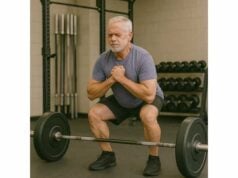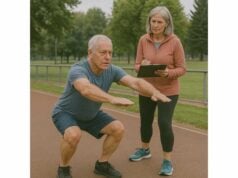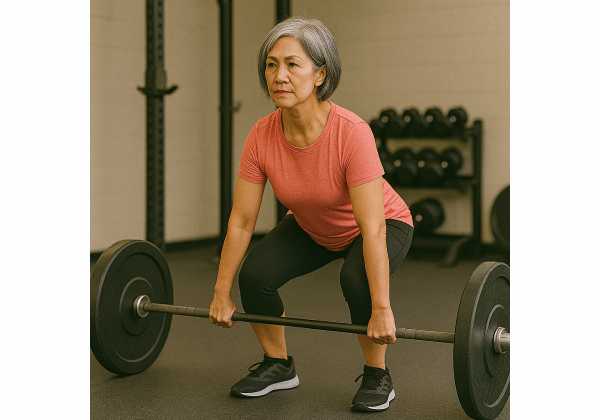
Bones grow stronger when you give them the right kind of stress—firm, well-placed forces that arrive in short, repeatable doses. Age, hormones, and long hours of sitting nudge bone in the wrong direction, but training tilts the balance back. This guide translates bone biology into clear actions: which lifts matter most, how to sprinkle in low- to moderate-impact work, and how to adjust volume and intensity if you have osteopenia or osteoporosis. You will learn how bracing protects your spine, how to organize a week that your joints enjoy, and which red flags mean “modify” rather than “push through.” For the wider context—why aerobic capacity and strength together support healthspan—see our pillar on fit-for-longevity fundamentals. The aim is a brief, repeatable plan that fits real life and steadily improves the structure that carries you through it.
Table of Contents
- How Bones Adapt: Load, Rate of Loading, and Consistency
- Resistance Choices: Squats, Hinges, Carries, and Presses
- Low- to Moderate-Impact Options: Hops, Steps, and Bounds
- Volume and Intensity Guidelines for Osteopenia/Osteoporosis
- Technique and Bracing: Safe Mechanics for Spine and Hips
- Weekly Template: Strength, Impact Bursts, and Recovery
- Safety Flags and When to Modify
How Bones Adapt: Load, Rate of Loading, and Consistency
Bone is living tissue. Every day, bone cells sense mechanical strain and decide whether to build up or break down. When you give bones clear, novel forces, they lay down new material along the lines of stress. When forces are absent, they conserve resources and thin out. Three training levers drive that decision.
1) Load magnitude — how much force reaches the bone.
Heavier loads, applied with good form, create higher strain. That does not require maximal lifts or risky ranges. It means choosing compound patterns that spread force over large areas and moving with control so joints and connective tissue share the work. Squats, hinges, loaded carries, and presses are the backbone because they target the hips, spine, and shoulders—the sites we most want to protect.
2) Rate of loading — how fast force arrives.
Bones respond strongly to forces that rise quickly. Short, crisp contacts—like a small hop or a controlled step-down—send a distinct signal compared with slow, grinding reps. You do not need high jumps. Early on, “quick and quiet” contacts with tiny amplitudes are enough to teach your body to stiffen briefly and safely.
3) Consistency and novelty — how often and how varied.
Bone adapts to what it sees most. When the signal never changes, improvements plateau. Rotate foot positions and bars or implements, vary the load location (front vs. back, bilateral vs. unilateral), and insert modest impact clusters. The goal is familiar but slightly different—safe, predictable movement with enough variation to stay interesting to your biology.
Site specificity matters.
Fractures cluster in the hip, spine, and wrist/forearm. Favor movements that load these areas in joint-friendly ways: hip-dominant hinges and squats for the spine and proximal femur, carries and pressing/rowing for the upper body, step-downs and small hops for the femoral neck.
Minimum effective dose.
Two to three strength sessions per week and two to three brief impact clusters (30–90 seconds each) on nonconsecutive days are sufficient for most adults. Quality beats quantity: crisp sets with clean positions produce better remodeling than marathons that degrade form.
What results feel like.
You will not feel bone density change day to day. You will feel steadier step-downs, easier carries, a firmer hinge, and less hesitation on stairs. Over months, those signals add up to stronger architecture and fewer slips, trips, and setbacks.
Resistance Choices: Squats, Hinges, Carries, and Presses
Your skeleton thrives on simple patterns you can load safely. Choose movements that respect your joints and deliver force to the hips, spine, and shoulders. Build skill first, then load.
Squats (front-loaded to start)
- Goblet squat: front-loaded with a dumbbell or kettlebell keeps your torso more upright and teaches full-foot balance. Start here, then progress load and depth you can own.
- Front squat or back squat: experienced lifters may use these for higher axial load. Only as deep as you can maintain tension, neutral spine, and knee tracking over mid-foot.
- Split squat/reverse lunge: unilateral options challenge hip stabilizers and improve femoral neck loading at modest external loads.
Hinges (posterior chain + spine-friendly compression)
- Hip hinge with dowel → Romanian deadlift: engrain the pattern before adding weight.
- Trap-bar deadlift: handles at your sides reduce shear and encourage leg drive; great for progressive loading.
- Single-leg RDL: lighter loads, high hip control, and strong proprioceptive benefits.
Carries (whole-skeleton loading + trunk control)
- Farmer’s carry: two hands, tall posture, quiet steps—20–40 meters.
- Suitcase carry: one hand; resist the side-bend. Excellent for lateral chain and anti-tilt.
- Front rack carry: more demand on upper back and core; rotate with farmer’s carries week to week.
Press and row (upper spine and shoulder girdle stimulus)
- DB bench or push-up on handles: shoulder-friendly pressing variations that load the thorax and arms.
- Landmine press or DB overhead press: choose the one that lets you press without shrugging or arching.
- Rowing variations: chest-supported row or strap row if bending stresses the back early on.
Accessories that help the main work
- Step-ups/step-downs: controlled angles, varied heights, focus on quiet landings.
- Calf raises (straight- and bent-knee): build tolerance for later impact, 2–3 sets of 8–12 with slow lowers.
- Back extensions (neutral spine): endurance for the posterior chain.
Progression rules
- Start sets where all reps are smooth at RPE 6–7 (2–4 reps in reserve).
- Progress by 2.5–5% load or one rep per set when technique is repeatable.
- If a joint protests, swap to a nearby pattern (e.g., trap-bar instead of conventional deadlift).
- One link that helps with movement quality across all these patterns: our primer on technique fundamentals—a quick review that pays dividends when loads rise.
A tidy 40-minute session (example)
- Primary lower (squat or hinge) 4–5 × 3–6
- The other lower pattern 3–4 × 5–8
- Carry 3–4 trips of 20–40 m
- Press + row superset 2–3 × 8–12
Low- to Moderate-Impact Options: Hops, Steps, and Bounds
Impact is a bone-specific stimulus when used in small, crisp bursts. You are not chasing hang time; you are teaching brief, controlled stiffness on contact. Start tiny, land quietly, and progress contact numbers before height.
Ground rules for every drill
- Surface: firm and grippy (rubber, wood, short turf).
- Posture: ribcage over pelvis, eyes level, arms relaxed.
- Contacts: short and soft; if you hear slapping, rest and reset.
- Work: 5–15 seconds; Rest: 30–60 seconds.
- Frequency: 2–3 mini-sessions per week, separate from your heaviest leg day at first.
Entry-level contacts (no true “jump”)
- Line taps: march in place, tapping toes over a taped line quickly for 8–10 seconds.
- Step drops: step off a 10–15 cm platform, land softly, stick for 2 seconds, step down; 3–5 reps.
- Low pogo ankles: heels kiss down; tiny amplitude; 2–3 bouts of 6–10 contacts.
Progressions with modest amplitude
- Skips in place: one foot leaves the floor briefly; switch; 2–3 bouts of 6–8 contacts.
- Forward low bounds: short hops forward, minimal height, 2–3 bouts of 6 contacts.
- Lateral line hops: side-to-side over a line for 6–10 contacts.
- Diagonal step-downs: off a 15–20 cm step toward midline/away; 3–5 reps each direction.
Lateral control (often the weak link)
- Add side-step stick: step sideways, land under the hip, hold 2 seconds; 6–8 reps per side.
- Keep knee over mid-foot; reduce step width if the knee caves inward.
When to add unpredictability
- Only when contact quality is consistently quiet.
- Use a partner’s callouts (“left/right/forward”) while performing very small hops or step-drops. Stop if accuracy falls or landings get noisy.
A 10-minute impact mini-session (example)
- Warm ankles/calves: 2 minutes of rocks and heel raises.
- Block A: step drops (3 × 4 reps).
- Block B: lateral line hops (3 × 8 contacts).
- Block C: skips in place (3 × 6 contacts).
- Rest generously between sets; end while you still feel crisp.
For more joint-friendly explosiveness—especially if you plan to add athletic drills later—see our progression guide to low-impact plyometrics.
Volume and Intensity Guidelines for Osteopenia/Osteoporosis
If you have osteopenia or osteoporosis, the goal is enough stimulus to move the needle—delivered with mechanics that your spine and hips love. Use the ranges below as a starting framework, then adjust based on comfort, form, and recovery.
Strength dosing (per session)
- Primary lower-body lift (squat or hinge): 3–5 sets × 3–6 reps at RPE 6–8 (1–4 reps in reserve).
- Secondary lower pattern (the other of squat/hinge): 3–4 sets × 5–8 reps at RPE 6–7.
- Carries: 3–4 trips of 20–40 m (or 30–60 seconds), posture tall, steps quiet.
- Upper press/row: 2–3 sets × 8–12 reps, steady tempo.
Impact dosing (per week)
- Beginners: 2 mini-sessions; each has 2–3 sets of 6–10 contacts across 1–2 drills.
- Intermediates: 3 mini-sessions; 3 sets of 8–12 contacts.
- Increase total weekly contacts by 10–20% only when all contacts stay quiet and landings feel confident.
Cycle structure (4–6 weeks + deload)
- Weeks 1–2: pattern and posture first, RPE ≤7, minimal impact.
- Weeks 3–4: nudge load by 2.5–5% on primary lifts; add contacts if quality holds.
- Week 5: hold loads; focus on bar speed (strength) and whisper-quiet landings (impact).
- Week 6: deload—cut total strength sets by 40–60% and impact contacts by 40–50% while keeping technique doubles and a few contacts for coordination.
When you’re deconditioned or anxious about impact
- Start with isometric holds (wall sits, split-stance holds), slow eccentrics (3–4 seconds down), and line taps before true hops.
- Elevate heels slightly in squats if ankles limit depth; keep the torso tall and the back neutral.
- Aim for two “green” indicators before progressing: soreness resolves within 48–72 hours and form looks the same at the end of a set as at the start.
Recovery and readiness checks
- If morning energy is low and joints feel achy, reduce RPE by 1–2 points for the day or swap to technique practice.
- If a specific area is repeatedly sore (e.g., patellar tendon), shorten ranges, change angles, and shift emphasis to the other primary pattern that week.
For set-rep-tempo refinements and how to dial RPE in real time, lean on our practical guide to session design. It keeps training precise when life or recovery is unpredictable.
Technique and Bracing: Safe Mechanics for Spine and Hips
Good bracing turns your torso into a stable platform so hips and legs can produce force without your spine absorbing sloppy motion. The aim is pressure, not rigidity—a steady cylinder with smooth breathing between efforts.
Four-step brace (use before every meaningful rep)
- Inhale quietly through the nose, expanding belly and lower ribs 360°.
- Set: gently knit ribs toward pelvis; imagine tightening a wide belt without tensing your neck.
- Hold that pressure as you lower or drive, keeping a long spine.
- Exhale through pursed lips near the top; re-inhale and repeat.
Hinge mechanics
- Push hips back, keep shins nearly vertical, feel hamstrings load.
- Maintain the dowel “three points” if you are learning (head, back, sacrum).
- Stop the rep before you round; range is earned over weeks.
Squat mechanics
- Tripod foot (big toe base, little toe base, heel) glued to the floor.
- Knees track over the second toe; think “spread the floor.”
- Depth is as deep as you can keep tension and position. Use a box or heel wedge if needed.
Carries and presses
- Carries: tall posture, chin slightly tucked, ribs stacked. If you sway in a suitcase carry, lighten the load and shorten the distance.
- Presses: avoid shrugging; keep forearms vertical over wrists. Landmine pressing is a friendly middle ground between horizontal and vertical.
Hip and spine-friendly swaps
- Conventional deadlift → trap-bar deadlift (handles at sides reduce shear).
- Back squat → goblet/front squat (front load encourages upright torso).
- Bent-over row → chest-supported row if hinges are limited early.
- Overhead press → landmine press if the shoulder or low back complains.
Warm-up ideas that actually help
- Ankle rocks, hip airplanes (small range), thoracic rotations—two or three movements for 30–45 seconds each beat a 15-minute checklist.
- If you often feel “stuck” in lifts, add one set of paused reps (2 seconds at the bottom) at light loads to reinforce control.
For a deeper look at how to create and time intra-abdominal pressure so lifts feel safer—and stronger—check our focused piece on bracing and breathing. Master the setup, and heavier loads become available without grinding reps.
Weekly Template: Strength, Impact Bursts, and Recovery
You do not need marathon sessions to build bone. You need a steady rhythm of clear signals and enough recovery to repeat them. Use this template as a model and adjust to your schedule.
Two-day strength base (plus short impact work)
- Day A (35–45 minutes)
- Squat pattern (primary): 4–5 × 3–6
- Hinge (secondary): 3–4 × 5–8
- Carry: 3–4 trips of 20–40 m
- Press or row: 2–3 × 8–12
- Day B (35–45 minutes)
- Hinge pattern (primary): 4–5 × 3–6
- Squat (secondary): 3–4 × 5–8
- Carry (alternate style): 3–4 trips
- Complementary upper body: 2–3 × 8–12
Impact mini-sessions (2–3×/week, 8–12 minutes)
- Warm ankles and calves (2 minutes).
- Choose two drills (e.g., step drops + lateral line hops).
- Perform 3 sets of 6–12 contacts each with generous rest.
- Stop while fresh—the signal to bone is crisp contact quality, not exhaustion.
Cardio for recovery and healthspan
- 2–3 Zone 2 sessions per week (20–45 minutes) at a conversational pace. Gentle hills and stairs supply variety without formal hopping.
- On days with heavy legs, move cardio to later or swap for a walk.
A four-week arc (then deload)
- Week 1: learn positions; keep RPE ≤7; minimal impact contacts.
- Week 2: add one set to the primary lower lift; inch up loads by 2.5–5% if reps stay crisp.
- Week 3: hold sets; bump contact count 10–20% if all landings are quiet.
- Week 4: allow one top set to reach RPE 8–9; keep impact steady.
- Week 5 (optional hold): maintain loads; emphasize bar speed and silence on landings.
- Week 6 (deload): cut total strength sets 40–60% and impact 40–50%; keep technique doubles/triples.
Recovery anchors that make training stick
- Sleep window: consistent bed/wake times beat total hours alone.
- Steps: 6,000–10,000 daily with 5–10 minute post-meal walks to reduce stiffness.
- Active recovery: easy cycling or relaxed walks on “off” days. If you tend to accumulate fatigue, skim our guidance on active recovery choices to keep joints happy.
Safety Flags and When to Modify
Smart training adjusts early. Use these rules to stay in the productive zone while you build bone and confidence.
Stop and seek professional input if you experience
- New neurological symptoms: numbness, weakness, foot drop.
- Unexplained dizziness or vision changes.
- Acute back pain with leg radiation, changes in bowel/bladder function, or night pain that does not ease.
- Fragility fracture or suspected stress injury.
Modify immediately if
- Pain is sharp and localized during a lift or contact. Reduce load/range or swap the exercise.
- Technique repeatedly breaks (knee collapse, back rounding, foot slaps). Film a rep, regress, or add support.
- Soreness persists >72 hours in the same spot—cut sets next time or deload early.
Joint-friendly swaps that preserve the stimulus
- Back squat → goblet squat or leg press (neutral pelvis).
- Conventional deadlift → trap-bar deadlift or RDL.
- Overhead press → landmine press or incline DB press.
- Lunges → split squats with shorter stance and support.
- Jumps → step drops/line hops with lower amplitude.
Osteoporosis-specific cautions
- Avoid deep, loaded spinal flexion (e.g., heavy rounded-back sit-ups).
- Respect rotation under load; train anti-rotation first (suitcase carries, pallof presses).
- With vertebral compression fracture history, favor front-loaded squats, neutral-spine hinges, and loads you can stop crisply.
Medication and comorbidity notes
- Some medicines influence tendon comfort or blood pressure; schedule impact away from peak side effects and stand up slowly between sets.
- Peripheral neuropathy: prioritize stable shoes, handholds for balance drills, and slower step-downs.
Return after a setback
- Rebuild in layers: isometrics → short-range reps → full-range reps → load → contacts.
- Use a two- to three-session ramp to normal volumes when symptoms settle rather than jumping straight back.
Mindset for the long run
- Bone adapts slowly but reliably to steady, specific work. Your job each week is to send a clear signal and show up again—no heroics required. Consistent, well-executed reps and quiet landings compound into denser bones and a wider margin for daily life’s surprises.
Disclaimer
This article offers general information for adults aiming to improve bone health with resistance and impact training. It is not a substitute for personalized medical advice, diagnosis, or treatment. Exercise choices and progressions should reflect your health status, medications, bone density results, fracture history, and comfort level. Consult a qualified clinician or physical therapist before starting or advancing a program, especially if you have osteopenia, osteoporosis, or prior fractures.
If you found this guide useful, please consider sharing it with a friend or on your preferred social platform, and follow our work for future updates. Your support helps us continue creating practical, trustworthy content.

