A home gym for healthy aging should be simple, safe, and relentlessly useful. You need tools that fit your space, support reliable habits, and cover the fundamentals: strength, power, balance, and cardiovascular fitness. You do not need a garage full of machines. A few well-chosen pieces can train every pattern that protects joint health and independence—pushing, pulling, squatting, hinging, and carrying—plus gentle intervals that build your engine. This guide lays out a practical starter kit, smart layouts for small rooms, and clear training templates you can follow tomorrow. You will also find progressions that respect joints and budgets, and maintenance tips so equipment lasts for years. For context on how home training connects to your broader healthspan—heart, muscle, and daily movement—see our overview of VO₂max, strength, and everyday activity. Set up once, use often, and let short sessions add up.
Table of Contents
- Starter Kit: Bands, Bells, Dumbbells, and a Bench
- Space and Safety: Layout, Flooring, and Storage
- Strength Circuit Template: Push, Pull, Hinge, Squat, Carry
- Cardio Options: Steps, Rower, Bike, and Jump Variations
- Progressions on a Budget: Modular Add-Ons Over Time
- Setup Routines: Warm-Up, Timers, and Music Cues
- Cleaning, Maintenance, and Equipment Lifespan
Starter Kit: Bands, Bells, Dumbbells, and a Bench
Buy once, train everything. A small, durable kit covers all major patterns with minimal footprint. Start here:
- Adjustable dumbbells (or pairs from light to moderate): train presses, rows, goblet squats, split squats, hinges, and loaded carries. Adjustable sets shrink storage and let you progress in 1–2 kg steps.
- Two kettlebells (one light, one moderate): ideal for goblet squats, Romanian deadlifts, dead-stop swings, rack carries, and simple complexes. The offset handle teaches wrist-neutral gripping and forearm alignment.
- Long resistance band (light and medium): anchors rows, face pulls, assisted push-ups, hip abductions, and rotation work. Bands make travel days and deload weeks easy.
- Flat bench (or sturdy box/step): supports presses, hip thrusts, step-ups, and sit-to-stand progressions.
- Suspension trainer (optional but compact): unlocks angle-based progressions for rows and push-ups without adding heavy weights.
- Step platform or stable stair: for step-ups, low-impact power, and cardio intervals.
- Timer (phone or simple interval app) and training log (paper or digital): crucial for consistency and progression.
Load guidance to start.
- Pressing/rowing: choose a weight you can lift for 8–10 smooth reps, leaving 1–2 reps in reserve.
- Squatting/hinging: pick a load you can move for 6–8 controlled reps with a neutral spine.
- Carries: total load ≈ 50–75% body weight split between hands for 20–30 meters.
Why this kit works for longevity. It respects joints, scales from rehab to performance, and trains patterns you actually need: rising from the floor, lifting groceries, climbing stairs, and catching yourself during a misstep. It encourages frequent, short sessions rather than rare marathons, which is how strength and capacity grow in midlife and beyond.
Nice-to-have upgrades: a foldable rower or compact air bike for low-impact conditioning; a hip belt for belt squats; a doorway pull-up bar for hangs and decompression.
Avoid early mistakes. Skip gimmicky single-use gadgets. Prioritize handles you can grip well, equipment that stores vertically, and pieces that allow measurable progression. If you must choose, buy quality dumbbells first—they do the most.
Space and Safety: Layout, Flooring, and Storage
Your room is your coach. A good setup reduces trip hazards, guides movement, and speeds session flow. You want clear lanes, good light, and stable surfaces.
Flooring and footprint.
- Shock and grip: Interlocking rubber tiles (8–12 mm) protect floors, reduce noise, and add traction. A 2 × 2 meter area is enough for most lifts and carries-in-place.
- Flat beats soft: Avoid plush mats under heavy lifts; they steal stability and stress ankles. Keep a yoga mat separate for warm-ups.
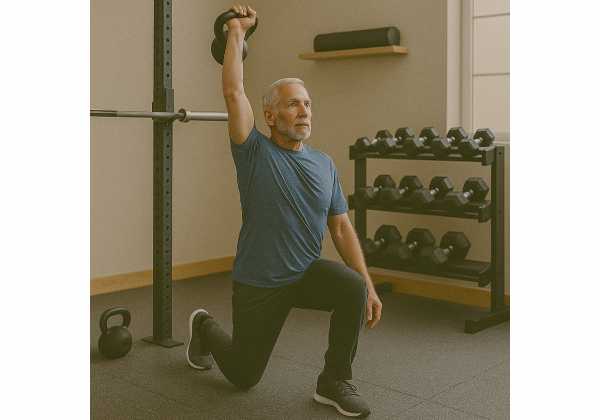
- Ceiling height: For overhead work, aim for 2.4 meters. If not available, use half-kneeling presses.
Layout principles.
- Zones: Keep a strength zone (bench, bells, dumbbells) and a movement zone (step, open space for carries, mobility).
- Anchor point: Install a safe anchor for bands at chest height and low height; a closed door with a quality anchor strap works.
- Traffic flow: Leave a 90 cm clear path across the room; no cords or loose bands in walkways.
- Lighting: Bright, indirect light reduces eye strain and improves balance. Position lights in front of you for step work.
Storage that speeds setup.
- Vertical racks: Store dumbbells and kettlebells by weight (light to heavy, left to right).
- Wall hooks: Hang bands and the suspension trainer by resistance level to avoid knots.
- Rolling bin: Keep small items (grips, chalk, tape, timer) together; roll it near your station.
- Wipe station: Towels, spray bottle, and hand sanitizer within reach encourage quick cleanup and better grip.
Safety basics.
- Clear edges: The space around benches and steps should be free of plates, bells, and shoes.
- Stable step: If it rocks, shim it or replace it; instability during step-ups is a fall risk.
- Bench height: Roughly knee-height; too high stresses shoulders on presses and makes mounting awkward.
- Spine alignment: Favor neutral spine on squats and hinges; if you are new to bracing, review concise spine mechanics before load increases.
Noise and neighbors.
- Use controlled lowering, no dropping. Place equipment gently; the habit protects floors, hands, and hearing.
Strength Circuit Template: Push, Pull, Hinge, Squat, Carry
A balanced circuit trains every major pattern in 25–35 minutes. The plan below scales from novice to advanced by adjusting load, reps, and rest—not complexity.
Core template (2–4 rounds).
- Push — Floor or bench press, or angle-based push-up (hands on bench).
- Pull — One-arm dumbbell row or band row (pause 1 second at chest).
- Hinge — Dumbbell or kettlebell Romanian deadlift (RDL), 2–3 second lowers.
- Squat — Goblet squat or split squat, full foot contact, smooth depth.
- Carry — Farmer carry or suitcase carry, 20–40 meters or 30–45 seconds.
Reps and rest.
- Novice: 8–10 reps on presses/rows/squats, 6–8 on hinges, 20–30 seconds carries. Rest 45–60 seconds between stations.
- Intermediate: 6–8 reps, 30–40 seconds carries; 60–75 seconds rest between rounds.
- Advanced: 5–6 reps heavier, 40–60 seconds carries; 75–90 seconds rest between rounds.
Cues that keep joints happy.
- Push: Wrists stacked, forearms vertical at the bottom, shoulder blades slide and press—no shrugging.
- Pull: Set ribs down slightly; lead with elbow; keep neck long.
- Hinge: Hips back, shins nearly vertical, slight knee bend, spine long; tap hamstrings, not lower back.
- Squat: Tripod foot (big toe, little toe, heel); knees track over middle toes.
- Carry: Tall posture, smooth steps, eyes forward, quiet breathing through nose when possible.
Progression options.
- Add a round (volume).
- Add 1–2 kg (intensity).
- Add a pause (time under tension).
- Trim 10–15 seconds of rest (density). Only change one lever per week.
Frequency.
- 2 days/week builds and maintains strength for most adults.
- 3 days/week works if you keep loads moderate or rotate movement emphasis (e.g., heavy hinge Monday, heavy squat Friday).
For form checkpoints on the big four lifts—squat, hinge, push, pull—skim our concise technique cues before your next cycle.
Cardio Options: Steps, Rower, Bike, and Jump Variations
Your heart and lungs respond best to a mix of steady work and short, controlled bursts. In a home setup, that means a step, a rower or bike if you have one, and low-impact jumps if your joints allow.
Zone work (easy to moderate).
- Brisk step circuits: 15–30 minutes at a conversational pace (RPE 3–4/10). Use a 15–20 cm step and alternate leads every minute.
- Bike or rower steady state: 20–40 minutes, maintain even strokes or cadence.
- Walk intervals at home: 5 minutes brisk around the block or in a hallway loop, 1 minute easy, repeat 4–6 times.
Gentle intervals (power with control).
- Step intervals: 30 seconds up-down at a strong pace, 30–60 seconds easy, 10–15 rounds.
- Rower 1:1: 45 seconds moderate-hard, 45 seconds easy, 10–12 rounds.
- Bike spin-ups: 20 seconds fast legs, 40 seconds easy, 12–20 rounds.
Low-impact jump options (if cleared and pain-free).
- Ankle pogo (micro-bounce): 10–15 small elastic bounces, 2–3 sets, focusing on soft landings.
- Line hops (front-back, side-side): 10–15 controlled hops, 2–3 sets.
- Step hop-ups: Light “pop” onto a low step, step down, 6–10 reps each leg.
Safety guardrails.
- Land softly, knees track over toes, and keep sessions short at first.
- If you have knee, hip, or spine considerations, start with bike or rower; add light step work later.
Weekly rhythm.
- Two Zone 2 sessions (20–40 minutes) support endurance and recovery.
- One interval session (12–20 minutes of work) preserves speed and power.
- On lifting days, keep cardio easy; on non-lifting days, place the interval session.
For targets on heart-rate zones, breathing cues, and how to gauge effort without a chest strap, see our straightforward Zone 2 guidance.
Progressions on a Budget: Modular Add-Ons Over Time
Think in modules. Start with essentials, then add pieces that unlock new patterns or solve bottlenecks. Each add-on should expand options without crowding your room.
Months 0–3: master the core kit.
- Goal: establish the circuit habit and steady cardio.
- Upgrade only if: you consistently hit strength rounds and cardio minutes for 4–6 weeks.
Months 3–6: add one lever.
- Weighted vest (5–10 kg): deepens step-ups, split squats, and incline walks without stressing hands.
- Thick grips: slide-on handles for dumbbells increase forearm demand without heavier loads.
- Hip belt: for belt squats when backs prefer less axial load.
Months 6–12: expand patterns.
- Compact rower or air bike: scalable conditioning with precise intervals and low joint stress.
- Adjustable bench to incline: supports angles for presses and rows; helps shoulder comfort.
- Doorway pull-up bar: enables hangs, flexed-arm holds, and assisted pull-ups.
When to add heavier bells or plates.
- If goblet squats at 10 reps feel crisp and you have 2 reps in reserve across all rounds for two weeks, add 2–4 kg.
- If carries exceed 60 seconds with clean posture, step up total load by 5–10%.
- If rows and presses reach 8–10 reps with perfect control, nudge weight up by the smallest available increment.
Budget tactics.
- Buy used: dumbbells, kettlebells, and benches wear well; inspect handles and welds.
- Choose loadable dumbbells (standard or Olympic) to grow with inexpensive plates.
- Store vertically: wall-mounted racks free floor space and reduce clutter.
Avoid “progression traps.”
- Adding too many specialty tools at once leads to scattered sessions.
- Chasing max loads without improving range and control invites joint issues.
- Neglecting single-leg work (split squats, step-ups) stalls balance and carry-over to stairs and hikes.
For a simple weekly strength outline you can plug these modules into, review our practical strength progression.
Setup Routines: Warm-Up, Timers, and Music Cues
Your routine should make training nearly automatic. Build a five-minute setup that primes joints, centers breathing, and locks in focus.
Warm-up (4–6 minutes).
- Joint prep (2 minutes):
- Ankles: 10 slow circles each way per ankle; calf rock-backs × 10.
- Hips: hip hinges with broomstick × 10; standing hip circles × 5 each way.
- Shoulders: band pull-aparts × 12; “scap slides” against a wall × 8.
- Activation (1–2 minutes):
- Glute bridge hold × 20 seconds; bird dog × 5 per side.
- Dead bug breathing: 3 slow breaths focusing on ribs down, belly and back expanding.
- Pattern rehearsal (1–2 minutes):
- Empty-hand squats × 8; hinge stick drill × 8; light farmer carry walk-through × 20 meters.
Timers and cadence.
- Use a 30:30 or 40:20 timer for circuits to reduce decision fatigue.
- For steady cardio, set a 10-minute alert to check posture and breathing every interval.
- For intervals, program work/rest in advance so you only press “start.”
Music and cues.
- Choose a playlist that keeps tempo modest during warm-ups and slightly higher during circuits.
- Use a single cue per movement to avoid overload—“knees over mid-foot,” “hips back,” “ribs stacked.”
- Between rounds, take nasal breaths for 30–45 seconds; it steadies heart rate and prevents rushing.
Environment habits that lock in consistency.
- Layout the next session’s weights during cooldown—tomorrow’s friction goes down.
- Keep a visible logbook; write loads, reps, and a one-line note on energy or sleep.
- Pair training with a stable trigger—same time, same water bottle, same first song.
For a short, reliable primer that preps joints without stealing energy, see our quick warm-up ideas and adapt the drills to your space and kit.
Cleaning, Maintenance, and Equipment Lifespan
Clean gear lasts longer, feels better in the hand, and keeps skin healthy. Most tasks take minutes and save you replacements down the road.
Dumbbells and kettlebells.
- Weekly wipe-down: Light soap-and-water cloth; dry thoroughly to prevent rust and slippery handles.
- Handle care: If knurling gets slick, scrub gently with a nylon brush. Avoid oily cleaners that coat grips.
- Rust prevention: In humid rooms, a thin film of mineral oil on steel (not on gripping surface) protects finishes; wipe before use.
Bands and suspension straps.
- Inspect monthly: Look for cracks, nicks, or stretched zones near anchor points; retire compromised bands promptly.
- Clean: Mild soap, cool water, air-dry away from sun. Heat and UV degrade elasticity.
- Anchor safety: Check doors and hinges; use a wide anchor strap to distribute load.
Bench and step.
- Surface cleaning: Spray and wipe after sweaty sessions; sweat salts degrade vinyl over time.
- Stability check: Tighten bolts quarterly; wobble is a red flag.
- Footing: Replace worn rubber feet; they protect floors and stop sliding.
Cardio machines (if owned).
- Rower: Wipe rails; vacuum seat rollers monthly; light silicone on chain if manufacturer recommends.
- Bike: Check pedal tightness; inspect seat posts; wipe console screens after each session.
Storage environment.
- Keep equipment dry, off direct sunlight, and away from HVAC vents that blow dust.
- Use silica gel packets in bins to reduce moisture.
- Label shelves and hooks so items return to the same place—faster setup, fewer trip hazards.
Skin and hygiene.
- Wash hands before and after training; clean hands grip better and reduce band wear.
- Manage calluses weekly so they do not tear; moisturize lightly at night.
Replacement timelines (guidelines).
- Bands: 9–24 months depending on use; retire on first sign of cracking.
- Straps: 2–4 years if inspected and cleaned.
- Rubber flooring: 5–10+ years with routine sweeping and spot cleaning.
- Dumbbells/kettlebells: decades if kept dry and handled, not dropped.
A few minutes of upkeep keeps the space inviting and safe. When the gym feels ready the moment you walk in, you will use it—and that is the whole point.
References
- WHO guidelines on physical activity and sedentary behaviour — 2020 (Guideline)
- Resistance Training for Older Adults: Position Statement From the National Strength and Conditioning Association — 2019 (Guideline)
- Physical Activity Guidelines for Americans, 2nd edition — 2018 (Guideline)
- Practical Recommendations for Maintaining Active Lifestyle During Aging — 2020 (Review)
Disclaimer
This article provides general information for adults building a home gym to support long-term health. It is not a substitute for personalized medical advice, diagnosis, or treatment. If you have cardiovascular, metabolic, neurological, or orthopedic conditions—or new pain, dizziness, or shortness of breath—consult a qualified clinician before starting or changing your exercise program. Progress gradually, choose pain-free ranges, and stop any activity that causes sharp or persistent symptoms.
If this guide was helpful, please share it on Facebook, X, or any platform you prefer, and follow our work. Your support helps us continue creating clear, practical resources for healthy aging.

