Aging well means staying strong, mobile, and confident in daily movement—without waking up to angry knees or hips. The goal isn’t to avoid stress entirely; it’s to apply the right kind, in the right dose, so tissues adapt instead of flaring. This guide shows how to train productively when cartilage feels cranky, steps creak, or deep squats complain. You’ll learn pain-guided rules that keep progress safe, joint-friendly exercise swaps, small technique tweaks that pay off, and conditioning options that build stamina without setbacks. If you want the broader longevity framework that ties cardio capacity, strength, and movement habits together, see our pillar on VO₂max, strength and daily movement. Then come back here for the practical how-to. The aim is not fragile training—it’s durable training that respects biology and builds capacity you’ll use every day.
Table of Contents
- Pain-Guided Rules: RPE, ROM, and Next-Day Check
- Smart Swaps: Box Squats, Step-Ups, and Hip Hinge Emphasis
- Tempo, Range, and Stance Tweaks That Reduce Stress
- Warm-Up and Activation: Glutes, Hamstrings, and Quads
- Conditioning Without Flare-Ups: Bike, Pool, and Incline Walk
- Return-to-Load: Week-by-Week Progressions
- When to Seek Assessment for Persistent Pain
Pain-Guided Rules: RPE, ROM, and Next-Day Check
Pain should inform your plan, not end it. Three variables keep training productive when knees or hips protest: perceived effort (RPE), range of motion (ROM), and the next-day check. Used together, they create a safety net that protects progress while letting you accumulate the training volume required for strength and longevity.
RPE guardrails. On strength days, target an RPE of 5–7 for most “working” sets when symptoms are active. That means you finish each set with 3–5 safe reps still “in the tank.” This zone is heavy enough to maintain or build strength but light enough to reduce joint load spikes. On good days, you can push a top set at RPE 8 (2 reps in reserve), then back off to RPE 6–7. On recovery or technique days, cap sets at RPE 4–5 and stop earlier if rep speed slows or mechanics change.
ROM dialing. Full depth isn’t mandatory to adapt; consistency is. If a deep knee bend or high-hip flexion pinches, trim ROM to the symptom-free arc that preserves alignment. For squats, that may mean box height set just above the pain threshold. For split or step-up patterns, use shorter step height and forward shin angles that remain comfortable. For hinges, limit knee bend, emphasize hip back, and keep the bar path close. Expand ROM gradually over weeks as tolerance improves.
Two-hour and next-day rules. A small, transient increase during training is common and acceptable, but apply two checks:
- Two-hour check: Within two hours post-session, pain should trend back toward baseline. If it remains elevated, that set, load, or movement was too aggressive.
- Next-day check: Morning-after symptoms should be at or below your typical baseline. If you wake stiffer, more swollen, or limping, reduce one variable next time: load (–10–20%), volume (–25–40% of sets or reps), or ROM (slightly higher box or lower step).
Set progression that respects joints. Start sessions with the movement that most often provokes symptoms, but treat warm-ups as “auditions.” Use 3–5 ascending sets of 5–6 reps, pausing if pain rises, and only enter working sets when the last warm-up is RPE ≤6 and mechanics feel smooth. If pain appears mid-session, “pivot” to a neighboring pattern (e.g., from squat to hinge) rather than forcing more reps.
Symmetry without obsession. Most adults show small side-to-side differences. Aim for smoothness, not identical feelings. If one side persistently lags in strength or balance, add one extra single-leg set for that side each session (e.g., 2 sets on the strong side, 3 on the limited side) to close the gap gradually.
Weekly rhythm. Two to three lower-body strength sessions per week work well for symptomatic joints. Insert low-impact conditioning between them and schedule at least one lighter “movement quality” day that focuses on technique, tempo, and tissue tolerance over heavy loading.
Red flags in training. Stop a set if pain sharpens or becomes localized and stabbing, if you feel catching/locking that alters your movement, or if your form drifts (knees diving inward, hips shifting away from the sore side). Regress and rebuild with smaller steps. The best joint-friendly plan is the one you can repeat.
Smart Swaps: Box Squats, Step-Ups, and Hip Hinge Emphasis
When the goal is strong legs for decades, not one-rep-max heroics, smart exercise choices do the heavy lifting. These swaps keep the training stimulus high while trimming joint stress, letting you collect strength “dividends” with fewer flare-ups.
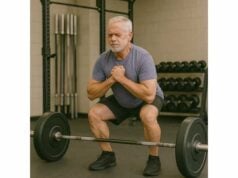
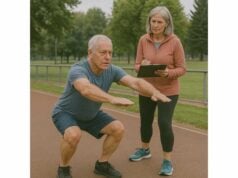
Box squats instead of free-back squats. Setting a box height to the deepest pain-free depth lets you groove consistent mechanics. Sit back to the box with control, lightly touch (don’t plop), and stand. This reduces knee travel and patellofemoral load, encourages a hip-dominant pattern, and gives a reproducible target for gradual ROM increases. Progress by lowering the box 1–2 cm every week or two if symptoms allow, not every session.
Goblet squats, heels elevated. Holding a dumbbell or kettlebell at the chest shifts the center of mass and can smooth torso positioning. A small wedge or weight plate under the heels reduces ankle mobility demands and often improves knee comfort. Keep the reps in the 6–10 range with a moderate tempo; if pain climbs, trim depth or reps before load.
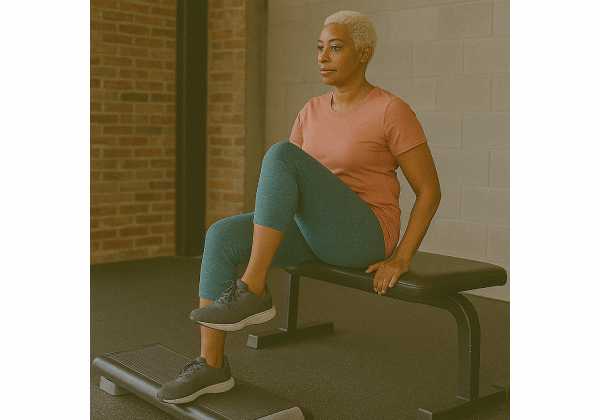
Step-ups beat forward lunges for many knees. Forward lunges combine deceleration and deep angles that can irritate the patellofemoral joint. Step-ups place more predictable forces through the hip and knee and allow precise control of height and shin angle. Start with a low step (10–20 cm), rise by driving through the whole foot, and resist pushing off the trailing leg. Increase height in 2–5 cm increments only when 3 sets of 8–10 reps per side feel smooth.
Split squats > walking lunges when space or tolerance is limited. Stationary split squats reduce balance and deceleration requirements. Let your torso tilt slightly forward to share load with the hip, keep the front knee tracking over middle toes, and adjust stance width to find a comfortable groove. Rear-foot-elevated variations (Bulgarian split squats) increase hip loading but may irritate some knees; use a modest rear-foot height or skip the elevation when symptomatic.
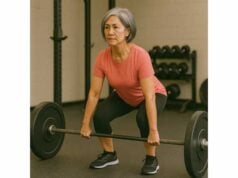
Hip hinge family for power without pinch. The deadlift family—the classic deadlift, trap-bar deadlift, and Romanian deadlift (RDL)—load the posterior chain while sparing deep knee flexion. Many with knee pain thrive on RDLs and trap-bar pulls set just below the knee. Cues that help: “hips back,” “shins vertical,” “bar close.” If hips feel tight, start from blocks or the rack and lower range slowly over weeks.
Leg press with intent. A neutral foot position, controlled 2–3 second lowering, and a stop short of painful depth can make leg press a useful hypertrophy tool when squats are flared. Avoid locking the knees; work sets of 8–12 at RPE 6–7.
Posterior-chain support moves. Add hip thrusts or bridges (barbell or band), 45° back extensions, and hamstring curls (seated or prone). Strong glutes and hamstrings reduce anterior knee load during gait, stairs, and squats.
Upper-body anchors that don’t provoke the knee/hip. Pair lower-body sets with upper-body pushing and pulling (e.g., rows, pulldowns, inclined presses) to build whole-body density while giving the legs recovery within the session.
If you’re refining squat and hinge technique for longevity lifting, a quick primer on setup, bracing, and bar path in our squat setup basics can speed your learning curve.
Weekly template (sample).
- Day 1 (Lower A): Box squat (moderate), step-up, RDL, core anti-rotation.
- Day 3 (Lower B): Trap-bar deadlift (moderate), goblet squat (heels elevated), hip thrust, calf raises.
- Day 5 (Lower C, lighter): Split squat, leg press (short ROM), hamstring curl, balance drill.
Rotate exercises every 6–8 weeks or earlier if a pattern consistently irritates a joint. The objective is productive work you can repeat, not loyalty to any one lift.
Tempo, Range, and Stance Tweaks That Reduce Stress
Small technical adjustments often deliver the biggest relief. Tempo controls peak forces, range trims provocative angles, and stance changes redistribute load between hip and knee. Together, they make familiar lifts feel new—and kinder.
Tempo as a shock absorber. Slower eccentrics (lowering phase) and short pauses at the bottom reduce momentum-driven joint stress. Useful tempos:
- 3–1–1 for squats, step-ups, and split squats (three seconds down, one-second pause, one second up).
- 2–0–2 for presses and rows.
- 3–0–2 for RDLs and hip hinges.
Pauses help you find the strongest, least painful position and keep form crisp. They also allow effective sets at lighter loads, a win when joints are irritable.
ROM bracketing. When depth is the trigger, bracket your range. For squats: work 2–3 sets to a higher box (pain-free), then 1–2 sets to a slightly lower box (marginally challenging but acceptable), finishing with the higher box again. For hinges: pull from blocks just below the kneecap for most sets; test a slightly lower start height for a single back-off set if all feels good.
Stance and foot angle.
- Squats: A slightly wider stance with toes turned out 10–20° can reduce anterior knee stress and create space for the hips. Track knees over the second/third toes and resist collapsing inward.
- Split and step-up patterns: Shorten the stride and bring feet to “railroad tracks” (hip-width apart) for stability. Keep the shin angle modest; think “push the floor away.”
- Hinges: Narrow to shoulder-width with a slight toe-out. This keeps shins vertical and cues hip loading.
Load placement. Front-loaded squats (goblet, front squat) encourage a more upright torso, which some hips prefer. Back-loaded options can feel better for some knees by sharing load with the posterior chain. Try both and pick the calmer joint response.
Pulses and partials done right. Short-range pulses near the top half of a squat or lunge allow quad work without deep knee flexion. Use light loads, high control, and stop if discomfort builds. Treat these as accessories, not main lifts.
Isometrics for quiet strength. Joint-friendly isometric holds (e.g., wall sits at a comfortable angle, split-squat iso at mid-range, Spanish squats) build tolerance with minimal motion. Hold 20–45 seconds, 3–5 sets, and focus on even pressure through the foot. Isometrics can also serve as a low-friction warm-up before dynamic sets.
Rep schemes and rest. For symptomatic joints, sets of 5–8 reps with controlled tempo often beat very low reps (high peak load) or very high reps (metabolic fatigue that degrades form). Rest 2–3 minutes between main sets to keep movement quality high.
For broader programming details—sets, reps, tempo, and how to balance sessions across the week—see our concise guide to set and tempo planning.
Progression cues. Make one change at a time. First smooth the movement with tempo and stance, then add a small load, then increase range. This one-variable rule clarifies what causes a flare and makes progress repeatable.
Warm-Up and Activation: Glutes, Hamstrings, and Quads
A joint-friendly session starts before the bar or dumbbell moves. Good warm-ups raise tissue temperature, nudge synovial fluid around the joint, “prime” muscles that share load, and reveal whether you need to pivot that day. Ten to fifteen purposeful minutes usually suffice.
Phase 1 — General circulation (3–5 minutes). Choose a low-impact modality: easy bike, treadmill walk, or rowing with small knee bend. Keep breathing conversational. The goal is warmth and rhythmic motion, not fatigue.
Phase 2 — Mobility that matters (3–5 minutes). Focus on the areas that influence knee and hip mechanics:
- Ankles: Knee-to-wall ankle rocks (10–15 reps/side) to ease dorsiflexion limits that force knees in or heels up.
- Hips: 90/90 transitions and controlled hip circles (5–8 each direction) to open external rotation without cranking.
- T-spine: Half-kneeling open books (6–8/side) for torso rotation that keeps squat and hinge bracing comfortable.
Phase 3 — Activation and patterning (4–6 minutes). Awaken the muscles that unload the knee:
- Glutes: Mini-band lateral walks (2×10–12 steps each way) and single-leg glute bridge holds (2×20–30 seconds/side).
- Hamstrings: Heel-elevated hip hinges with dowel (2×10) and hamstring sliders or physio ball curls (1–2×8–12).
- Quads: Terminal knee extensions with band (2×12–15) or Spanish squat holds (2×20–30 seconds) at a comfortable angle.
Phase 4 — Rehearsal sets (5–8 minutes). Groove the day’s main pattern with pauses and reduced range. For box squats, use two to three progressive sets of 5 with a longer (1–2 second) pause on the box. For hinges, run “three-position” RDLs—mid-thigh, just above knee, mid-shin—2–3 reps at each stop to cement bar path.
Micro-dose balance and footwork. Add 30–60 seconds of single-leg balance (barefoot if safe) between warm-up sets. Quiet feet improve knee tracking. If balance is shaky, place a fingertip on a rack for light support and remove it gradually.
Self-check questions before working sets:
- Can I hit my planned range without pinch?
- Do my reps look the same left to right?
- Do I feel the work where I want it (glutes, hamstrings, quads), not in the joints?
If any answer is “no,” adjust: raise the box, shorten the stride, lighten the load, or extend the activation phase. For deeper prep ideas and session openers across the week, scan our joint prep sequence and pick two to three elements that fit your needs.
Don’t chase the perfect warm-up; chase the right response. The best routine leaves you calmer, smoother, and ready to accumulate quality sets—today and next week.
Conditioning Without Flare-Ups: Bike, Pool, and Incline Walk
Cardiorespiratory fitness predicts longevity, cognitive health, and recovery, yet not all aerobic work treats knees and hips kindly. The sweet spot is “joint-light, heart-heavy”: modalities that challenge the engine while keeping joint irritation low.
Stationary cycling. Upright or recumbent bikes deliver rhythmic motion that lubricates knees and hips with modest compressive loads. Start with saddle height that allows a slight knee bend at the bottom of the stroke; too low increases flexion and can irritate the kneecap. Programming options:
- Zone 2 base: 20–40 minutes at a conversational pace (RPE 4–6), 2–3 times per week.
- Low-impact intervals: 6–10 rounds of 60–90 seconds “hard” (RPE 7–8) with equal easy pedaling. Keep cadence smooth; avoid maximal sprints if they cause sharp spikes.
Aquatic training. Water’s buoyancy reduces joint loading, yet drag makes muscles work. In chest-deep water, body weight through the joints drops markedly, allowing volume you couldn’t tolerate on land. Options include pool walking, gentle jogging in the deep end with a flotation belt, and interval laps. A common starter is 15–25 minutes of mixed strokes or walking at a steady effort, followed by 4–6×30–45 seconds of brisk efforts with easy recovery. Aquatic sessions are particularly useful in flare weeks to maintain fitness without deconditioning.
Incline treadmill walking. Uphill grades shift work toward the posterior chain and reduce impact compared with jogging. Start at 3–5% incline and 2.5–3.5 mph, aiming for 15–30 minutes. Increase either incline or speed, not both, and only when the next-day check is clean. If downhill walking irritates joints, finish sessions flat or slightly uphill.
Elliptical and rowing. Ellipticals can be comfortable for many; pick a stride length that doesn’t overshoot hip flexion tolerance. Rowing demands coordination and hip flexion, so treat it as optional: half strokes that emphasize hip extension can work on light days.
Outdoor options with guardrails. Flat, soft surfaces (track, dirt path) trump cambered or broken sidewalks. Short, brisk walks scattered through the day (3×10 minutes) yield similar heart benefits with less joint fatigue than one long march.
Weekly conditioning menu. Start with two to three sessions on nonconsecutive days:
- Day 2: Cycle Zone 2, 25–35 minutes.
- Day 4: Pool intervals (moderate), 15–25 minutes total.
- Day 6: Incline walk, 20–30 minutes, finish with 5 minutes easy flat.
If you’re planning longer aerobic phases for healthspan—how to dose steady state vs. intervals—our zone 2 guide outlines time targets and simple monitoring methods that pair well with joint-calmer modalities.
Signs to scale back: Next-day stiffness that changes your gait, swelling that outlasts 24 hours, or increasing reliance on the handrail during stairs. Reduce the session length by 20–30% or choose the pool for a cycle to restore tolerance.
Return-to-Load: Week-by-Week Progressions
After a flare, illness, or time off, the fastest path back is a patient one. A structured, joint-aware ramp compresses risk while rebuilding strength, work capacity, and confidence. Use this template as a starting point and adjust based on your two-hour and next-day checks.
Baseline finder (Week 0). In one session, test the main patterns at conservative loads: box squat, hinge (RDL or trap-bar pull), step-up or split squat, and a hamstring accessory. For each, do 2–3 sets of 5–6 reps at RPE ≤6. Record the load, the box/step height, and any symptoms. That’s your Week 1 target.
Week 1 — Restore rhythm.
- Strength (2 sessions): 3×5 per main lift at the baseline load/height, plus one accessory (2–3×8–10). Tempo 3–1–1 on squats and split patterns, 3–0–2 on hinges.
- Conditioning (2 sessions): 20–25 minutes Zone 2 cycling or incline walk. Keep RPE ≤6.
- Goal: Smooth movement, zero next-day escalation.
Week 2 — Add small steps.
- Increase load 2.5–5% or add 1 rep to two sets on main lifts (e.g., 5–6 reps). Maintain ROM and tempo.
- Conditioning up to 25–30 minutes, or introduce 4×60-second cycling pickups at RPE 7 with easy pedaling between.
- If symptoms nudge upward but resolve by the next morning, repeat the same dose before progressing again.
Week 3 — Expand range or volume.
- Lower the box/raise step by 1–2 cm if pain-free, or add one extra set at the same load (e.g., 4×5).
- Keep hinges from blocks if needed; consider lowering start height a notch for one back-off set if the pattern is calm.
- Conditioning: pool session replaces one land session if joints feel “full” or stiff.
Week 4 — Consolidate.
- Hold load steady and practice “repeatability”: same quality, less effort. If reps feel easier (RPE –1), you’ve earned the next step.
- Consider one top set at RPE 7–8, followed by 2–3 back-off sets at –10% load.
Week 5–6 — Build capacity.
- Alternate weeks emphasizing load (+2.5–5%) and weeks emphasizing volume (+1 set or +1 rep across sets). Only move one lever per week.
- Gradually lower the box in 1–2 cm steps if tolerated; do not chase depth at the expense of the next-day check.
Week 7–8 — Introduce variety.
- Swap goblet for front squat, step-up height up one notch, or RDL for trap-bar deadlift from blocks. Keep the same RPE targets.
- Add a second hamstring accessory (e.g., hip hinge cable pull-throughs) on one day to support knee-friendly loading.
For a broader, whole-body view on rebuilding after breaks that also covers upper-body and conditioning, our gradual ramp-up plan pairs well with the week-by-week structure above.
What to do when you overshoot. If pain remains elevated the next morning, return to the last “clean” week and repeat. Your tissues are telling you the step size was too big; smaller rungs get you to the same roof with fewer slips.
When to Seek Assessment for Persistent Pain
Most knee and hip grumbles settle with load adjustments and time. Still, some patterns signal the need for a skilled evaluation to rule out other causes or to tailor your plan.
Get assessed if you notice:
- Night pain that wakes you or pain that escalates at rest rather than during activity.
- Swelling that doesn’t recede within 48 hours or recurrent joint effusion after light sessions.
- Mechanical symptoms like catching, locking, or giving way that alters your gait.
- Rapid loss of function, such as difficulty weight-bearing after a minor bump in training.
- Unexplained systemic signs: fever, unexplained weight loss, or profound fatigue alongside joint pain.
- Progression despite conservative care: six to eight weeks of thoughtful modifications without meaningful improvement.
What a good assessment includes. History (pain behavior, activities, previous flares), gait and movement screening, strength and endurance testing for the quadriceps, hamstrings, and gluteals, joint-specific provocation tests, and, where indicated, imaging only to answer a focused clinical question. Expect a plan that blends education, progressive exercise, and load management before any invasive options enter the conversation.
Your role during the wait. Maintain capacity with friendly options: cycling, pool, upper-body strength, and isometrics (wall sits, split-squat holds) at comfortable angles. Keep a simple log noting session type, effort, and next-day feel; this accelerates the evaluation and improves the recommendations you’ll receive.
Mindset matters. Degenerative findings on imaging are common with age and do not dictate your ceiling. People with “noisy” scans often train and live actively when dosage, exercise selection, and expectations align. Seek clinicians who collaborate, measure progress that matters to you (stairs, walks, hobbies), and adjust plans based on response—not fear.
The north star. Training for healthy aging is not about perfect knees or hips; it’s about capable legs and joints that recover between the things you love. With the rules and tools in this guide, you can keep moving forward—deliberately and confidently.
References
- EULAR recommendations for the non-pharmacological core management of hip and knee osteoarthritis: 2023 update (2024) (Guideline)
- Comparative efficacy of exercise therapy and oral non-steroidal anti-inflammatory drugs and paracetamol for knee or hip osteoarthritis: a network meta-analysis of randomised controlled trials (2023) (Systematic Review/Network Meta-analysis)
- Exercise Therapy for Knee Osteoarthritis: A Systematic Review and Network Meta-analysis (2023) (Systematic Review/Network Meta-analysis)
- Efficacy and safety of aquatic exercise in knee osteoarthritis: A systematic review and meta-analysis of randomized controlled trials (2023) (Systematic Review/Meta-analysis)
- Exercise Therapy for Knee and Hip Osteoarthritis (2023) (Review)
Disclaimer
This article provides educational information about exercise modifications for knee and hip discomfort. It is not a substitute for personalized medical advice, diagnosis, or treatment. Always consult a qualified healthcare professional before starting or changing your exercise program, especially if you have persistent or worsening pain, recent injury, surgery, or medical conditions that affect your joints or balance.
If you found this guide useful, please consider sharing it on Facebook, X (formerly Twitter), or your preferred platform, and follow us for future updates. Your support helps us continue creating high-quality, practical resources for healthy aging.

