Mobility is not a party trick—it is how you get off the floor, carry groceries, and turn your head to check traffic. As we age, range of motion narrows first where we move most: hips, shoulders, and ankles. The good news is that targeted practice restores usable motion quickly when you pair the right drills with smart progressions. This guide gives you repeatable screens to find your priorities, precise exercises that respect irritated joints, and a 10-minute daily flow you can scale. It also shows how to lock in new range with strength so flexibility turns into function. For the bigger picture—how mobility supports aerobic capacity, strength, and everyday movement—see our pillar on longevity-focused fitness habits. Use this routine to move better in the gym and, more importantly, in life: smoother stairs, easier reaches, steadier balance.
Table of Contents
- Assess, Then Address: Quick Screens You Can Repeat
- Hips: 90/90s, Hip Flexor Openers, and Hinge Prep
- Shoulders: Scapular Control, T-Spine, and Overhead Prep
- Ankles and Feet: Dorsiflexion, Calf, and Toe Work
- Isometrics and PNF: Locking In New Range
- Daily 10-Minute Flow and Weekly Progressions
- When Tightness Is Really Weakness
Assess, Then Address: Quick Screens You Can Repeat
Before you stretch anything, find out what matters. Quick, repeatable screens turn guesswork into a plan and let you measure progress without lab gear. Use the simple sequence below. Perform each screen after a minute of easy movement (walk, cycle, or marching in place). Note left–right differences and how each position feels—not just the angle you reach. Re-test weekly.
Hip external/internal rotation (seated 90/90): Sit tall on the edge of a chair. Place knees and hips at about 90°. Rotate one ankle outward (internal rotation) and inward (external rotation) without leaning. Comfortable range and smooth motion beat forcing depth. If one direction feels blocked, that becomes a priority.
Hip extension (half-kneeling lunge rock): Kneel on a cushion with one knee down, other foot forward. Tuck tailbone gently (posterior pelvic tilt) and glide hips forward without arching the lower back. If the down-leg front feels tight high in the thigh or pelvis, note it—this often limits walking speed and stride length.
Shoulder overhead reach (back-to-wall flexion): Stand with back to a wall, feet 15–20 cm forward, low ribs down. Raise both arms overhead, thumbs to wall if possible. If ribs flare or elbows bend before hands reach the wall, thoracic spine or lat stiffness may be the limiter.
Shoulder rotation (hands-behind-back/behind-neck): Reach one hand up the spine from below and the other down the spine from above. Measure the gap between fingertips. Switch sides. Large differences point toward side-specific work.
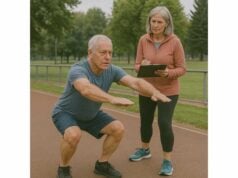
Ankle dorsiflexion (knee-to-wall): Kneel facing a wall. Place big toe 5–10 cm from the wall. Drive knee straight forward to touch the wall without the heel lifting. Measure the maximum distance where the heel stays down. A side with 2 cm less distance deserves attention.
Foot tripod and toe control (short foot): Standing, spread toes, keep heel and base of big toe and little toe on the ground. Lightly “suction cup” the arch without scrunching toes. If the arch collapses or the big toe buckles, pencil in foot drills.
Breathing and posture check (ribs over pelvis): Stand tall and exhale to feel lower ribs drop slightly. Inhale into the sides of the ribcage and low back. If this is difficult, overhead mechanics will suffer—note it for the shoulder section.
How to use the results. Limit each session to two priorities and one “maintenance” area. For example: left ankle dorsiflexion and hip extension as priorities, shoulder overhead maintenance. Re-test the two priorities after your session; if range improves acutely and the next day feels normal, you chose well. If nothing changes, adjust drills or reduce intensity (less stretch force, more repetitions).
Safety guardrails. Mild stretch discomfort is normal; sharp, pinchy, or joint-line pain is not. Keep reps smooth, avoid breath-holding, and respect the two-hour/next-day rule: symptoms should settle within two hours and be at baseline by morning. If not, scale back.
Hips: 90/90s, Hip Flexor Openers, and Hinge Prep
Hips power walking speed, stairs, and lifts. For most adults, the limiting pieces are internal rotation, extension, and coordinated hip hinge. This section builds those three in a sequence that respects cranky knees and backs.
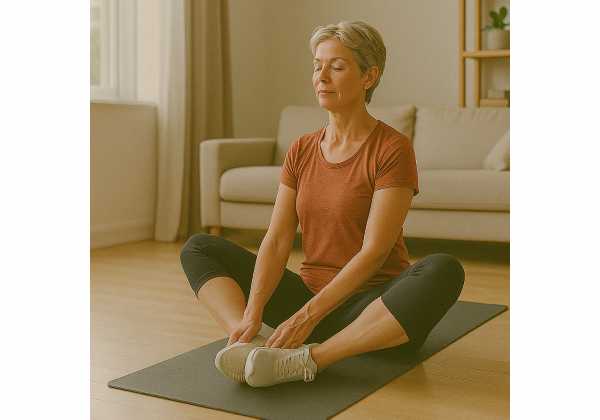
90/90 transitions (rotation control). Sit on the floor with front and back knees at 90°. Plant hands lightly. Rotate both legs together to switch sides without lifting feet. Keep ribs stacked over pelvis and avoid collapsing on the back hip. Perform 6–10 slow transitions each way, pausing 2–3 seconds at end range to breathe. If knees complain, place yoga blocks under them or sit on a cushion to reduce hip flexion.
Shin box to tall kneel (rotation to extension). From the 90/90 front-leg position, drive the front foot and back shin into the ground to lift to tall kneel. Squeeze glutes subtly at the top, then reverse under control. Do 3–5 controlled reps per side. This links rotation with hip extension—useful for turning, rising from a chair, and gait.
Half-kneeling hip flexor opener (rear-glute on). Kneel on a cushion with the target side down. Tuck tailbone (posterior tilt) and gently squeeze the glute of the down leg. Slide hips forward until you feel a stretch high in the front of the hip—not the low back. Hold 20–30 seconds, repeat 2–3 times. Add a reach overhead with the same-side arm to bias the psoas and front line.
Standing lunge rocks (dynamic extension). From a long split stance, keep torso tall and ribs down. Rock forward until the back-hip front feels a light stretch; rock back to neutral. Ten rocks per side, steady cadence. Keep the back glute lightly on so the low back stays calm.
Hinge prep with dowel (hip patterning). Hold a dowel along your spine touching the head, mid-back, and tailbone. Soften knees slightly, then send hips back until you feel hamstring tension with shins nearly vertical. Return by driving the floor away. Do 2×8–10 reps. This teaches the bar path and spinal position you will use in Romanian deadlifts and daily lifting.
Glute bridges (lock in extension). Lie on your back, feet hip-width, knees bent. Exhale, tuck pelvis slightly, then press through whole feet to lift hips until ribcage and pelvis stay stacked. Hold one second at the top. Perform 2–3×8–12. Progress to single-leg bridges as control improves.
Programming notes. Most adults benefit from 3–5 minutes of hip work in warm-ups and 2–3 longer sets on off days. On stiff days, emphasize breath-paced holds (20–30 seconds). On better days, favor reps (6–10) that explore end range without forcing it. If knees are sensitive, choose seated or supported versions first and bias hinge work over deep squats.
For periods when knees or hips are touchy, combine this sequence with joint-friendly lower body work so you keep training while tolerance returns.
Shoulders: Scapular Control, T-Spine, and Overhead Prep
Comfortable overhead reach depends on three partners: a ribcage that expands, a thoracic spine that rotates and extends, and shoulder blades (scapulae) that upwardly rotate and posteriorly tilt without shrugging. The drills below groove those patterns without cranking on the joint.
Ribcage breathing (360° expansion). Lie on your back with knees bent. Place hands on lower ribs. Inhale through the nose and feel the ribs widen sideways and into the floor; exhale softly for 4–5 seconds to let ribs settle down. Take 4–6 breaths. This resets the “stack” (ribs over pelvis) that makes overhead motion feel lighter.
T-spine open books (rotation). Lie on your side, hips and knees bent. Reach top arm forward, then arc it overhead and back until you feel a gentle stretch across the chest and upper back. Keep knees together. Pause to breathe at the end for 2–3 seconds. Do 6–8 per side.
Wall slides with lift-off (upward rotation). Stand with forearms on the wall, elbows at 90°. Slide forearms up while keeping ribs down and neck long. At the top, lift forearms an inch away from the wall, reaching through the shoulder blades. Lower under control. Do 2×8–10. Adjust distance from the wall to keep the low back quiet.
Scapular clocks (control). On hands and knees or against a wall, move shoulder blades like a clock: up, down, in, out—without bending elbows. Small, slow movements teach the “map” of the scapula. Ten smooth reps each direction per side.
Lat and posterior cuff reach (tissue glide). From half-kneel beside a bench, place forearms on the bench and sit hips back slightly to feel a line of tension along the outer back. Keep ribs down; do not dump into sway. Hold 15–20 seconds, breathe, repeat 2–3 times.
Overhead press holds (isometric end-range). With a light kettlebell or band, press overhead and hold where range feels challenging but comfortable. Think “reach long,” not “shrug up.” Hold 10–20 seconds, 2–3 repetitions. These holds teach the shoulder to own new range with light force.
Bench angels (scapula on the ribcage). Lie face down on a bench with arms hanging. Pull shoulder blades gently toward back pockets, then slide arms out to a “Y,” rotating thumbs up, then return. Keep the neck long. Do 2×8–12. This builds control where many have stiffness sensations.
As tolerance improves, pair this section with shoulder-friendly options for pressing and pulling so gains translate into stronger workouts without flare-ups.
Ankles and Feet: Dorsiflexion, Calf, and Toe Work
Ankles and feet are the foundation for balance, walking speed, squatting depth, and comfortable stairs. Limited dorsiflexion (knee-over-toe motion) often shifts stress upstream to the knees or hips. The sequence here restores range, strength, and foot control.
Knee-to-wall rocks (graded dorsiflexion). Set big toe 5–8 cm from a wall. Drive knee toward the wall without lifting the heel or twisting the foot. Rock in and out for 10–15 reps, then scoot the foot back 0.5–1 cm if easy. Aim for a smooth end range, not a painful jam. Repeat 2–3 sets per side. If the front of the ankle pinches, shift knee slightly outward or stop short of the pinch.
Ankle mobilization with strap (talar glide). Loop a strap around the front of the ankle just above the foot, pulling backward as you drive the knee forward. Do 8–12 slow reps. The backward pull helps the talus glide and can reduce the “block” feeling at end range.
Elevated calf raise (strength through range). Stand on a step. Rise up for two counts, pause one, and lower for three counts to a gentle stretch. Keep pressure through the big toe. Perform 2–3×8–12. Progress to single-leg as control improves.
Soleus bias heel raises (knee bent). Hinge forward slightly with knees bent, then perform small-range heel raises. The bent-knee position trains the deeper calf (soleus), which supports walking endurance and balance. Do 2–3×12–15.
Short foot and toe spread (foot tripod). Barefoot, spread toes and press the pad of the big toe, little toe, and heel into the ground. Lightly “lift” the arch without curling toes. Hold 5 seconds, repeat 6–10 times. Then practice big toe lifts while the other toes stay down (and vice versa). Better foot control steadies knees and hips during squats and lunges.
Split-stance dorsiflexion lunge (integration). In a short split stance, push the front knee forward over the toes while keeping the heel down, then return. Ten reps per side, slow tempo. Add a light dowel for balance if needed. This mirrors gait and step-down mechanics.
Programming notes. Use ankle work 3–5 days per week for faster gains. Pair range drills (knee-to-wall, mobilization) with strength (heel raises) in the same session so new motion “sticks.” If a drill causes lingering soreness or swelling, cut volume in half and bias gentle rocks instead of longer holds.
When you are ready to express ankle gains in daily life, weave them into walking: slightly longer strides on flat ground, a few minutes of gentle incline walking, and mindful push-offs. For ideas on turning ankle mobility into smoother, faster steps outdoors, scan our primer on better walking mechanics and experiment with one cue at a time.
Isometrics and PNF: Locking In New Range
New range disappears unless you teach muscles to hold it. Two tools shine here: isometrics (force without movement) and PNF (proprioceptive neuromuscular facilitation), which pairs a light contraction with a stretch. Done patiently, both improve usable range and reduce that “elastic band snaps back” feeling.
Why isometrics work. Isometric contractions increase tendon and muscle tolerance at a specific joint angle and can calm pain by modulating sensory input. They also build low-risk strength in positions where you feel limited.
Hip examples.
- End-range bridge hold: Lift hips until glutes engage and hold 20–30 seconds, 3–5 sets. Keep ribs down; breathe.
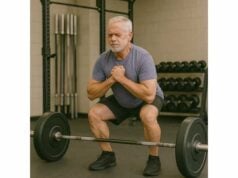
- Split-squat iso (mid-range): Short split stance, lower until front thigh is halfway to parallel. Hold 15–30 seconds, 2–4 sets per side. Aim for even pressure through the front foot tripod.
Shoulder examples.
- Overhead press hold with band: Press to a comfortable end-range and hold 10–20 seconds, 3–4 sets. Think “reach long” and keep neck relaxed.
- External rotation doorway press: Elbow at side, bent 90°, forearm presses into a doorframe without moving. Hold 10 seconds, 5–6 reps. This teaches cuff activity at the range you want to keep.
Ankle examples.
- Isometric calf raise (top position): Rise onto toes and hold 20–30 seconds, 3–4 sets. Keep weight through big toe.
- Dorsiflexion iso (band): Sit with band around forefoot, pull toes toward you to a firm but pain-free effort, hold 10–15 seconds, 5 reps.
PNF “contract-relax” basics (gentle).
- Move into a light stretch you can breathe in.
- Contract the muscle being stretched at ~20–40% effort for 5–8 seconds (e.g., try to “pull out” of the stretch without moving).
- Exhale, relax, and move a few millimeters deeper. Repeat 2–3 cycles.
Use PNF sparingly early on (1–2 muscles per session) and keep contractions modest. The goal is teaching, not forcing.
Where PNF shines.
- Hip flexors: In half-kneeling, tuck pelvis, feel the front-of-hip stretch, lightly try to pull the back knee forward (hip flex) against the floor for 5–6 seconds, then relax deeper.
- Hamstrings: On your back with a strap around the foot, raise the leg to a light stretch. Gently press the heel into the strap for 5–6 seconds, then relax a bit deeper.
- Pecs/lats: Half-kneeling forearms on a bench, feel a chest/lat stretch, lightly press forearms down for 5–6 seconds, then relax deeper keeping ribs down.
Lock it in with strength. Right after isometrics or PNF, do 1–2 sets of a strength move in the new range (e.g., light split squats after hip flexor work, wall slides after pec/lat PNF, bent-knee calf raises after ankle PNF). This “greases” the pattern and helps the brain accept the new motion as normal.
To choose between static holds, PNF, and active mobility on any given day, skim our overview of stretching methods and match the tool to your goal: calming, opening, or owning range.
Daily 10-Minute Flow and Weekly Progressions
Mobility gains come from small, frequent deposits. Ten minutes a day beats one long weekend session. Use the flow below as a template; adjust the emphasis to match your two priority areas from the screens.
Minute 0–2 — Heat and breath.
- One minute brisk marching or easy cycling.
- Four slow breaths: inhale through the nose (ribs expand 360°), long soft exhale (ribs settle). This sets posture for overhead and hinge work.
Minute 2–4 — Ankles and feet.
- Knee-to-wall rocks, 10–12/side.
- Short foot holds, 6×5 seconds.
- Optional: 10 bent-knee heel raises (soleus bias).
Minute 4–6 — Hips.
- 90/90 transitions, 6–8 total.
- Half-kneeling hip flexor opener, 20–30 seconds/side.
- Two hinge reps with a dowel to pattern.
Minute 6–8 — Shoulders and T-spine.
- Wall slides with lift-off, 8–10 reps.
- Open books, 6/side.
Minute 8–10 — “Lock it in.”
- Split-squat isometric, 15–20 seconds/side.
- Overhead press hold (light band or kettlebell), 10–15 seconds.
- Finish with two controlled hinge reps to feel the stack and hip drive.
Weekly rhythm (baseline).
- Daily: 10-minute flow.
- 2–3 days/week: Add 10–15 minutes after strength or Zone 2 to expand a priority (e.g., extra ankle and hip work on lower-body days).
- Deload every 4–6 weeks: Halve holds/reps and emphasize breathing and gentle rocks. This is where tissue tolerance consolidates.
Progression levers (change one at a time).
- Time: Add 5–10 seconds to isometric holds, up to 30–40 seconds.
- Reps: Add 1–2 reps to transitions or wall slides (cap most drills at 12–15).
- Range: Use a slightly deeper 90/90 position or move the foot 0.5–1 cm farther from the wall in knee-to-wall rocks if landings stay quiet.
- Load: Add a light dumbbell to split-squat isos or a micro-plate to heel raises once control is crisp.
Stop-rules. Sharp, localized joint pain; lingering soreness that changes your gait or reach the next morning; or swelling. If any appear, cut volume by 30–50% and favor breath-paced holds for a week.
Pair this flow with a brief warm-up before strength sessions to arrive “ready.” For menu ideas that slot neatly before lifts, explore our joint prep sequence and plug in two elements that match your screens.
When Tightness Is Really Weakness
The body often uses “tightness” as a safety strategy—tissues brace when they do not trust a joint to handle load. If you stretch the feeling away but it returns by afternoon, you are chasing a symptom. The fix is usually better strength and control in the range you want to keep.
Clues the limiter is strength, not tissue length.
- You can reach further after a warm-up but lose it quickly without light strength work.
- End ranges feel unstable or shaky rather than truly stiff.
- The “tight” side tires faster on single-leg tasks, carries, or overhead holds.
- Stretching alone does not change the next-day feel, but adding a small isometric does.
Common patterns.
- Hip flexors feel tight; glutes are sleepy. Bridges and split-squat isos calm the front-of-hip “grab” more than longer holds alone. Aim for 2–3 holds of 20–30 seconds, then two sets of 8–10 light split squats.
- Hamstrings feel tight; hinge pattern is weak. Dowel hip hinges and light Romanian deadlifts teach the hips to own the position so the hamstrings stop guarding. Two sets of 8–10 slow RDLs often beat another hamstring stretch.
- Overhead feels blocked; scapular control is low. Wall slides with end-range holds and light overhead carries make space where passive stretching fails. Use 8–10 slides, then a 20–30 second carry.
- Ankles feel jammed; calves are deconditioned. Bent-knee heel raises and isometric calf holds (20–30 seconds) frequently relieve the block sensation more than pushing harder into knee-to-wall.
Build “strength at end range.”
- Open range gently (breath, mobilization, or short PNF).
- Hold it (isometric 10–30 seconds at the edge).
- Use it (5–10 controlled reps with light load in the same angle).
Repeat this micro-sequence for one or two joints per session. The combination teaches your nervous system that the new position is safe and useful.
Mindset for durable mobility. You do not need circus-level flexibility. You need enough range to stack joints, absorb force, and produce force through the angles you use daily. That means integrating mobility with strength and balance: hinges, split patterns, carries, step-downs, and controlled presses. When in doubt, do a little less today and a little more often this week. Consistency—not intensity—wins.
If your “tightness” persists for six to eight weeks despite thoughtful work, or if it comes with night pain, joint locking, or giving way, seek an assessment. A skilled clinician can rule out other contributors and fine-tune your plan.
References
- Chronic effects of stretching on range of motion with considerations for dose-response and trainability: a systematic review with meta-analysis (2023) (Systematic Review/Meta-analysis)
- Effect of Joint Mobilization in Individuals with Chronic Ankle Instability: A Systematic Review and Meta-Analysis (2022) (Systematic Review/Meta-analysis)
- Exercise for preventing falls in older people living in the community (2020) (Systematic Review/Cochrane)
- Strength Training versus Stretching for Improving Range of Motion: A Systematic Review and Meta-Analysis (2021) (Systematic Review/Meta-analysis)
- Effectiveness of specific scapular therapeutic exercises in shoulder pain: a systematic review (2024) (Systematic Review)
Disclaimer
This article provides general educational information about mobility training for healthy aging. It is not a substitute for personalized medical advice, diagnosis, or treatment. Consult a qualified healthcare professional before starting or modifying your exercise program, especially if you have recent injury or surgery, persistent or worsening pain, neurologic symptoms, or conditions that affect balance or bone health. Stop any drill that causes sharp pain, swelling, or instability, and seek assessment.
If you found this guide useful, please consider sharing it on Facebook, X (formerly Twitter), or any platform you prefer, and follow us for future updates. Your support helps us continue producing practical, high-quality resources for long-term health.

