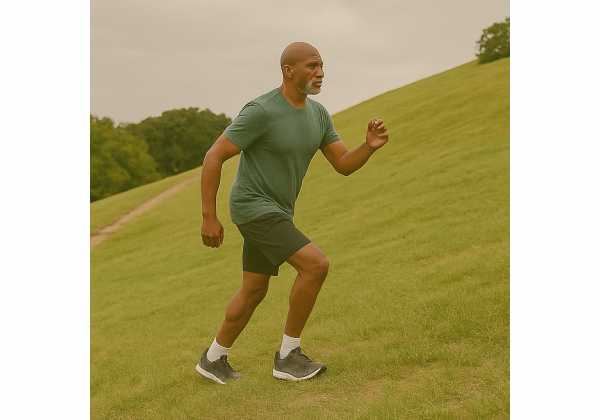
Outdoor conditioning is simple on paper—walk more, climb a hill, take the stairs—but the details determine whether your joints feel invigorated or inflamed. Elevation changes challenge the heart and legs in ways flat ground cannot, while uneven surfaces sharpen balance and foot strength. This guide turns local parks, neighborhoods, and staircases into a structured engine for cardiorespiratory fitness, leg endurance, and confidence on varied ground. You will learn how to pick routes, dose hill and stair intervals, move safely on climbs and descents, plan around weather, choose footwear and packs that add variety without pain, and build a weekly mix that respects recovery. If you want to see how these outdoor sessions anchor a broader healthspan plan, skim our pillar on VO₂max, practical strength, and daily movement—then come back here and put your shoes on.
Table of Contents
- Picking Routes: Elevation, Surfaces, and Safety
- Hill and Stair Intervals: Work-Rest Recipes
- Technique on Ascents and Descents
- Heat, Cold, and Weather Planning
- Footwear and Pack Options for Variety
- Weekly Mix: Long Easy, Short Hard, and Recovery
- Tracking: Time on Feet, HR, and Perceived Effort
Picking Routes: Elevation, Surfaces, and Safety
Great outdoor conditioning starts with smart route selection. Your choices—grade, surface, distance, traffic, and bailout options—shape both the stimulus and the risk. Think like a session designer before you step outside.
Elevation and grade. For hill repeats, grades between 4–8% (gentle) and 8–12% (moderate) suit most adults. Gentle grades let you hold form; moderate grades build leg strength and aerobic power without pounding. Reserve steeper grades (>12%) for short, crisp efforts or hiking. If you do not know the exact slope, use feel: on a gentle hill you can still talk in short sentences; on a moderate hill you can speak a few words; on steep slopes you prefer signals and hand waves.
Out-and-back vs. loops. Out-and-backs with a single climb simplify pacing and exit decisions—you know how far the car or home is. Loop routes add variety and micro-terrain changes but can trap you into “one more hill.” If you are returning from illness or injury, choose an out-and-back with an easy downhill return.
Surfaces. Asphalt is consistent but transmits more impact. Packed dirt, fine gravel, and cinder paths reduce impact and challenge foot muscles subtly. Technical trails (roots, rocks) build agility but raise falls risk; start with short sections and daylight-only attempts. For stairs, prefer wide treads with handrails. Outdoor public stairways can be uneven; test several steps before committing to speed.
Traffic and crossings. Minimize mid-interval stops by picking routes with long, uninterrupted stretches. Lights and crowded sidewalks teach patience, not power. If traffic is unavoidable, use those stops as structured recovery points and keep form crisp when you restart.
Safety and visibility. Wear bright, reflective elements at dawn, dusk, or in shade. In winter, carry a small light even if you plan to return before dark. On trails, tell someone your route and carry a phone, ID, and a small bandage strip—minor scrapes happen.
Bailout options. Good routes include easy exits: a flat cut-through, a return bus stop, or a loop that passes your starting point every 10–15 minutes. These exits prevent “finish at all costs” decisions on hot days, icy mornings, or when a knee complains.
Landmarks and segments. Pick landmarks for work bouts (from the bench to the bend; three light poles; the first landing to the third on the stairs). Landmarks make pacing intuitive and allow consistent progressions without a GPS watch.
Local scouting. Spend one walk scouting three candidates: a gentle continuous hill for steady work, a short/steep hill for power, and a staircase with handrails. Take notes on shade, wind exposure, and surface. Your future self will thank you when the forecast shifts and you can swap plans without missing a day.
Accessibility for crabbier joints. If deep descents irritate knees or hips, favor routes with uphill return on grass or trails, or choose a staircase where you can climb up and take the elevator or ramp down. Uphill walking and stair ascents can deliver high cardiovascular return while trimming impact.
The right route turns your neighborhood into a flexible training ground. Start conservative, and your map will grow with your fitness.
Hill and Stair Intervals: Work-Rest Recipes
Intervals on hills and stairs pack a lot of fitness into short windows by increasing muscular demand at lower speeds. The key is organizing bouts and rests to produce repeatable quality without frying your legs or lungs. These recipes scale from first-timers to seasoned walkers and runners.
RPE anchors. Use a 1–10 effort scale for clarity. Easy Zone 2 feels like 4–6, conversational. Hard aerobic intervals land at 7–8, where you speak only a few words. Near-max efforts (9) are rare and short. For longevity training, most work should live at 6–8.
Gentle hill intervals (4–8% grade).
- Intro set (15–20 minutes total): 6×45–60 seconds uphill at RPE 6–7, easy walk or slow jog down for recovery (1:1 to 1:1.5 work\:rest). Finish with 5–8 minutes easy on flat ground.
- Build set (20–28 minutes): 8–10×60 seconds at RPE 7–8, 60–90 seconds easy down; every third rep drop to RPE 6 as a “control” to keep quality high.
- Progressor (25–30 minutes): 5×90 seconds at RPE 7, 5×45 seconds at RPE 8, walk down between. The longer reps build steady strength; the short ones add a pop of power.
Moderate hill intervals (8–12% grade).
- Intro set: 8–12×30–45 seconds at RPE 7, easy down (1:1.5 rest).
- Build set: 6–8×60 seconds at RPE 7–8, walk down; cap the session when your last two reps slow or posture wobbles.
Stair sessions (with handrail).
- Time-based climbs: 8–12×30 seconds steady up, walk down. Keep steps crisp, feet quiet, and posture tall.
- Landing-based climbs: Start at the first landing, climb to the third, descend to the first; repeat 6–10 times. Increase to the fourth landing as strength improves.
- Power micro-sets: 6–8×10–12 fast steps up (not maximal), walk down fully. These build leg pop with minimal fatigue.
Recovery rules. Use downhills or descents as recovery, moving slowly enough to talk in full sentences. If downhills irritate your knees, take a ramp or an elevator down on stair days, or choose a switchback hill with gentler descents.
Stop criteria. End the session if your landings get loud, your stride shortens significantly, your knee dives inward, or you cannot stabilize through the midfoot. Quality declines predict soreness and derail consistency.
Once per week, go steadier. Replace intervals with one continuous climb at RPE 6–7 for 10–20 minutes (or two 8–10 minute climbs separated by a flat walk). This “strength endurance” block reinforces mechanics at a sustainable pace.
For more interval structures that pair well with hills and respect recovery across the week, see our concise interval playbook. Choose one recipe, run it for three to four weeks, then change the variable (time, reps, or grade), not all three at once.
Technique on Ascents and Descents
Good technique feels like free fitness. On climbs, efficient mechanics spread load across the hips and lower legs; on descents, small adjustments protect knees and ankles while keeping speed. Think “tall, quiet, steady” and use the cues below.
On ascents (hills).
- Posture: Stand tall with ribs over pelvis. Lean slightly from the ankles, not the waist. A soft forward angle aligns the body with the slope and reduces over-stride.
- Stride: Shorten steps, increase cadence. Over-striding uphill wastes energy and stresses calves. A “quick but light” rhythm keeps you springy.
- Foot strike: Land midfoot to entire foot, not just toes. Push the ground behind you with a full-foot roll-off; imagine “scratching the hill” backward.
- Arms: Keep elbows bent about 90°, swing compactly within your frame. Relax shoulders; arms guide rhythm, not power the climb.
- Breath: Inhale through the nose if comfortable; exhale long and steady. If breath spikes, shorten the interval or reduce the grade.
On ascents (stairs).
- Foot placement: Place the entire foot on the step when possible. On steeper stairs, a forefoot placement can work if your calves tolerate it. Use the handrail lightly for balance—especially early on.
- Knee tracking: Knees follow second and third toes; do not let them cave inward. If they do, slow down and shorten the step.
- Stride strategy: One step at a time beats skipping steps for most adults. If you skip, do so only when fresh and symmetrical.
On descents (hills).
- Posture: Stay tall; avoid braking with locked knees. Imagine being pulled gently forward by a cord at your chest.
- Foot strike: Land closer under your center of mass with soft knees. Think “quiet feet.” If foot slaps get loud, slow down or add a slight zig-zag to cut the grade.
- Cadence over stride length: Let cadence rise a bit to reduce impact per step.
- Surface awareness: Scan two to three steps ahead. Pick lines that avoid marbles of gravel or slick leaves.
On descents (stairs).
- Small controlled steps: Reduce speed, place full foot when possible, and keep one hand near the rail. Descending irritates many knees; control beats bravado.
- Angle: Keep shins angled slightly forward with soft knees; do not lock the joint.
- Use the rail: A fingertip on the rail improves balance without hauling your weight.
For uneven terrain.
- Eyes up: Look 2–3 strides ahead to map foot placement; avoid staring at your feet.
- Ankles ready: Slightly stiffen the ankle by “spreading toes and pressing the big toe pad.” This stabilizes the arch without clawing.
- Hips lead: Let hips steer steps around obstacles; twisting at the knees invites slips.
If you want more help dialing-in gait mechanics before adding load or speed, review the basic cues and progressions in our brief guide to efficient walking mechanics and rucking. Technique compounds—small improvements reduce stress on every future step.
Heat, Cold, and Weather Planning
Weather adds richness—and risk—to outdoor training. Planning around heat, cold, wind, and precipitation makes sessions safer and more repeatable. Use conservative thresholds; the reward is consistency across seasons.
Heat strategies.
- Timing: Train before 10 a.m. or after sunset during heat waves. Shade and elevation breezes help, but do not erase risk.
- Hydration: Start sessions hydrated (pale yellow urine). For workouts longer than 45–60 minutes in warm conditions, carry fluid. Small, frequent sips beat chugging. If you finish two hours after training still thirsty or with dark urine, you under-did it.
- Pacing: Drop intensity a notch (RPE –1) in the heat; keep the same total work time. Swap steeper hills for gentle grades to reduce heat production.
- Clothing: Light, breathable fabrics; a cap and sunglasses; consider a light, handheld bottle on hill intervals so you do not “save” sips for later.
- Red flags: Chills, dizziness, goosebumps, or confusion—stop immediately, find shade, cool with water on skin, and seek help if symptoms persist.
Cold strategies.
- Layering: Base layer to wick, mid-layer to insulate, shell to block wind. Overheating early means sweat that chills later; start slightly cool.
- Traction: If ice is possible, choose shoes with aggressive lugs or add traction aids. Swap steep descents for flats; pick stairs with dry treads and rails.
- Warm-up: Add five minutes of easy movement and gentle mobility before the first interval; cold tissue is less tolerant of fast loading.
Wind and rain.
- Wind: Use headwinds for steady aerobic work and tailwinds for intervals. Hills partly shield wind, which is another reason to pick them on blustery days.
- Rain: Wet surfaces reduce friction. Shorten steps, reduce speed on descents, and favor routes with good drainage. A brimmed cap improves visibility.
Air quality and pollen.
- AQ alerts: On poor air days, reduce intensity and session length or move indoors. If you must go out, choose early hours and avoid traffic-heavy corridors.
- Allergies: After high-pollen sessions, rinse face and hands, and change shirts to reduce irritation.
Heat-cold weekly planning.
- In hot weeks, replace one interval day with a shaded Zone 2 hill walk, and emphasize recovery walks the day after hard sessions.
- In cold snaps, cluster shorter sessions on safer surfaces and increase warm-up time.
During stressful weather weeks, your body appreciates lower-intensity movement and sleep more than hero intervals. For ideas on scaling output while staying consistent, see our notes on recovery days and deload choices and adjust volume before intensity.
Footwear and Pack Options for Variety
Shoes and pack choices add variety and fine-tune training stress. The aim is to match the tool to the terrain and your current tolerance—not to chase trends. Rotate options with intention and track how joints respond.
Footwear families.
- Road trainers (moderate cushioning): Best for mixed surfaces and light hills. Look for a stable heel, secure midfoot, and enough forefoot space for toe splay. Stack height around the mid-range offers cushion without wobble.
- Trail shoes (lugs and rock plates): Grip on dirt, gravel, and mild technical paths. Lug depth of 3–5 mm suits parks and mixed terrain; 5–6 mm or more for muddy routes.
- Light hikers: Stiffer soles and protective uppers for rocky paths. They trade speed for stability—a good pick for long, steady climbs and descents.
- Minimal shoes: Useful for short technique drills to wake foot muscles and improve feel on smooth grass. Keep exposures brief (5–10 minutes) and separated from heavy interval days until feet adapt.
Fit and rotation. Fit trumps brand. Aim for a thumb’s width at the toe box, snug midfoot, and locked heel. Rotate two pairs weekly—one for hills and intervals, one for walking and recovery—to vary loads on tissues and let midsoles rebound.
Insoles and socks. If arches collapse or toes crowd, a simple off-the-shelf insole with a mild arch and a metatarsal pad can help. Friction falls with quality socks; wool blends regulate temperature in both heat and cold.
Packs and load carriage.
- Hydration vests: Spread weight across the torso, stabilize bottles or bladders, and reduce bounce. Ideal for longer hill walks where frequent sips help.
- Daypacks: For ruck-style sessions on flat to gentle terrain. Start with 5–8% of body weight; increase slowly (no more than +2–3% per month) while monitoring knees and low back.
- Weight placement: Keep heavier items high and close to your spine for stability. Loose, low loads tug on shoulders and encourage over-leaning.
- When to avoid load: If knees or hips grumble on descents, keep packs for flat routes until symptoms settle.
Poles and extras. Trekking poles shift ~5–10% of the workload to the upper body, reducing knee load on descents and improving balance on uneven surfaces. Learn a simple rhythm: plant opposite pole with each step. On stairs, poles can be awkward—use the rail instead.
Bone and tendon perspective. Gentle, regular impact supports bone health; abrupt impact spikes inflame tendons. If you are new to hills, let tissues adapt with progressive volume before adding a pack. When you are ready for more skeletal stimulus, short, brisk hill walks or light rucks can complement resistance training; for context on building bone safely, see options in impact-friendly loading that play well with outdoor sessions.
Maintenance checklist. Replace shoes when tread smooths or midsoles crease deeply (often 500–800 km, but track feel over mileage). Retire packs when straps fray or frames squeak under load. Equipment is cheaper than time off for tendon pain.
Weekly Mix: Long Easy, Short Hard, and Recovery
Outdoor conditioning for longevity blends three ingredients: long easy work to build the aerobic base, short hard intervals to raise ceilings, and recovery days to consolidate gains. The right weekly mix respects joints and energy while moving you forward month after month.
Principles.
- Nonconsecutive stress: Separate hard hill/stair sessions by at least 48 hours.
- One focus per day: If you sprint stairs in the morning, avoid heavy leg strength that night.
- Volume before intensity: Build session length and total time on feet first, then sharpen with more demanding intervals.
Two-day template (busy schedule).
- Day 1 — Hills Intervals (30–45 min): Warm up 8–10 minutes easy, then 8–10×60 seconds at RPE 7–8 on a gentle hill, walk down. Cool down 5–10 minutes.
- Day 3 or 4 — Long Easy (40–70 min): Continuous hilly walk at RPE 4–6, keeping steps light on descents. If heat rises or knees feel cranky, flatten the route or split into two 30-minute sessions.
Three-day template (balanced).
- Day 1 — Stairs (30–40 min): 10×30 seconds up, walk down, finish with two steady climbs of 2–3 minutes at RPE 6.
- Day 3 — Long Easy (50–75 min): Park loops or rolling trail, conversational pace.
- Day 5 — Hill Power (25–35 min): 6×45 seconds on a steeper hill (8–12%), RPE 7–8; cap session when form fades.
Four-day template (experienced, resilient).
- Day 1: Hill intervals (moderate grade).
- Day 2: Recovery walk 30–40 minutes, light mobility.
- Day 4: Stairs or short hill power.
- Day 6: Long easy mixed terrain.
Deload weeks (every 4–6 weeks). Cut total climbing volume by 30–50%, replace one interval day with a flat Zone 2 walk, and finish sessions feeling better than you started. This “ebb” builds the “flow” of future weeks.
Strength and mobility pairing. Lower-body strength pairs well on non-interval days (hinges, split squats, calf raises). Mobility fits after outdoor sessions—especially ankles and hips. If you enjoy loaded carries or rucking, slot them on a long easy day with a light pack, not on steep interval days.
Signs to scale back. Next-day soreness that changes gait, knee swelling, foot hotspots, or mounting fatigue. Reduce one variable at a time: either total climb time, interval count, or grade. Keep frequency if you can; consistency is the secret sauce.
To structure sets, rests, and intensities across your whole training week—not just outdoors—see our practical notes on weekly structure and RPE. Plan the week, then listen to how your legs and breath respond.
Tracking: Time on Feet, HR, and Perceived Effort
Longevity fitness thrives on simple, repeatable tracking. You do not need a lab or a high-end watch. A small set of markers—time on feet, elevation, heart rate, and perceived effort—tells you whether you are progressing or overreaching.
Time on feet and elevation.
- Time on feet (ToF): Track total minutes moving per session and per week. Most adults do well building to 150–300 minutes per week across all walking, hill, and stair work.
- Climb time and gain: Log minutes spent climbing and approximate total ascent. You can estimate ascent by counting landmarks or landings if you lack a device.
Heart rate (HR) and RPE.
- Baselines: Know your conversational pace HR for flats and for gentle climbs. It will be higher on hills—expect +10–20 bpm for similar RPE.
- Drift check: In a 20–30 minute steady hill walk, HR should drift upward only modestly for the same pace. Large drift signals heat, dehydration, or lack of aerobic base.
- RPE alongside HR: They are a pair—use both. If HR is low but RPE is high, you are likely dealing with heat, wind, heavy packs, poor sleep, or an impending cold.
Stairs and segment times.
- Landing counts: Track how many landings you can climb at RPE 6 without stopping. Add one landing conservatively every one to two weeks if next-day knees are happy.
- Segment times: Time one standard hill segment under calm conditions monthly. Keep variables consistent: time of day, route, footwear.
Foot and joint notes.
- Hotspot map: Note any hot spots (ball of foot, big toe, heel) and the shoe/route combo that produced them. Information here prevents repeat mistakes.
- Next-day feel: Baseline, a little stiff, or worse than baseline. Progress only when most sessions return to baseline.
Micro-tests of economy.
- Step counting: On a chosen hill, count steps to a fixed tree or lamp post at RPE 6. If steps fall over time at the same RPE, your stride is becoming more efficient.
- Talk test: Record how many words you can say on a moderate climb without gasping. Improvements here often precede measurable HR changes.
When gadgets help. A simple altimeter watch or phone app adds clarity on total ascent. Trekking pole cadence counters and HR chest straps can refine data, but start with pen and paper. Devices are aids, not rulers.
Monthly review. Every four to six weeks, scan your log: ToF rising or steady? Fewer steps to the landmark? Similar HR at the same RPE? If yes, continue. If no, adjust one lever: reduce grade, add a recovery day, or deload for a week.
Tracking should motivate, not police. Choose two or three markers, watch trends, and let the numbers confirm the story your legs already tell you.
References
- ACSM Expert Consensus Statement on Exertional Heat Illness: Recognition, Management, and Return to Activity (2023) (Guideline)
- The effects of various stair-climbing exercises on functional mobility and trunk muscle activation in community-dwelling older adults: A pilot randomized controlled trial (2024) (RCT)
- Physiological impact of load carriage exercise (2022) (Review)
- Stair-climbing interventions on cardio-metabolic outcomes in adults: a systematic review and meta-analysis (2023) (Systematic Review)
- Load carriage physiology in normoxia and hypoxia (2023) (Review)
Disclaimer
This article provides general educational information about outdoor conditioning. It is not a substitute for individualized medical advice, diagnosis, or treatment. Consult a qualified clinician before starting or changing your exercise plan, especially if you have cardiovascular disease, heat or cold intolerance, balance disorders, recent injury or surgery, or persistent joint pain. Stop any session that causes chest pain, dizziness, marked shortness of breath, or joint instability, and seek assessment.
If you found this guide useful, please consider sharing it on Facebook, X (formerly Twitter), or any platform you prefer, and follow us for future updates. Your support helps us continue producing clear, practical resources for long-term health.


