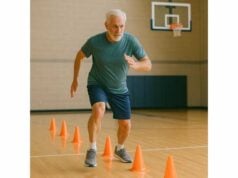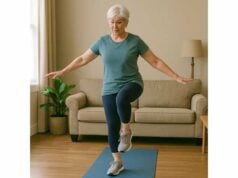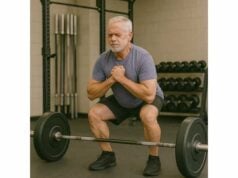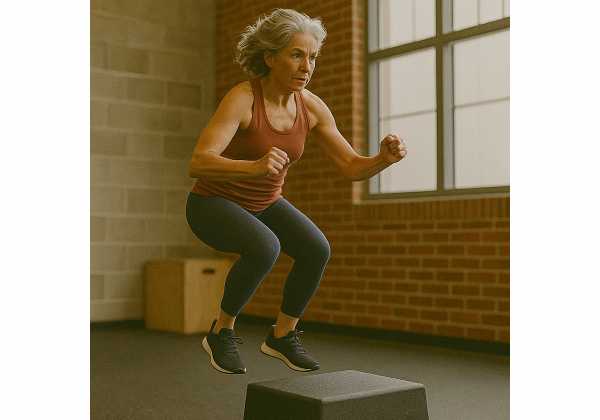
Power fades faster than strength with age, yet it is the quality that helps you clear a curb, catch a stumble, and lift groceries with ease. Power training is not reckless leaping—it is deliberate, low-volume practice of moving with intent: crisp jumps, smooth throws, and short sprints that respect joints. This guide gives you the safety screens, landing mechanics, gradual progressions, sprint cues, and weekly templates that make power work both productive and enjoyable. You will also see when to trade impact for safer substitutes and how to track progress with simple field tests. For how power fits with aerobic capacity and strength across the week, see our concise longevity-focused fitness framework. Start small, move fast with control, and let the numbers improve while your body stays calm the next day.
Table of Contents
- Prerequisites and Screening: Strength, Balance, and Pain Check
- Landing Mechanics First: Soft Knees, Hip Hinge, and Quiet Feet
- Low-Impact Progressions: Step Jumps, Skips, and Medicine Ball Tosses
- Sprint Technique Basics: Posture, Stride, and Acceleration Drills
- Session Design: Reps, Sets, Rest, and Weekly Frequency
- Contraindications and Safer Substitutions for Joints
- Tracking Power: Jump Height, Throw Distance, and Sprint Times
Prerequisites and Screening: Strength, Balance, and Pain Check
Power training works best on a steady base. Before adding speed, confirm you can control positions, tolerate load, and recover cleanly. Use the checklist below to turn readiness into a yes/no answer.
Balance and coordination. Hold a single-leg stance for 20–30 seconds on each side without grabbing a support. If that is shaky, spend two weeks practicing single-leg stands, heel-to-toe walks, and light lateral weight shifts. A quiet balance system reduces errant landings.
Baseline strength. Aim for:
- Sit-to-stand × 10 from a standard chair without hands, controlled tempo.
- Split squat × 8 per leg with steady knee tracking and no hip drop.
- Hip hinge × 10 (dowel along spine) with shins nearly vertical and ribs stacked over pelvis.
If any test fails, train toward these for 3–6 weeks. Strength and alignment are the shock absorbers that make power work feel good.
Landing control rehearsal. Step off a 10–15 cm platform, land, and freeze. Criteria: even foot pressure (big toe, little toe, heel), knees track over mid-toes, ribs stacked over pelvis, and the landing sounds like a whisper. Fail this? Practice “drop and stick” before rebounds or sprints.
Pain and next-day check. Use a two-part rule:
- Two-hour rule: Any discomfort should settle within two hours after training.
- Next-day rule: Joints should feel at baseline by morning—mild, diffuse stiffness is fine.
If symptoms linger or swell, scale the plan. Replacing jumps with medicine ball work for a week keeps intent high while your tissues calm.
Surface and footwear. Start on forgiving ground: rubberized flooring, short turf, track, or firm grass. Choose shoes with a stable heel and midfoot. Very soft soles can blur feedback and promote sloppy landings; very rigid soles can increase shock in new jumpers.
Warm-up commitment. Five to eight deliberate minutes serve you more than five extra reps. Use easy cardio (2–3 minutes), ankle rocks, hip circles, two light sets of your first drill, and three slow breaths with a soft brace. Warm tissue and a focused brain prevent most mistakes.
Contraindications (temporary). Recent joint flare, unhealed tendon pain, uncontrolled blood pressure, or balance-limiting dizziness: favor throws and low-impact accelerations until cleared. Safety is progression.
This readiness step is not bureaucracy—it is the signal that your next six weeks will work. Check the boxes, then move fast with control.
Landing Mechanics First: Soft Knees, Hip Hinge, and Quiet Feet
Better takeoffs start with better landings. Your body remembers the last thing it did; if you finish with quiet, aligned landings, your next rep begins in a stronger position. Master the cues below before you add height, distance, or speed.
Foot tripod and pressure path. Land with the whole foot, then roll pressure forward smoothly. Imagine three points sharing load: big toe pad, little toe pad, and heel. Avoid crashing onto heels or tiptoes—both spike local stress. The gold standard is quiet feet. If landings slap, shrink the jump, lower the step height, or change the surface.
Knees track over toes. Think “knees forward and out,” not “in.” Slight shin angle forward is fine. Put a light band around the knees during rehearsals if they collapse inward; the band cues outward pressure without overthinking.
Hips back, ribs stacked. Land with a subtle hip hinge and a tall chest. Keep ribs over pelvis—no big flare in the low ribs. If you catch yourself arching on landings, exhale gently as you stick to reset rib position.
Arms for rhythm. Use an active arm swing to balance trunk motion: forward on takeoff, back on landing. Arms help timing and keep your center of mass over your base.
Eyes and head. Look at the horizon, not your feet. A stable gaze reduces wobble and prevents overcorrection.
Breath and brace. Inhale softly before reps; exhale as you land and freeze. A light brace is supportive firmness, not a hard belly push. If bracing feels new, skim our primer on pressure and bracing and practice one drill for a week.
Micro-drills that teach mechanics.
- Snap-downs: Rise onto toes, “snap” into an athletic stance, stick. 3×6–8.
- Low step-offs (10–15 cm): Step off, land, freeze. 3×5–6.
- Line hops (in place): Small, quiet, 10–15 contacts, focusing on midfoot landings.
Self-audit after each set (10 seconds).
- Were my feet quiet?
- Did my knees track over toes?
- Was my torso long, not arched?
Two “yes” answers mean repeat; three “yes” answers mean you can consider a small progression next session. Mechanics first; intensity later. Your joints, tendons, and next-day self will thank you.
For a fast refresh on squat and hinge positions that carry into your landings, see the alignment cues in technique fundamentals and apply them to your first drill of the day.
Low-Impact Progressions: Step Jumps, Skips, and Medicine Ball Tosses
Power is about intent and timing, not circus height. Start small, progress patiently, and let quality stay high from the first rep to the last. The sequence below builds elastic ankles, controlled landings, and whole-body pop—without punishing joints.
Phase 1 — Elastic ankles and rhythm (2–4 weeks).
- Pogo hops (in place): Knees mostly straight, bounce from ankles. 2–3×10–20 light contacts. Cue “quick off the floor.”
- Side-to-side line hops: Micro-shifts over a taped line. 2–3×10–15 contacts. Keep hips level.
- Calf oscillations: Mid-range, quick-rise/controlled-lower heel raises. 2×15–20.
Phase 2 — Step jumps and stick landings (2–4 weeks).
- Low step jump (10–15 cm): Step up, small jump in place, land and stick. 3×4–6. Teaches vertical pop with forgiving angles.
- Step-off to stick: Step off the same height, land quietly. 3×5–6. Only progress when every landing is calm.
- Low forward hops: Half-foot hops forward, 2–3×10 contacts. Focus on identical posture each landing.
Phase 3 — Skips and small rebounds (3–6 weeks).
- A-skips (low amplitude): Marching rhythm with a light, quick hop. 3×15–25 meters. Emphasize posture and cadence.
- Pogo forward (short travel): 2–3×10–12 contacts, quiet rhythm.
- Ankle-to-knee pogos: Sync a small knee bend with the bounce. 2–3×10 contacts.
Medicine ball tosses (any phase; 2–3 kg to start).
- Chest pass to wall: 3×6–8. Crisp release, soft catch.
- Scoop toss (hip extension): From between legs to wall or partner, 3×6–8. Drive through hips; stick the catch.
- Rotational throw: 3×6–8 per side. Pivot through hips; avoid over-arching the low back.
Micro-progressions that keep you honest.
- Add 5–10% contacts only after two clean sessions.
- Raise step height in 2–5 cm increments, not leaps.
- Add one rebound to a drill (e.g., step-off → land → one small rebound → stick) once your landings are consistently quiet.
Substitutions for sensitive knees or hips.
- Swap jumps for throws, band-resisted fast presses, or pool plyometrics (ankle bounces, line hops in shallow water).
- Favor box step-ups and hip hinges on strength days to keep tissues calm while power intent stays high.
If you want a deeper menu of low-impact options before you increase amplitude, our primer on joint-friendly plyometrics offers additional drills you can rotate every four to six weeks.
Sprint Technique Basics: Posture, Stride, and Acceleration Drills
Short sprints build leg power, tendon stiffness, and confidence in fast feet—when technique is crisp and volumes are modest. Treat sprint sessions like skill practice. You are rehearsing posture and rhythm, not proving toughness.
Posture and projection.
- Relax up top, firm down low. Stand tall with ribs over pelvis. For accelerations, lean slightly from the ankles, not the waist.
- Head and eyes. Look down the track 5–10 meters; a quiet head steadies the torso.
Stride and cadence.
- Shorter steps, quicker rhythm early in the run. Over-striding brakes you and spikes hamstring strain.
- Strike under the hips. Land midfoot beneath your center of mass; think “strike and go,” not “reach and pull.”
Arm action.
- Elbows at ~90°, compact hands moving cheek-to-hip. Arms set rhythm; do not cross midline excessively.
Drills that teach without fatigue.
- March → skip → run progression: 2×15–20 meters each, building rhythm.
- Wall drills (posture series): Lean into a wall, one knee up. Cycle ankles under hips for 3×10 contacts per leg.
- Falling starts (10–20 meters): Tip forward from ankles until you “must” go; drive out smoothly for a short acceleration.
- High-knee runs (very low amplitude): 2×15 meters focusing on cadence, not height.
Surfaces and footwear. Use a track, turf, or smooth grass. Avoid cambered roads and broken sidewalks. Choose trainers with a stable heel; minimal shoes are fine for drills only if your feet are conditioned.
Volumes that respect tendons.
- Beginners: 6–10 total accelerations of 10–20 meters, full walk-back rest (60–120 seconds). Stop if technique fades.
- Intermediates: 6–8 reps of 20–30 meters; keep two reps “in the tank.”
- Speed play option: Insert 2–4 10-second strides (RPE 7) at the end of an easy walk, once or twice weekly.
Hamstring and calf care.
- Warm ankles (rockers and light heel raises), hips (glute bridges), and add one dose of hamstring isometrics (e.g., 2×20-second hip hinge holds pushing heels into the floor) before your first acceleration.
- Keep sprints short and crisp the first eight weeks; the tendon system prefers small, regular exposures.
To translate better strides into outdoor routes and hill accelerations, scan the gait cues in efficient walking and rucking and borrow one or two for your next sprint session.
Session Design: Reps, Sets, Rest, and Weekly Frequency
Power wants freshness, not fatigue. Organize sessions to protect quality, separate stressors, and allow steady progress. Think of each contact, throw, or acceleration as a “quality rep” you want to repeat next week.
Warm-up (8–12 minutes).
- General heat (2–3 minutes): Easy cycle or brisk walk.
- Mobility (3–4 minutes): Ankle rocks (10–12/side), hip circles (5–8/side), T-spine openers (6/side).
- Activation (2–3 minutes): Mini-band lateral steps (2×10/side), glute bridge holds (2×20 seconds), calf isometrics (2×20 seconds).
- Rehearsal (1–2 minutes): Two low-intensity sets of your first drill.
Main work—typical volumes.
- Jumps: 30–60 total contacts/session early on (e.g., 3 drills × 10–20 contacts). Build toward 80–100 over 6–8 weeks if your next-day check stays clean.
- Throws: 3–4 sets of 6–8 per pattern (chest, scoop, rotational). Keep the ball light enough that speed is crisp.
- Sprints: 6–10 total accelerations (10–30 meters) with full rest—walk back and breathe calmly before the next rep.
Set structure and rest.
- Small sets beat big ones: 4–8 contacts per set keep technique sharp.
- Rest 60–120 seconds between sets of jumps/throws; 90–180 seconds between different drills.
- For sprints, rest until your breathing is steady and you feel springy; that often means 60–120 seconds for short accelerations.
Placement within a workout.
- Do power first, after warm-up. If you lift on the same day, choose lighter technique strength (goblet squat, RDL patterning) afterward.
- Conditioning belongs after power—or, better, on another day. If you must combine, pair power with easy Zone 2 later, not before.
Weekly frequency.
- Beginners: 1–2 power sessions/week on nonconsecutive days.
- Intermediates: 2 sessions/week; an optional third micro-dose (e.g., 30 contacts or 4 short accelerations) can live inside a warm-up.
- Deload every 4–6 weeks: Halve contacts and cut sprint volume by 30–50% for one week. Swap rebounds for stick landings and bias throws.
Stop-rules. End a set if landings get loud, posture wobbles, or you need more than two words to talk after a sprint. End a session if a joint pinches sharply or swelling appears after the warm-up.
For help blending power with the rest of your program—sets, reps, and RPE across the week—skim simple session design and plug in one template that fits your schedule.
Contraindications and Safer Substitutions for Joints
Power work can be scaled for most people, but not for every situation. The aim is to keep the intent (fast force) while trimming the impact when a joint is cranky or a condition is active. Use the guide below to pivot without losing training momentum.
Relative contraindications (proceed only with clearance and cautious scaling).
- Recent joint flare or swelling (last 7–10 days) in knee, hip, or ankle.
- Persistent Achilles or patellar tendon pain during daily tasks.
- Uncontrolled blood pressure, symptomatic arrhythmia, or chest discomfort.
- Balance-limiting neuropathy or vertigo.
- Unhealed fracture, recent surgery, or joint replacement without clinician guidance.
Absolute “not today” signs.
- Sharp joint pain that worsens as the set continues.
- Giving way, locking, or new neurologic symptoms (numbness, weakness).
- Systemic red flags (fever, unexplained weight loss) accompanying pain.
Substitutions that preserve intent.
- For knee sensitivity: Replace jumps with medicine ball tosses (chest, scoop, rotational), band-resisted fast presses/rows, and step-ups to a low box done “fast up, slow down.”
- For hip irritability: Favor hip-dominant hinges (RDL patterning), glute bridge thrusts, and throws. Keep stride skips low and controlled.
- For Achilles or calf issues: Swap pogo work for isometric calf holds (20–30 seconds) followed by light throws. Use pool plyometrics for bounce with buoyancy.
- For back discomfort: Emphasize anti-extension core drills (dead bug, plank variations) and maintain rib-pelvis stacking during all power work. Choose rotational tosses over heavy, long sprints.
Surface and equipment pivots.
- Move from hard rubber to turf or firm grass.
- Lower step heights by 2–5 cm and remove rebounds.
- Use soft-shell med balls to reduce catch forces.
- On sprint days, try gentle uphill accelerations (2–4% grade) to reduce braking forces.
Return-to-impact sequence.
- Stick landings (no rebound) on low steps.
- Short throws (2–3 kg) with soft catches.
- Micro-hops and A-skips (low amplitude).
- Short accelerations (10–15 meters) on forgiving surfaces.
If knees or hips are the consistent bottleneck, pair this section with practical options in joint-friendly training so strength continues to rise while you reintroduce elastic work gradually.
Tracking Power: Jump Height, Throw Distance, and Sprint Times
What gets measured gets managed—especially for speed. You do not need lab gear to know if your plan is working. Two to four simple markers, tested consistently, will tell the story.
Pick your markers (choose 2–3).
- Countermovement jump height: Use a wall and chalk or a smartphone app; record best of three after warm-up. A 1–3 cm rise over a month is meaningful for many adults.
- Seated medicine ball chest pass distance (2–4 kg): Sit with back against a wall to remove leg drive; measure to first bounce. Record best of three.
- Five-hop distance (in place): From the same start mark, five small hops and measure forward displacement. Keep amplitude low and landings quiet.
- Skater hop stick distance: Single lateral bound to a stick landing; measure best of three per side.
- Sprint segments: Time 10-meter or 20-meter accelerations with a stopwatch start on first movement. Keep surfaces and shoes identical each test.
Subjective measures that matter.
- Landing sound: 0–2 scale—0 silent, 1 occasional slap, 2 frequent slap. Keep average ≤1.
- Symmetry feel: 0 even, 1 slight bias, 2 obvious shift. If “2,” add one extra unilateral set to the lagging side next session.
- Next-day check: Baseline, slightly stiff, or worse than baseline. Progress only with predominantly baseline days.
Testing schedule.
- Mini-checks (biweekly): One marker after your warm-up—e.g., CMJ best of three. Keep it light; do not chase fatigue.
- Block checks (every 4–6 weeks): Re-test all chosen markers at the start of a dedicated session, before heavy work.
Interpreting change.
- Upward trend: Keep progressions small (contacts +5–10%, step height +2–5 cm, one extra sprint rep).
- Flat line: Adjust one variable: add rest between sets, tweak drill selection (e.g., swap pogo forward for pogo in place), or vary surface.
- Downturn with noisy landings: You overreached. Halve contacts and sprint volume for two sessions, emphasize sleep and gentle Zone 2, then re-test.
Video as a coach. Ten seconds of slow-motion from the side reveals posture, knee tracking, and whether heels kiss the ground softly. Keep angle and light consistent. Reviewing clips monthly helps you see trends your memory misses.
Keep it fun. Add one “play” drill weekly—balloon taps during ankle bounces, light reaction hops to a clap, or partner toss-and-catch. The nervous system learns better when engaged, and you will show up more often.
Your log should tell a quiet story over months: slightly higher jumps, longer tosses, smoother landings, and calmer next-day notes. That is power aging well.
References
- Comparison of Power Training vs Traditional Strength Training on Physical Function in Older Adults: A Systematic Review and Meta-analysis (2022) (Systematic Review/Meta-analysis)
- An age-adapted plyometric exercise program improves dynamic strength, jump performance and functional capacity in older men either similarly or more than traditional resistance training (2020) (RCT)
- The Benefits and Risks of Strength Training in Older Adults (2018) (Review)
- Effects of Sprint Interval Training on Aerobic Capacity in Older Adults: A Systematic Review and Meta-Analysis (2019) (Systematic Review/Meta-analysis)
Disclaimer
This guide is educational and not a substitute for personal medical advice, diagnosis, or treatment. Consult a qualified clinician or physical therapist before starting or changing your exercise program, especially if you have cardiovascular disease, uncontrolled blood pressure, recent injury or surgery, balance disorders, or persistent joint pain. Stop any session that causes sharp pain, instability, chest discomfort, or unusual shortness of breath, and seek assessment.
If this article helped you, please consider sharing it on Facebook, X (formerly Twitter), or any platform you prefer, and follow us for future updates. Your support helps us continue producing clear, practical resources for long-term health.


