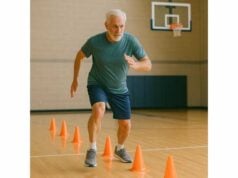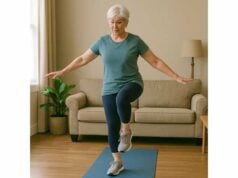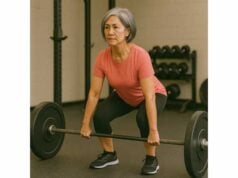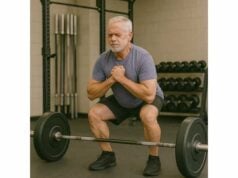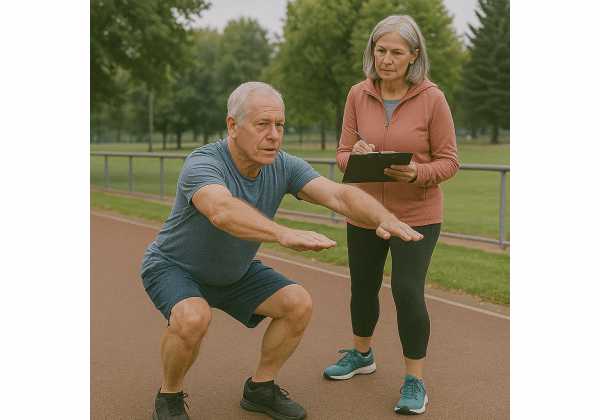
Numbers are not the point—direction is. A handful of simple, well-run field tests can show whether your training protects the abilities that matter for independent living: getting around briskly, standing up without hands, carrying groceries, and regaining balance after a stumble. You do not need a lab or fancy devices to get useful data. You need clear instructions, repeatable conditions, and honest effort. This guide lays out practical tests you can do at home or in a nearby park, plus scoring tips, reference zones, and retest rhythm. We will also convert results into straightforward training goals you can act on this week. For the broader framework that ties aerobic capacity, strength, and everyday movement together, see our pillar on fitness for long-term health. Use these tests as mile markers—brief, objective check-ins that keep your plan aligned with the life you want to live.
Table of Contents
- Aerobic Capacity: 1-Mile or 6-Minute Walk Tests
- Muscular Endurance: 30-Second Sit-to-Stand and Push Variations
- Strength Proxies: Grip Dynamometer and Loaded Carries
- Mobility and Balance: Sit-and-Reach and Single-Leg Stand
- Power and Speed: 10-Meter Walk and Stair Climb
- Setting Reference Ranges and Retest Cadence
- Turning Results Into Actionable Goals
Aerobic Capacity: 1-Mile or 6-Minute Walk Tests
What you are measuring: the heart–lung–muscle system’s ability to deliver and use oxygen during steady effort. Field walking tests correlate well with everyday capacity—how far you can go, how briskly you cover ground, how easily you handle stairs and hills.
Choose one test (not both on the same day):
A) One-Mile Walk Test (flat course)
- Setup: a measured track, treadmill set to 1.0% incline, or a GPS-verified flat loop. Warm up with 5 minutes of easy walking.
- Instructions: walk as fast as you can maintain without breaking into a run. Keep pace even; avoid late surges. Record finish time (minutes\:seconds) and immediately note post-walk heart rate (15-second pulse × 4).
- Common targets:
- Brisk, active adults often finish between 13:00–16:00.
- A strong longevity target is ≤15:00 sustained by a conversational, not gasping, effort.
- If you are new to training, aim to trim 30–60 seconds across the next training block.
B) Six-Minute Walk Test (distance in meters)
- Setup: a 20–30 m marked corridor or track lane with clear turn points; a flat sidewalk loop also works. Warm up 5 minutes.
- Instructions: cover the greatest distance possible in 6 minutes of fast walking. You may slow briefly but try not to stop. Record total distance and perceived effort (0–10 scale).
- Common targets:
- Many healthy adults land between 500–700 m; ≥600 m is a practical benchmark for robust everyday endurance.
- Newer or deconditioned walkers may start at 350–500 m. Progress is typically 30–60 m across 8–12 weeks of consistent training.
Run the test well:
- Wear the same shoes, test at the same time of day, and use the same course for reliable comparisons.
- Avoid heavy meals and alcohol before testing; hydrate normally.
- If the weather is extreme, postpone or use a treadmill for the mile test.
How to nudge results:
- Two to three Zone 2 sessions per week (20–45 minutes) at a conversational pace; hills or gentle intervals add variety.
- One day of strides or brisk surges: after 10 minutes easy, do 6–8 × 30 seconds faster walking with 60–90 seconds easy between.
- Steps anchor: aim for 6,000–10,000 daily, with 5–10 minute post-meal walks to build volume with minimal stress.
Safety notes: stop if you experience chest pain, unusual breathlessness, or dizziness. If you use a heart-rate monitor, verify it reads plausibly across the test; artifacts can mislead you about progress.
Recordkeeping: log date, course, footwear, weather, warm-up, finish metric (time or distance), post-test heart rate, and a one-sentence note on how it felt. Small details make trends trustworthy.
Muscular Endurance: 30-Second Sit-to-Stand and Push Variations
What you are measuring: the ability of large muscle groups to repeat functional efforts without failing—standing up from chairs, pushing doors or strollers, controlling body weight across the day. Muscular endurance buffers fatigue and supports fall recovery.
A) 30-Second Sit-to-Stand (STS)
- Setup: a standard chair 43–45 cm high, placed against a wall for stability. Cross arms over the chest or keep hands lightly on shoulders—no pushing off the thighs.
- Instructions: from seated, stand fully (hips and knees extended) and sit back down as many times as possible in 30 seconds with control. Count only clean reps.
- Targets by training age:
- Starting point: 10–14 reps signals room to build.
- Solid function: 15–19 reps.
- High standard: ≥20 reps with crisp form.
- Form guardrails: full hip/knee extension, quiet landings on the seat, knees tracking roughly over mid-foot.
B) Push Variations (choose one based on current capacity)
- Incline Push-Up (counter or bench height): set hands on a surface where you can achieve 8–15 reps.
- Knee-Elevated or Wall Push-Up: if full push-ups are not yet accessible, use these to standardize range and posture.
- 30–Second Reps Test: perform as many clean push-ups as possible in 30 seconds—chest-to-target depth, body in a straight line, no bouncing.
- Targets:
- Starting point: 8–12 clean reps.
- Solid: 12–18.
- High standard: ≥20 at a meaningful incline (countertop or lower).
How to improve scores:
- Grease-the-groove STS: 2–3 micro-sets of 6–10 throughout the day on nonconsecutive days.
- Cluster push-ups: total 30–50 quality reps across 3–5 mini-sets, 2–3 days/week; lower the hand height over time.
- Strength base helps endurance: include goblet squats and rows/presses twice weekly to raise the ceiling for these endurance tasks. For setup cues that keep reps crisp as you add volume, skim our primer on technique basics.
Common pitfalls: bouncing off the seat, losing plank in push-ups, rushing the last 10 seconds. Better to post a slightly lower number you can reproduce than a “PR” you cannot repeat next month.
Recordkeeping: log seat height or hand height, total reps, and any modifications. Note perceived effort (0–10). Retest at the same heights to make progress apples-to-apples.
Strength Proxies: Grip Dynamometer and Loaded Carries
What you are measuring: whole-body strength and usable force for daily life. Grip strength and carrying ability predict how you handle doors, jars, luggage, and yard work—and they offer quick, repeatable snapshots of global strength.
A) Grip Dynamometer (maximal squeeze)
- Tool: a spring or digital dynamometer with adjustable handle.
- Setup: stand tall, shoulder neutral, elbow straight but not locked, wrist neutral.
- Instructions: perform three attempts per hand, alternating hands, with 60–90 seconds rest between. Start with the nondominant hand. Record best and average for each side (kg).
- Targets:
- Aim to move your best hand toward the upper half of age- and sex-adjusted charts over time; as a simple training target, add 2–6 kg across a focused 12–16 week strength block.
- A practical rule: if your daily tasks feel easier and your carry test improves, small grip gains are likely translating.
B) Loaded Carry (farmer’s or suitcase)
- Options:
- Farmer’s carry: one weight per hand.
- Suitcase carry: one weight in one hand (test each side).
- Standardization: flat surface, straight path or marked loop, shoes on, straps not allowed.
- Two ways to score:
- Max distance in 60 seconds at a set load.
- Time to cover 40–60 meters at a set load.
- Choosing loads: start with 15–25% of body weight per hand for farmer’s, 20–35% of body weight for suitcase (one hand). Adjust so posture stays tall, steps quiet, and the weight does not bang your leg.
- Targets:
- Farmer’s carry: cover ≥60 m in 60 seconds with ~20% BW/hand cleanly.
- Suitcase carry: cover ≥40 m each side in 60 seconds with ~25–30% BW.
- Progress by adding distance first, then load in 2.5–5% steps.
Technique that makes numbers honest:
- Eyes level, ribs stacked over pelvis, shoulders down.
- Hands crush the handles, wrists straight.
- Small, whisper-quiet steps; no leaning in suitcase carries.
How to raise the ceiling:
- Twice weekly strength sessions built on hinges, squats, and rows/presses.
- Specific grip work: heavy holds (20–40 seconds), towel rows or hangs (if shoulders allow), and pinch plate carries.
- For deeper how-to and simple tools that accelerate progress, see practical grip training.
Recordkeeping: note carry style, load, hand position (dumbbells vs. farmer handles), surface, distance/time, and perceived effort. For grip, log handle setting and best/average each hand.
Mobility and Balance: Sit-and-Reach and Single-Leg Stand
What you are measuring: whether joints move comfortably through the ranges daily life demands, and whether your nervous system can organize posture on a small base of support. Mobility keeps options open; balance prevents small wobbles from becoming big falls.
A) Sit-and-Reach (posterior chain comfort + hamstring extensibility)
- Equipment: a sit-and-reach box if available, or a yardstick taped to the top of a shoebox.
- Setup: sit with legs straight, feet hip-width, soles against the box, knees flat. Warm up with 2–3 minutes of easy marching or gentle hinges.
- Instructions: with hands stacked and arms straight, exhale slowly and reach forward in one smooth motion—no bouncing. Hold 1–2 seconds. Perform three attempts; record the best reach relative to your toes (negative numbers mean short of toes, positive mean past toes).
- Targets:
- Practical function is often met at toes to +5 cm without strain.
- If you are far short, prioritize hip hinge practice and active hamstring work rather than static stretching alone.
B) Single-Leg Stand (eyes open), optional narrow-base progressions
- Setup: shoes off if safe, near a stable support. Choose a flat, well-lit surface.
- Instructions: stand tall, fix your gaze on a point straight ahead, lift one foot just off the ground, and time how long you can hold without the raised foot touching down or the stance foot pivoting. Cap each attempt at 60 seconds. Test both sides; perform two trials per side and record the best.
- Targets:
- 30–45 seconds per side is a solid base; ≥60 seconds suggests high steadiness.
- If you cannot hold 10 seconds, add simpler balance work daily (see below) and retest in 2–4 weeks.
Progressions (build capacity without scare)
- Foot positions: narrow stance → semi-tandem → full tandem (heel-to-toe) holds for 20–40 seconds.
- Head turns: keep posture tall; slowly turn head left/right during single-leg holds.
- Unstable but safe: fold a towel under the stance foot to add challenge when you own 30 seconds on the floor.
Daily micro-doses (2–5 minutes):
- Ankle rocks, calf raises, and short single-leg holds while brushing teeth or waiting for the kettle.
- Step-overs: slow, controlled step over a mid-calf obstacle; pause on one leg for 1–2 seconds.
- Tie mobility to useful positions (hip hinge, split stance) so range supports strength, not just bendiness. For a more complete routine that targets hips, shoulders, and ankles, scan our guide to daily mobility. If stumbles worry you, pair balance practice with the drills in fall prevention.
Recordkeeping: log best reach (cm relative to toes) and best single-leg time each side. Note surfaces and lighting; these factors change difficulty.
Power and Speed: 10-Meter Walk and Stair Climb
What you are measuring: how quickly you can produce usable force. Speed and power fade earlier than slow endurance yet protect independence—catching a bus, crossing a street, reacting to a slip.
A) 10-Meter Walk (preferred: 20 m with flying 10 m timing)
- Setup: measure 20 m with clear start/end marks. Use the first 5 m to accelerate, 10 m for timed “flying” speed, and 5 m to decelerate. If space is limited, a straight 10 m from a standing start works—just note the method for future tests.
- Instructions: after a warm-up of easy walking and a few brisk strides, perform 3–5 trials with full recovery. Record best time to the nearest 0.1 second.
- Targets (flying 10 m):
- ≤6.0 s (≈1.7 m/s) indicates capable community ambulation.
- ≤5.0 s (≈2.0 m/s) signals robust walking speed for daily life.
- Standing-start times will be ~0.2–0.5 s slower; track like-with-like.
B) Stair Climb (functional power)
- Setup: a safe staircase with 8–12 steps, handrail available.
- Instructions: after a warm-up, climb at a fast but safe pace. Use the rail only for light balance, not pulling. Time from first foot move to the final foot on the top step. Perform 2–3 trials, record best time, and note any assistance.
- Targets:
- A strong target is ≤1.5 seconds per step without breathlessness at the top.
- If you need the rail heavily or feel wobbly, anchor training first with strength and balance, then retest.
Power practice that moves numbers:
- Hill or incline intervals: after 10 minutes easy, do 6–8 × 15–30 seconds brisk uphill walking, back down easy.
- Step-ups: sets of 6–8 per leg on a box height that allows powerful drive without knee pain.
- Low-impact power drills: marching skips, quick step-ups, or short stair bursts (one flight) for 2–4 rounds, focusing on posture and quiet landings.
- If you want structured explosive progressions that stay joint-friendly, visit our piece on low-impact power or pair with power training for aging well.
Recordkeeping: log method (flying vs. standing start), surface, footwear, wind (outdoors), and best time. For stairs, note step count and rail use.
Safety: choose clear, well-lit paths and stairs with solid rails. Stop if you feel dizzy or if foot placement becomes sloppy—power gains should feel crisp, not reckless.
Setting Reference Ranges and Retest Cadence
Field tests work when the rules are simple and the schedule is steady. You do not need perfect “norms” to benefit; you need personal baselines and progress markers that match your context.
Build your baseline in two sessions
- Session 1: Aerobic (mile or 6-minute walk) plus mobility/balance.
- Session 2 (48–72 hours later): Muscular endurance, strength proxies, and power/speed.
- This spacing prevents fatigue in one domain from depressing another.
Practical reference zones (aim to live here or progress toward them):
- Aerobic: 1-mile walk ≤15:00 or 6-minute walk ≥600 m.
- Muscular endurance: Sit-to-Stand 15–20 reps; push-up variation 12–20 clean reps in 30 seconds at a meaningful incline.
- Strength proxies: Grip improving 2–6 kg across a training block; farmer’s carry ~20% BW/hand for 60 m in 60 seconds; suitcase ~25–30% BW for 40 m each side.
- Mobility/balance: Sit-and-reach toes to +5 cm; single-leg stand 30–60 seconds each side.
- Power/speed: Flying 10 m ≤5.0–6.0 s depending on current fitness; stair climb ≤1.5 s/step.
Retest cadence
- Aerobic & Power: every 8–12 weeks.
- Endurance & Strength Proxies: every 6–8 weeks (they change faster).
- Mobility & Balance: spot-check monthly (2–3 minutes) and full retest every 8–12 weeks.
Keep conditions stable
- Same shoes, surface, time of day, and warm-up script.
- Avoid back-to-back max tests; distribute them across the week.
- If you are coming off illness, travel, or a heavy training cycle, delay retesting 7–10 days for fair comparisons.
How to handle outliers
- A big one-day jump or drop usually reflects sleep, stress, heat, or pacing. Retest within 7 days; use the better of two close results.
- Track a 3-test rolling average to smooth noise and see the real trend.
When to modify the plan
- If you miss target zones by a wide margin in one domain, spend the next block biasing training there.
- If a domain stalls across two cycles, change the stimulus (e.g., move from steady Zone 2 to intervals, or from volume push-ups to heavier presses). For help tuning sets, reps, and effort to your current level, visit session design.
Progress is permission to progress
- When three consecutive retests are inside your target zone, shift focus to the next bottleneck. Maintain wins with a minimal effective dose rather than constantly chasing new PRs.
Turning Results Into Actionable Goals
Tests are useful only if they steer training. Use your numbers to identify the limiting factor, set a 4–8 week goal, and build a plan that fits your week.
1) Identify the bottleneck
- Breathless early? Aerobic capacity is likely limiting everything else—especially power and recovery.
- Quads fatigue on stairs, or push-ups fade fast? Muscular endurance needs work.
- Groceries feel heavy, suitcase pulls you off center? Strength proxies—particularly carries and grip—are the lever.
- Wobbly step-downs, toe touch far away? Balance/mobility are holding you back.
- Street crossing feels rushed? Power and speed need attention.
2) Set one clear outcome, then reverse-engineer the work
- Example—6-minute walk from 520 m → 600 m (8–10 weeks):
- Sessions: 2× Zone 2 (30–40 min), 1× hill intervals (8 × 30 s brisk uphill, easy down).
- Anchor: post-meal 10-minute walks 1–2× daily.
- Progress check: add ~10 m/week; if a week stalls, keep volume steady but vary terrain.
- Example—STS from 12 reps → 18 reps (6–8 weeks):
- Work: 3×/week STS clusters (5–8 reps × 4–6 mini-sets) plus goblet squats (3×6–8).
- Progress: raise seat height slightly to groove form, then lower it over weeks.
- Example—Farmer’s carry from 20% BW/hand for 45 m → 60 m (6–8 weeks):
- Work: 2×/week carries (4–6 trips of 20–30 m); progress distance first, then load.
- Support: trap-bar deadlifts (3–5×3–6) and suitcase holds (3×20–30 s).
- Example—Flying 10 m from 6.1 s → 5.6 s (8–10 weeks):
- Work: 1×/week strides (8–10 × 20–30 m) and 1× hill session (6–8 × 15–25 s).
- Support: step-ups (3×6/leg) and low-impact power skips (3×8).
3) Organize a simple, sustainable week (example)
- Mon: Strength A (squat + press + carries) + 10 min easy walk
- Tue: Zone 2 (30–40 min)
- Wed: Short skill (balance/mobility 10 min) + hill intervals (20–25 min)
- Thu: Strength B (hinge + row + carries)
- Fri: Zone 2 (25–35 min)
- Sat: Optional brisk walk with strides + mobility
- Sun: Off or gentle walk
4) Translate tests into daily cues
- Aerobic: breathe through the nose at easy paces; you should speak in phrases, not single words or full paragraphs.
- Endurance: stop sets with 1–2 reps in reserve to keep quality high and soreness sane.
- Strength: long exhale between reps, squeeze the floor with your feet, and keep loads close to your center.
- Balance: practice single-leg stands while coffee brews; step-overs when waiting on laundry.
- Power: focus on crisp first steps—quality beats quantity.
5) Decide when to push and when to hold
- Push when sleep is solid, joints are quiet, and warm-ups feel snappy.
- Hold or deload when morning energy dips, soreness lingers >72 hours, or your tests slide two weeks in a row.
6) Celebrate the right wins
- Add up weekly minutes walked, total quality reps, or carry distance. These drive outcomes more reliably than occasional all-out efforts.
- If life disrupts training, lean on travel-friendly circuits to preserve your base; we built several in hotel and park workouts.
7) Keep it human
- Pick modes you enjoy. The best plan is the one you want to repeat.
- Share your targets with a friend and retest together for accountability.
- Remember: longevity fitness is a compounding habit, not a single test day.
Disclaimer
This guide provides general fitness information for adults and is not a substitute for medical advice, diagnosis, or treatment. Testing and training should reflect your health status, medications, and prior injuries. Stop any test if you feel chest pain, dizziness, unusual shortness of breath, or neurological symptoms, and consult a qualified clinician or physical therapist.
If this article helped you, please consider sharing it with a friend or on your preferred social platform, and follow our work for future updates. Your support helps us continue producing practical, trustworthy content.

