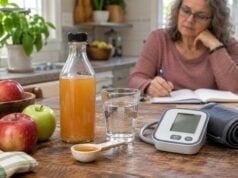
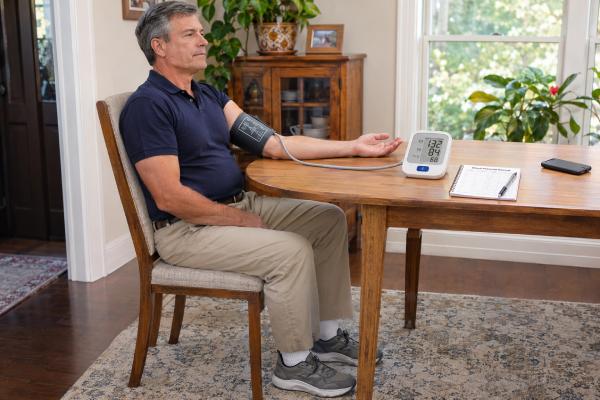
Measuring blood pressure at home is useful only when the technique is consistent. A good home reading is not simply the number that appears after you press a button; it depends on the monitor, cuff size, body position, timing, and what you did in the 30 minutes beforehand. Small mistakes can move a reading enough to create false reassurance or unnecessary concern. For most adults, the best setup is a validated automatic upper-arm monitor with a cuff that fits the arm correctly. Sit quietly for five minutes, keep your back supported and feet flat, support the cuffed arm at heart level, and take two readings one minute apart. When a clinician wants a reliable home average, a common approach is morning and evening measurements for several days rather than random spot checks. The goal is a repeatable trend that your health care team can interpret alongside symptoms, medications, and office readings.
Table of Contents
- Choose the Right Monitor and Cuff
- Prepare for an Accurate Reading
- Measure Blood Pressure Step by Step
- Use a Consistent Home Monitoring Schedule
- Avoid Common Measurement Mistakes
- Interpret Your Home Readings as a Pattern
- Know When a Reading Needs Medical Attention
Choose the Right Monitor and Cuff
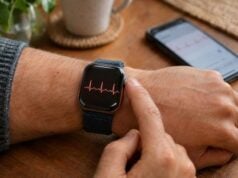
For most people, the best home device is an automatic, validated monitor that uses a cuff around the upper arm. Automatic upper-arm devices are easier to use consistently than manual cuffs, and current guidance does not recommend relying on cuffless smartwatch-style blood pressure estimates for diagnosis or treatment decisions.
“Validated” matters. A monitor can be sold to consumers without having the same quality of independent accuracy evidence as another model. Before buying, look for a model that has passed a recognized clinical validation protocol. If you already own one, bring it to a medical appointment so the staff can compare its readings with their equipment and watch your technique. Recheck it periodically, especially if readings suddenly become implausible.
The cuff is just as important as the monitor. Measure the circumference of the middle of your upper arm and use the manufacturer’s size range. A cuff that is too small can read falsely high, while a cuff that is too large can distort the reading in the other direction. Research using automated devices has shown that using the wrong cuff can shift systolic blood pressure by several millimeters of mercury and, in some people, much more. If your arm falls near the edge of a cuff’s stated range, ask a clinician or pharmacist which size is most appropriate. For more detail, see why blood pressure cuff size affects accuracy.
Wrist monitors are less preferred because the wrist must be positioned very precisely at heart level, and small position errors can affect the result. A wrist device may be considered when an upper-arm cuff cannot fit or cannot be used for a medical reason, but choose a validated model and have your technique checked. Finger devices are not appropriate for routine home blood pressure management.
Before you begin a monitoring period, make sure you have:
- A validated automatic upper-arm monitor
- The correct cuff size
- A chair with back support
- A table or surface that supports your arm at heart level
- A log, app, or device memory that records readings and times
- A consistent place where you can sit quietly
A dependable setup removes many sources of error before the first measurement is taken.
Prepare for an Accurate Reading
Preparation begins before you sit down. Blood pressure responds quickly to activity, stimulants, stress, pain, temperature, and bladder fullness. If you measure immediately after climbing stairs, drinking coffee, or rushing through the door, the number may describe that moment rather than your usual resting pressure.
For at least 30 minutes before a planned reading, avoid exercise, smoking or nicotine, and caffeinated drinks. If possible, do not measure immediately after a large meal or alcohol. Empty your bladder first. A full bladder can raise blood pressure, and the discomfort may make it harder to sit quietly.
Then sit in the measurement chair for at least five minutes before starting. During that rest period:
- Keep your back supported.
- Place both feet flat on the floor.
- Keep your legs uncrossed.
- Rest the arm you will use on a table or cushion.
- Stay quiet and avoid phone calls, texting, or conversation.
- Breathe normally; do not deliberately hold your breath or perform a relaxation trick to force a lower number.
Use bare skin. Remove clothing from the upper arm rather than placing the cuff over a sleeve. If rolling up a sleeve creates a tight band around the arm, take the arm out of the sleeve instead. The cuff should sit where the monitor instructions specify, with its lower edge usually just above the elbow crease and the artery marker aligned correctly.
Try to measure under similar conditions each time. If your clinician wants morning readings, take them at roughly the same point in your routine. If medication timing matters, follow the specific instructions you were given. A random mix of readings taken after exercise, before bed, during work stress, and after coffee is harder to interpret than a standardized set.
One more detail: decide which arm to use. Many people have a small difference between arms. At a clinic, the initial evaluation may include both arms, with subsequent measurements taken on the arm that reads higher if the difference is consistent. If your clinician has told you which arm to use, follow that advice. Otherwise, ask at your next visit rather than switching arms from reading to reading.
Measure Blood Pressure Step by Step
Once you are prepared, the actual measurement is straightforward. The value comes from repeating the same technique, not from trying to produce a particular result.
- Sit quietly for five minutes. Keep your back supported, feet flat, and legs uncrossed.
- Place the cuff on your bare upper arm. Position it according to the monitor instructions, using the correct cuff size.
- Support the arm at heart level. Rest the forearm on a table or cushion so the middle of the cuff is approximately level with your heart. Keep your hand relaxed, usually with the palm facing upward.
- Start the monitor and stay still. Do not talk, text, watch an upsetting video, or move the cuffed arm while it inflates and deflates.
- Record the systolic and diastolic numbers. Systolic pressure is the top number; diastolic pressure is the bottom number. Record the pulse if your monitor displays it, especially if your clinician has asked you to track heart rate.
- Wait one minute. Remain seated in the same position.
- Take a second reading. Record both readings rather than selecting the lower one.
If the two readings differ, that does not automatically mean the monitor is wrong. Blood pressure naturally varies beat to beat and minute to minute. If the difference is unusually large, make sure you did not move or talk, then take a third reading after another minute if your clinician’s protocol allows it.
Do not repeatedly measure until you get a number you like. That creates biased data and can increase anxiety. Two readings per session are enough for many home-monitoring plans.
A simple log can include:
| Date and time | Reading 1 | Reading 2 | Pulse | Notes |
|---|---|---|---|---|
| Mon 7:10 a.m. | 136/82 | 132/80 | 68 | Before breakfast |
| Mon 8:20 p.m. | 128/78 | 126/77 | 66 | Quiet evening |
Notes are most useful when something unusual could affect interpretation, such as a missed medication dose, illness, poor sleep, pain, or recent travel. You do not need to write a diary beside every normal reading.
If you are new to home monitoring, review the meaning of blood pressure numbers and ranges, but do not diagnose yourself from one session. Clinicians make decisions from averages, repeat measurements, overall cardiovascular risk, and medical history.
Use a Consistent Home Monitoring Schedule
The best schedule depends on why you are checking. A person confirming a possible hypertension diagnosis needs a denser set of readings than someone with stable, well-controlled blood pressure who checks occasionally.
For a short diagnostic or treatment-assessment period, a commonly used protocol is sometimes called “722”: two readings per session, two sessions per day, for seven days. That usually means two measurements about one minute apart in the morning and two in the evening, creating up to 28 readings over the week.
A practical version looks like this:
- Morning: after waking and using the bathroom, after five minutes of seated rest, and before breakfast or caffeine. If your clinician wants readings before medication, follow that instruction.
- Evening: at a consistent time when you have been settled for several minutes, not immediately after exercise, a large meal, alcohol, or a stressful commute.
- Each session: take two readings one minute apart and record both.
- Duration: usually three to seven days, with seven days providing a stronger average when feasible.
Some clinical protocols exclude the first day of readings when calculating an average; others use all valid readings. Do not invent your own rule. Give the complete log to your clinician and let the care team calculate the average according to the protocol they use.
Once blood pressure is stable, you may not need twice-daily checks every day. Excessive monitoring can create anxiety and does not necessarily improve treatment. Your clinician may suggest a few days of readings before appointments, periodic checks each week, or more frequent monitoring after a medication change.
A structured home blood pressure monitoring routine is particularly useful when medication is started or adjusted, when office and home values disagree, or when a clinician is evaluating whether treatment lasts through the day.
Home monitoring can also reveal patterns that office measurements miss. White coat hypertension refers to higher readings in medical settings with lower readings outside the clinic. Masked hypertension is the reverse: office values may appear acceptable while home or ambulatory values are elevated. If the pattern remains uncertain, 24-hour ambulatory blood pressure monitoring can measure blood pressure repeatedly during normal daytime activities and sleep.
Avoid Common Measurement Mistakes
Most home errors are simple, but several can meaningfully change the result. If your readings seem inconsistent, audit your technique before assuming your blood pressure itself is wildly unstable.
Using the wrong cuff size. A cuff that does not fit can produce a systematic error every time you measure. Check your arm circumference and the cuff’s stated range instead of assuming a “standard” cuff fits everyone.
Letting the arm hang down. The cuff should be supported at heart level. An unsupported arm also makes you tense shoulder and arm muscles, which can raise the reading.
Crossing your legs or dangling your feet. Sit with both feet flat and legs uncrossed. If the chair is too high, use a footrest.
Talking during the reading. Conversation activates muscles and changes breathing and attention. Stay silent from the end of the rest period through the measurement.
Skipping the five-minute rest. Measuring as soon as you sit down after walking, climbing stairs, or doing chores can capture activity-related elevation.
Taking the cuff over clothing. Put it on bare skin. Thick sleeves can interfere with fit, and a tightly rolled sleeve can constrict the arm.
Measuring after caffeine, nicotine, or exercise. These can temporarily raise blood pressure. Keep the 30-minute buffer when you want a resting value.
Checking with a full bladder. Use the bathroom first when possible.
Using a wrist device casually. Wrist monitors require exact positioning. If the wrist is below heart level, the reading can be misleading. An upper-arm monitor is preferred for most adults.
Trusting an unvalidated device because it looks sophisticated. Bluetooth, apps, and a large display do not prove measurement accuracy. Validation evidence matters more than extra features.
Taking repeated readings until one looks normal. Record the planned readings, including higher ones. Selective recording can hide a real trend.
Changing technique from day to day. Morning at a desk, evening on a sofa with crossed legs, and weekend readings in bed create avoidable variation. Use the same chair, arm, cuff, and routine whenever practical.
Reacting to one spike. Pain, stress, cold, poor sleep, or recent activity can produce an isolated high value. Repeat it correctly and look at the pattern. If large short-term changes are common, review potential causes of blood pressure spikes with your health care team.
Technique errors are common enough that it is worth having a clinician watch you use your monitor at least once. Bring the device, cuff, and log to an appointment rather than assuming you have mastered the process from the box instructions alone.
Interpret Your Home Readings as a Pattern
A single blood pressure reading is a snapshot. The average of properly collected readings is much more useful for diagnosis and treatment decisions. That is one reason home monitoring can be valuable: it samples blood pressure across normal life rather than during one clinic visit.
If you obtain 12 to 28 valid readings over several days, do not focus on the highest and lowest values. Calculate or review the average, and note whether the morning and evening patterns differ consistently. Many monitors and apps can average readings automatically, but verify that they include the intended measurement period.
Blood pressure is written as systolic over diastolic, such as 128/76 mm Hg. In U.S. guidelines, office categories commonly include normal blood pressure below 120/80 mm Hg, elevated systolic pressure of 120 to 129 with diastolic below 80, stage 1 hypertension at 130 to 139 systolic or 80 to 89 diastolic, and stage 2 hypertension at 140 systolic or 90 diastolic or higher. However, a diagnosis should not be made from one home reading. Your clinician may apply specific home thresholds, confirm results with ambulatory monitoring, or interpret them differently depending on pregnancy, kidney disease, age, medication, and cardiovascular risk.
Home and office values may not match. A person can have:
- Consistently high readings in both places
- High office readings but lower home readings, suggesting possible white coat hypertension
- Normal office readings but high home values, suggesting possible masked hypertension
- Highly variable readings caused by inconsistent technique or true physiologic variation
Do not stop or reduce blood pressure medication because a few home readings look good. Good numbers may mean the medication is working. Similarly, do not take extra medication for one elevated reading unless you have an individualized plan from your clinician.
Your log is most useful when paired with context. Bring it to appointments and include the device itself periodically. If the home monitor repeatedly differs from clinic equipment by a large amount, the cuff, device, or technique may need attention.
Know When a Reading Needs Medical Attention
Most mildly high home readings are not emergencies. Sit quietly, check your technique, take the planned repeat measurement, and record the result. Contact your clinician if your average remains above the target you were given or if readings are consistently much higher than your usual pattern.
Very high readings need a different response. If your blood pressure is above 180/120 mm Hg, wait at least one minute and measure again using correct technique. If it remains that high, contact a health professional promptly for instructions, even if you feel well.
Call emergency services if a reading above 180/120 mm Hg is accompanied by symptoms such as:
- Chest pain
- Shortness of breath
- New weakness or numbness
- Difficulty speaking
- New vision changes
- Severe confusion
- Fainting or another alarming neurologic symptom
Those symptoms can signal acute organ damage and should not be managed by repeatedly checking the cuff at home.
Low blood pressure can also matter when it causes symptoms. A low number in a person who feels well may be normal, while dizziness, fainting, weakness, confusion, or signs of dehydration deserve attention. Contact a clinician if low readings are new, persistent, or occur after a medication change.
Home monitoring works best when it supports a treatment plan rather than replacing professional care. The core method is simple: use a validated upper-arm device with the right cuff, prepare for 30 minutes, rest for five, sit in the correct position, take two readings one minute apart, and track averages over several days. Consistency turns the monitor from a gadget into useful clinical information.
References
- Home Blood Pressure Monitoring 2025
- 2025 High Blood Pressure Guideline 2025 (Guideline)
- Self-measurement of blood pressure at home using a cuff device for change in blood pressure levels: systematic review and meta-analysis 2025 (Systematic Review)
- Effects of Cuff Size on the Accuracy of Blood Pressure Readings: The Cuff(SZ) Randomized Crossover Trial 2023 (RCT)
- Comparison of Home and Office Blood Pressure Devices in the Clinical Setting 2024
- Standardized home blood pressure monitoring: Rationale behind the 722 protocol 2022 (Review)
Disclaimer
This article is for general education and does not replace individualized medical advice, diagnosis, or treatment. Follow the monitoring schedule and blood pressure targets given by your health care professional, and do not change prescribed medication based on home readings alone. Seek emergency care for severely high blood pressure accompanied by chest pain, shortness of breath, neurologic symptoms, fainting, or other signs of acute illness.